Palate Taste
Egg Flower Chicken SoupWhether you want a break from heavy food or something to soothe your lungs on a cold day... you are on the right page. What is more comforting than a pot of hot hearty homemade delicious chicken soup?

My personal spin on this steaming bowl of "Egg Flower Chicken Soup" is a simplified and quick one-pot dish method prepared in 30 minutes. Its satisfying classic flavors are sure to top your comfort food list. The ingredients added relieve you when down with sore throat or cold and flu. A study of the "Encyclopedia of Medicinal Plants" was an awakening for me with the health benefits we gain from the regular usage of Indian spices when consumed correctly.

This "Egg Flower Chicken Soup" will instantly take you to heaven as it's so good for your body, mind, and soul. My family loves it when served with a warm toast or a dinner roll.

PREP TIMECOOK TIMETOTAL TIME
 Category: Soup, AppetizerCuisine: Indian
Level: EasyServes: 5
Requirement: Pressure Cooker
Nutrition Facts Servings 5.0 Amount Per Serving calories 194 % Daily Value * Total Fat 16 g 25 % Saturated Fat 0 g 0 % Monounsaturated Fat 0g Polyunsaturated Fat 0 g Trans Fat 0 g Cholesterol 0 mg 0 % Sodium 398 mg 17 % Potassium 56 mg 2 % Total Carbohydrate 2 g 1 % Dietary Fiber 0 g 1 % Sugars 0 g Protein 51 g 103% Vitamin A 2 % Vitamin C 2 % Calcium 0 % Iron 1 % * The Percent Daily Values are based on a 2,000 calorie diet, so your values may change depending on your calorie needs. The values here may not be 100% accurate because the recipes have not been professionally evaluated nor have they been evaluated by the U.S. FDA.
INGREDIENTS
1. Chicken - 2 pounds (skinless, bone-in)-I used breast and thighs
2. Pearl onions - 6 (peeled and chopped)- Check notes3. Cinnamon - 1-inch stick4. Bay leaf - 15. Cloves - 4 nos
6. Cumin/ Jeera powder - 1/4 teaspoon 7. Pepper Powder- 1/2 teaspoon or as required8. Ginger and Garlic paste - 1 teaspoon
9. Turmeric Powder - 1/8 teaspoon10. Mint - 1 sprig11. Coriander leaves - 4-5 sprigs (chopped)12. Water - 8 cups (cold)13. Salt to taste14. Organic Egg - 2 (whites only)
 DIRECTIONS1. In a pressure cooker, add all the ingredients except the egg and coriander leaves. Ensure that the chicken is submerged completely. Close the lid and turn the heat to medium-high. (Check notes)
2. Cook until 2 whistles and set aside for the pressure to release.
3. Carefully open the lid to fish out the whole spices (cinnamon stick, cloves, bay leaf, and mint sprig).
4. Remove the chicken pieces and set aside to cool slightly. Shred the chicken to bite size pieces and discard the bones.
5. Return the shredded chicken to the cooker and turn the heat again to bring it to a boil.

6. Lower the heat and pour the egg white into the soup in a slow but steady stream. Gently give it a stir only in 1 direction. In less than a minute you will find the cooked egg whites flowering up. Garnish with freshly chopped coriander leaves.
7. Ladle into serving bowls and serve piping hot with a warm toast or dinner roll.
 NOTES AND TIPS
1. Peeled pearl onions and be chopped or just smash it with your knife to release flavor.
2. The whole spices can be bundled in a small cheesecloth for easy removal.--------------------------------------------------Sweet Brown Rice Sarkarai Pongal
It's time to celebrate prosperity, the festival of abundance. Happy Pongal to you and your family! Our Pongal special is "Sweet/Sarkarai Pongal" with a slight variation using "Sweet Brown Rice" and Dates.

Pongal is a Hindu festival celebrated on the 1st day of the 10th month (Thai) according to the Lunar calendar. Traditionally on this auspicious day, freshly harvested rice is boiled with fresh milk and jaggery in clay pots. While boiling the concoction, people allow the milk to spill over the pot as an auspicious sign of abundance and prosperity. This Pongal is then seasoned with ghee, cashew nuts, and raisins usually. I have added dates to this recipe taken from my mom. Also, my ratio of dal is slightly on the higher side for more protein, you may reduce it to your taste. This being brown rice, I used the pressure cooker for an effortless cooking.

Sweet brown rice has a shiny and smooth exterior. Once it is cooked with lentils it tends to get mushy like our regular rice. Although this mushiness keeps the pongal from getting too dry /hard; cooked sweet brown rice retains a slight and perfect crunchiness with each bit that you will love. Without any delay let's get started with this "Sweet Brown Rice Pongal"...

PREP TIMECOOK TIMETOTAL TIME
Category: Dessert Cuisine: South Indian
Level: Easy
Serves: 5
Nutrition Facts Servings 5.0 Amount Per Serving calories 649 % Daily Value * Total Fat 14 g 21 % Saturated Fat 5 g 27 % Monounsaturated Fat 3g Polyunsaturated Fat 1 g Trans Fat 0 g Cholesterol 5 mg 2 % Sodium 28 mg 1 % Potassium 296mg 8 % Total Carbohydrate 119g 40 % Dietary Fiber 5 g 21 % Sugars 64 g Protein 13 g 25 % Vitamin A 7 % Vitamin C 1 % Calcium 8 % Iron 14 % * The Percent Daily Values are based on a 2,000 calorie diet, so your values may change depending on your calorie needs. The values here may not be 100% accurate because the recipes have not been professionally evaluated nor have they been evaluated by the U.S. FDA.
 INGREDIENTS
- Sweet Brown Rice (organic)- 1 cup
- Yellow Moong Dal (Paasi paruppu)- 1/2 cup
- Milk (Organic or A2) - 1/2 cup + 1/4 cup
- Water - 3 cups
- Jaggery (powder) - 1 cup (check notes)
- Cardamom powder - 1/4 teaspoon
- Ghee - 2 tablespoons
- Raisins - 3 tablespoons
- Broken cashew nuts - 3 tablespoons
- Dates - 6-7 nos (pitted)
 DIRECTIONS
1. Rinse and soak the sweet brown rice for about an hour. Drain and set aside.
2. Lightly roast the dry moong dal for approximately 3 minutes until aromatic, making sure you do not brown it.

3. In a pressure cooker, take the drained rice, roasted moong dal along with half a cup of milk and 3 cups of water. Pressure cook for 2 whistles.

4. Once the cooker is cooled, add the remaining milk(1/4 cup), jaggery powder, and cardamom powder (check notes). Bring this to a boil.

5. Heat the ghee in a tadka ladle or a small pan, and add the cashew nuts until it turns golden brown. You may add the raisins to puff up. But I prefer the raisins raw.

6. Add the above along with raisins and dates (cut into fours lengthwise) and give it a good stir. Now it's ready to serve:)

NOTES AND TIPS1. Jaggery powder is readily available, which doesn't require grating/ crushing or straining the syrup. When heated it automatically dissolves.
2. Cardamom powder can be replaced with 2 pods of cardamom in ghee along with cashew nuts. Since we don't like it whole, I always have them stocked powdered.
3. Adding milk to cooked rice and dal adds flavor to the Pongal.
4. Sweet Brown Rice is available in Whole Foods.
 ------------------------------------------------Eggless Wheat Banana Bread
"Happy 2017", a brand new beginning for your dreams and desires to come to reality and efforts turn into great achievements. Starting this new year with the most popular and ultimate "Banana Bread", a healthy recipe as my 1st post this year.

You don't want to miss this extremely moist, sweet, nutty, and most importantly healthy recipe. This delicious bread is an anytime healthy bread prepared with wheat, jaggery, and banana as the key ingredients. It's a big no to the all-purpose or maida flour. Banana Bread can be enjoyed as a breakfast, snack, or even as a dessert for lunch or dinner.

When my good and long-time friend Kirthika Kameshwaran shared this healthy recipe, my family relished every bit of it. I slightly modified her recipe with a few additions as well. Thanks again Kirthika for your sharing and being supportive always :)

Overripe bananas don't go to waste anymore, you can instantly start baking with the ingredients you will readily have at home. Are you geared up for some easy baking? Here we go...


PREP TIMEBAKE TIMETOTAL TIME
Category:Breakfast,DessertCuisine: International
Level: EasyServes: 1 loaf (9x3)
Source:Kirthika Kameshwaran
Nutrition Facts Servings 10.0 Amount Per Serving calories 309 % Daily Value * Total Fat 13 g 21 % Saturated Fat 2 g 9 % Monounsaturated Fat 2g Polyunsaturated Fat 7 g Trans Fat 0 g Cholesterol 0 mg 0 % Sodium 187 mg 8 % Potassium 129mg 4 % Total Carbohydrate 42g 14 % Dietary Fiber 1 g 3 % Sugars 22 g Protein 3 g 6 % Vitamin A 1 % Vitamin C 3 % Calcium 2 % Iron 6 % * The Percent Daily Values are based on a 2,000 calorie diet, so your values may change depending on your calorie needs. The values here may not be 100% accurate because the recipes have not been professionally evaluated nor have they been evaluated by the U.S. FDA.
INGREDIENTS
1. Whole Wheat Flour / Atta - 1 1/2 cups
2. Baking Powder - 1 1/2 tsp
3. Baking Soda - 1/2 tsp
4. Cardamom Powder - 1/2 tsp
5. Nutmeg Powder - 1/2 tsp
6. Powdered Jaggery - 1 cup
7. Vegetable Oil - 1/2 cup
8. Organic Milk - 1/2 cup9. Salt - 1/4 teaspoon
10. Banana - 2 (medium-sized - ripened)
11. Walnuts (chopped) - 1/4 cup
 DIRECTIONS
1. Preheat the oven to 350°F.
2. Combine the dry ingredients (1-5 ) in a bowl and sieve it using a sifter and set aside.
3. Blend the jaggery along with wet ingredients (6-9) in a mixer to a smooth paste.

4. Now combine the dry and wet mixtures together using a hand blender or a whisk.

5. Sprinkle the chopped walnuts and fold them gently to spread evenly.
6. Transfer to batter to a prepared bread loaf (check notes) and bake in the middle rack for about 50-55 mins.
7. While baking, in the middle about 25-30 mins, cover the pan with aluminum foil to prevent the top layer from getting burnt.
8. Once the bread is done, allow it to rest in the pan for 5-7 minutes before transferring to a wire rack.
9. Let sit on the wired cooling rack until room temperature to slice and serve.
Enjoy baking!
 NOTES AND TIPS
- To prepare the pan, use a teaspoon of vegetable oil and brush the pan evenly. you may dust it with some dry flour or simply use a lining of parchment paper for the bottom for easy removal. The oil will help keep the liner in place.
- This bread keeps well refrigerated, after 24 hours but ours was over on the same day ;)
 ------------------------------------------------
Cabbage Mushroom Soup
You will love this nourishing vegetarian quick-to-fix comfort soup with just 2 main ingredients rich in antioxidants. The convenience of a one-pot meal on a busy cold night makes this a no-fuss soup.

Cabbage is an excellent source of vitamins K, C, and B6. It is also a fiber-rich and a very good source of manganese, dietary fiber, potassium, vitamin B1, folate, and copper. It is low in calories, saturated fat, and cholesterol. Mushrooms being a good source of protein (especially for vegetarians), dietary fiber, iron, zinc, and vitamins C, D and B6 add more flavor to this dish.
With great depth of flavor, the deliciously thick soup will steal your heart away when served in a bread bowl. Although I have embellished my hot soup with potato boro's this time. Well, it's about time to enjoy easy and simple healthy warm comfort soup this winter. You sure will impress your guests effortlessly!

 PREP TIMECOOK TIMETOTAL TIMECategory: Soup, AppetizerCuisine: Indian Serves: 4
Nutrition Facts Servings 4.0 Amount Per Serving calories 33 % Daily Value * Total Fat 1 g 1 % Saturated Fat 0 g 2 % Monounsaturated Fat 0g Polyunsaturated Fat 0 g Trans Fat 0 g Cholesterol 1 mg 0 % Sodium 280 mg 10 % Potassium 90 mg 3 % Total Carbohydrate 6 g 2 % Dietary Fiber 2 g 7 % Sugars 2 g Protein 2 g 4 % Vitamin A 3 % Vitamin C 29 % Calcium 2 % Iron 1 % * The Percent Daily Values are based on a 2,000 calorie diet, so your values may change depending on your calorie needs. The values here may not be 100% accurate because the recipes have not been professionally evaluated nor have they been evaluated by the U.S. FDA.
INGREDIENTS
- Butter - 1 teaspoon (melted)
- Mushroom - 2 cups (chopped)
- Cabbage - 2 cups (roughly chopped)
- Ginger Garlic paste - 1 tablespoon
- Onions (white) - 1/4 cup (optional)
- Coriander leaves - 1/4 cup (chopped)
- Salt to taste
- Water as required (approximately 3 cups)
DIRECTIONS1. Heat a large saucepan with butter and ginger garlic paste, chopped mushrooms, and onions to saute for 3-4 minutes.
2. Pour in the water and add cabbage and coriander leaves along with required salt. Bring it to a boil.
3. Using a hand blender, directly puree the soup in the same pot. You may reserve some cooked cabbage to float in your soup.
4. Embellish with croutons/ potato boro or a slice of toasted bread on the side of the hot soup. Although serving in a bread bowl would be ideal. YUM!

NOTES AND TIPS1. Let cool for a few minutes if using a blender.
2. Button mushrooms result in light creamy colored soup. Whereas, Shiitake mushrooms add more flavor but result in a light brown color.
3. Notice I haven't added any spice as the natural flavor will be thoroughly enjoyed. The mild heat from the ginger and garlic would suffice. You may add ground black pepper if required.
 ---------------------------------------------Cheesy Shiitake Mushroom Crescent Roll
Craving for a rich and freshly baked tasty twist? A perfect Thanksgiving cheesy savory appetizer wrapped in Pillsbury's flaky crescent roll.

Flakey buttery goodness with Indian spiced mushrooms and melted cheese is mouth-watering. This dish can be a quick last-minute addition to any party. It's a semi-home-made recipe, where the stuffing can be made ahead of time and freshly baked with the readily available crescent roll dough. The French pastry bread or dinner roll is usually shaped up in a unique crescent shape, but I have mine rolled and covered completely for the stuffing to stay intact to look like a bundle.
These crescent rolls were transformed into a large Cornucopia using a cone-shaped aluminum foil and baked longer until they turned crisp. This cornucopia was filled with fresh fruits for our previous Thanksgiving Feast.
Last-minute non-traditional Thanksgiving menu ideas:
Bruschetta - Sun-dried Tomato Basil pesto
Caramel Spiced Rosemary Walnut
Six Tastes Watermelon Salad
Lobster Popcorn
BelVita Blueberry Cheesecake
European Tiramisu Cake
Strawberry Ale Mojito - Mocktail
Blueberry Infused Fizz
Nutrition Facts Servings 8.0 Amount Per Serving calories 124 % Daily Value * Total Fat 4 g 7 % Saturated Fat 3 g 14 % Monounsaturated Fat 1g Polyunsaturated Fat 3 g Trans Fat 0 g Cholesterol 0 mg 0 % Sodium 299 mg 12 % Potassium 14 mg 0 % Total Carbohydrate 11g 4 % Dietary Fiber 0 g 2 % Sugars 4 g Protein 1 g 3 % Vitamin A 3 % Vitamin C 1 % Calcium 0 % Iron 3 % * The Percent Daily Values are based on a 2,000 calorie diet, so your values may change depending on your calorie needs. The values here may not be 100% accurate because the recipes have not been professionally evaluated nor have they been evaluated by the U.S. FDA.
 BAKE TIMECOOK TIMETOTAL TIME
Category: AppetizerCuisine: Fusion
Level: MediumServes: 8 nosINGREDIENTS- 1. Pillsbury Crescent roll - 1(8oz)can refrigerated
- 2. Shiitake Mushrooms - 1/2 cup (sliced)
- 3. Onion - 1/4 cup (julienne)
- 4. Ginger garlic paste - 1/4 teaspoon
- 5. Chilly powder/ Paprika - 1/4 teaspoon
- 6. Coriander powder/ Dhanya powder - 1/4 teaspoon
- 7. Cumin powder/ Jeera - 1/8 teaspoon
- 8. Garam Masala - 1/8 teaspoon
- 9. Salt to taste
- 10. Pepper Jack (or any preferred)- 1 slice (cut into 8 small pieces)
- 11. Coriander leaves - garnish
- 12. Oil - 2 teaspoons
DIRECTIONS
STUFFING:
1. To make the Shiitake mushroom stuffing, in a saucepan/ kadai heat a couple of teaspoons of oil on medium heat. Add the onions and ginger and garlic paste and saute until golden brown.

2. Now add the sliced mushrooms, required salt, cumin powder, garam masala, chilly powder and coriander powder. Continue cooking for close to 7-8 mins.

3. Once done, garnish with coriander leaves remove from heat, and set aside to cool.
ASSEMBLY AND BAKING:
1. Preheat oven to 375°F. Open the can as per the directions stated. Unroll the dough and separate it into 8 triangles.

2. Place a small cheese slice or shredded cheese of your choice. Top it with approximately 2 teaspoons of prepared mushroom stuffing (as mentioned above) on the wider edge of the triangle dough.

3. Roll up to the narrow end (opposite point). The side of the rolls can be closed and wrapped completely to prevent the cheese from leaking.

4. Place rolls on cookie sheets leaving enough space to raise and fluff. I like to line my sheets with aluminum foil or parchment paper.

5. Bake at 375°F for 10- 12 minutes or until light golden color. Remove from the cookie sheet and serve immediately to enjoy the melted cheese with just the right amount of spice to this fluffy dinner roll.
NOTES AND TIPS1. Keep the Pillsbury crescent rolls refrigerated until you are ready to bake. Keeping it at room temperature causes the dough to loosen its firmness which is difficult to roll.
2. Don't forget to cool your stuffing before you remove the dough from the refrigerator.
3. If you do not prefer masalas in your stuffing, you may simply add Spanish, cheese, and garlic powder and season with fresh ground pepper.
4. The bake time varies according to the construction of your oven and its settings.
 -------------------------------------------------------Salmon with Peanut Sauce and Papaya Salsa
Looking for an Asian-inspired seafood dish? Oven-roasted salmon is simply delicious when dipped in peanut dipping sauce and served with ripe papaya salsa.
 This beautifully seared and roasted Salmon with Peanut sauce (Satay sauce) and Papaya salsa provides a good source of heart-healthy omega-3 fatty acids and vitamins. Salmon is seared using a cast iron skillet on the stovetop first, which crisps the outer layer delectably. Then transfer it to the oven to finish cooking. This method is highly recommended if cooking a few fillets that fit in the skillet. Do not crowd it with too many pieces of fish. You can prepare chicken the same way however cooking time in the oven is longer.

You will love this Asian-flavored peanut dipping sauce with the little crunchy texture. Always use the freshly pressed peanut butter (with no added ingredients), once you relish it, you will never prefer to buy the ones previously packed in jars.
The fresh and tropical fruity Papaya salsa is a great accompaniment to a grilled fish or chicken. The pickled dill slice can be replaced with some lime juice and salt.
For more Seafood recipes check out my:

Egg Flower Chicken Soup
Whether you want a break from heavy food or something to soothe your lungs on a cold day... you are on the right page. What is more comforting than a pot of hot hearty homemade delicious chicken soup?

My personal spin on this steaming bowl of "Egg Flower Chicken Soup" is a simplified and quick one-pot dish method prepared in 30 minutes. Its satisfying classic flavors are sure to top your comfort food list. The ingredients added relieve you when down with sore throat or cold and flu. A study of the "Encyclopedia of Medicinal Plants" was an awakening for me with the health benefits we gain from the regular usage of Indian spices when consumed correctly.

This "Egg Flower Chicken Soup" will instantly take you to heaven as it's so good for your body, mind, and soul. My family loves it when served with a warm toast or a dinner roll.

PREP TIME
COOK TIME
TOTAL TIME
 Category: Soup, Appetizer
Cuisine: Indian
Level: Easy
Level: Easy
Serves: 5
Requirement: Pressure Cooker
Requirement: Pressure Cooker
| Nutrition Facts | |
|---|---|
| Servings 5.0 | |
| Amount Per Serving | |
| calories 194 | |
| % Daily Value * | |
| Total Fat 16 g | 25 % |
| Saturated Fat 0 g | 0 % |
| Monounsaturated Fat 0g | |
| Polyunsaturated Fat 0 g | |
| Trans Fat 0 g | |
| Cholesterol 0 mg | 0 % |
| Sodium 398 mg | 17 % |
| Potassium 56 mg | 2 % |
| Total Carbohydrate 2 g | 1 % |
| Dietary Fiber 0 g | 1 % |
| Sugars 0 g | |
| Protein 51 g | 103% |
| Vitamin A | 2 % |
| Vitamin C | 2 % |
| Calcium | 0 % |
| Iron | 1 % |
| * The Percent Daily Values are based on a 2,000 calorie diet, so your values may change depending on your calorie needs. The values here may not be 100% accurate because the recipes have not been professionally evaluated nor have they been evaluated by the U.S. FDA. | |
INGREDIENTS
1. Chicken - 2 pounds (skinless, bone-in)-I used breast and thighs
2. Pearl onions - 6 (peeled and chopped)- Check notes
2. Pearl onions - 6 (peeled and chopped)- Check notes
3. Cinnamon - 1-inch stick
4. Bay leaf - 1
5. Cloves - 4 nos6. Cumin/ Jeera powder - 1/4 teaspoon
7. Pepper Powder- 1/2 teaspoon or as required
8. Ginger and Garlic paste - 1 teaspoon
9. Turmeric Powder - 1/8 teaspoon
9. Turmeric Powder - 1/8 teaspoon
10. Mint - 1 sprig
11. Coriander leaves - 4-5 sprigs (chopped)
12. Water - 8 cups (cold)
13. Salt to taste
14. Organic Egg - 2 (whites only)

DIRECTIONS
1. In a pressure cooker, add all the ingredients except the egg and coriander leaves. Ensure that the chicken is submerged completely. Close the lid and turn the heat to medium-high. (Check notes)
2. Cook until 2 whistles and set aside for the pressure to release.
2. Cook until 2 whistles and set aside for the pressure to release.
3. Carefully open the lid to fish out the whole spices (cinnamon stick, cloves, bay leaf, and mint sprig).

6. Lower the heat and pour the egg white into the soup in a slow but steady stream. Gently give it a stir only in 1 direction. In less than a minute you will find the cooked egg whites flowering up. Garnish with freshly chopped coriander leaves.
7. Ladle into serving bowls and serve piping hot with a warm toast or dinner roll.

NOTES AND TIPS
1. Peeled pearl onions and be chopped or just smash it with your knife to release flavor.
2. The whole spices can be bundled in a small cheesecloth for easy removal.
--------------------------------------------------
Sweet Brown Rice Sarkarai Pongal
It's time to celebrate prosperity, the festival of abundance. Happy Pongal to you and your family! Our Pongal special is "Sweet/Sarkarai Pongal" with a slight variation using "Sweet Brown Rice" and Dates.

Pongal is a Hindu festival celebrated on the 1st day of the 10th month (Thai) according to the Lunar calendar. Traditionally on this auspicious day, freshly harvested rice is boiled with fresh milk and jaggery in clay pots. While boiling the concoction, people allow the milk to spill over the pot as an auspicious sign of abundance and prosperity. This Pongal is then seasoned with ghee, cashew nuts, and raisins usually. I have added dates to this recipe taken from my mom. Also, my ratio of dal is slightly on the higher side for more protein, you may reduce it to your taste. This being brown rice, I used the pressure cooker for an effortless cooking.

Sweet brown rice has a shiny and smooth exterior. Once it is cooked with lentils it tends to get mushy like our regular rice. Although this mushiness keeps the pongal from getting too dry /hard; cooked sweet brown rice retains a slight and perfect crunchiness with each bit that you will love. Without any delay let's get started with this "Sweet Brown Rice Pongal"...

PREP TIME
COOK TIME
TOTAL TIME
Category: Dessert
Cuisine: South Indian
Level: Easy
Serves: 5
Level: Easy
Serves: 5
| Nutrition Facts | |
|---|---|
| Servings 5.0 | |
| Amount Per Serving | |
| calories 649 | |
| % Daily Value * | |
| Total Fat 14 g | 21 % |
| Saturated Fat 5 g | 27 % |
| Monounsaturated Fat 3g | |
| Polyunsaturated Fat 1 g | |
| Trans Fat 0 g | |
| Cholesterol 5 mg | 2 % |
| Sodium 28 mg | 1 % |
| Potassium 296mg | 8 % |
| Total Carbohydrate 119g | 40 % |
| Dietary Fiber 5 g | 21 % |
| Sugars 64 g | |
| Protein 13 g | 25 % |
| Vitamin A | 7 % |
| Vitamin C | 1 % |
| Calcium | 8 % |
| Iron | 14 % |
| * The Percent Daily Values are based on a 2,000 calorie diet, so your values may change depending on your calorie needs. The values here may not be 100% accurate because the recipes have not been professionally evaluated nor have they been evaluated by the U.S. FDA. | |

INGREDIENTS
- Sweet Brown Rice (organic)- 1 cup
- Yellow Moong Dal (Paasi paruppu)- 1/2 cup
- Milk (Organic or A2) - 1/2 cup + 1/4 cup
- Water - 3 cups
- Jaggery (powder) - 1 cup (check notes)
- Cardamom powder - 1/4 teaspoon
- Ghee - 2 tablespoons
- Raisins - 3 tablespoons
- Broken cashew nuts - 3 tablespoons
- Dates - 6-7 nos (pitted)

DIRECTIONS
1. Rinse and soak the sweet brown rice for about an hour. Drain and set aside.
2. Lightly roast the dry moong dal for approximately 3 minutes until aromatic, making sure you do not brown it.

3. In a pressure cooker, take the drained rice, roasted moong dal along with half a cup of milk and 3 cups of water. Pressure cook for 2 whistles.

4. Once the cooker is cooled, add the remaining milk(1/4 cup), jaggery powder, and cardamom powder (check notes). Bring this to a boil.

5. Heat the ghee in a tadka ladle or a small pan, and add the cashew nuts until it turns golden brown. You may add the raisins to puff up. But I prefer the raisins raw.

6. Add the above along with raisins and dates (cut into fours lengthwise) and give it a good stir. Now it's ready to serve:)

NOTES AND TIPS
1. Jaggery powder is readily available, which doesn't require grating/ crushing or straining the syrup. When heated it automatically dissolves.
2. Cardamom powder can be replaced with 2 pods of cardamom in ghee along with cashew nuts. Since we don't like it whole, I always have them stocked powdered.
3. Adding milk to cooked rice and dal adds flavor to the Pongal.
4. Sweet Brown Rice is available in Whole Foods.

------------------------------------------------
Eggless Wheat Banana Bread
"Happy 2017", a brand new beginning for your dreams and desires to come to reality and efforts turn into great achievements. Starting this new year with the most popular and ultimate "Banana Bread", a healthy recipe as my 1st post this year.

You don't want to miss this extremely moist, sweet, nutty, and most importantly healthy recipe. This delicious bread is an anytime healthy bread prepared with wheat, jaggery, and banana as the key ingredients. It's a big no to the all-purpose or maida flour. Banana Bread can be enjoyed as a breakfast, snack, or even as a dessert for lunch or dinner.

When my good and long-time friend Kirthika Kameshwaran shared this healthy recipe, my family relished every bit of it. I slightly modified her recipe with a few additions as well. Thanks again Kirthika for your sharing and being supportive always :)

Overripe bananas don't go to waste anymore, you can instantly start baking with the ingredients you will readily have at home. Are you geared up for some easy baking? Here we go...

PREP TIME
BAKE TIME
TOTAL TIME
Category:Breakfast,Dessert
Cuisine: International
Level: Easy
Level: Easy
Serves: 1 loaf (9x3)
Source:Kirthika Kameshwaran
Source:Kirthika Kameshwaran
| Nutrition Facts | |
|---|---|
| Servings 10.0 | |
| Amount Per Serving | |
| calories 309 | |
| % Daily Value * | |
| Total Fat 13 g | 21 % |
| Saturated Fat 2 g | 9 % |
| Monounsaturated Fat 2g | |
| Polyunsaturated Fat 7 g | |
| Trans Fat 0 g | |
| Cholesterol 0 mg | 0 % |
| Sodium 187 mg | 8 % |
| Potassium 129mg | 4 % |
| Total Carbohydrate 42g | 14 % |
| Dietary Fiber 1 g | 3 % |
| Sugars 22 g | |
| Protein 3 g | 6 % |
| Vitamin A | 1 % |
| Vitamin C | 3 % |
| Calcium | 2 % |
| Iron | 6 % |
| * The Percent Daily Values are based on a 2,000 calorie diet, so your values may change depending on your calorie needs. The values here may not be 100% accurate because the recipes have not been professionally evaluated nor have they been evaluated by the U.S. FDA. | |
INGREDIENTS
1. Whole Wheat Flour / Atta - 1 1/2 cups
2. Baking Powder - 1 1/2 tsp
3. Baking Soda - 1/2 tsp
4. Cardamom Powder - 1/2 tsp
5. Nutmeg Powder - 1/2 tsp
6. Powdered Jaggery - 1 cup
7. Vegetable Oil - 1/2 cup
8. Organic Milk - 1/2 cup
2. Baking Powder - 1 1/2 tsp
3. Baking Soda - 1/2 tsp
4. Cardamom Powder - 1/2 tsp
5. Nutmeg Powder - 1/2 tsp
6. Powdered Jaggery - 1 cup
7. Vegetable Oil - 1/2 cup
8. Organic Milk - 1/2 cup
9. Salt - 1/4 teaspoon
10. Banana - 2 (medium-sized - ripened)
10. Banana - 2 (medium-sized - ripened)
11. Walnuts (chopped) - 1/4 cup

DIRECTIONS
1. Preheat the oven to 350°F.
2. Combine the dry ingredients (1-5 ) in a bowl and sieve it using a sifter and set aside.
3. Blend the jaggery along with wet ingredients (6-9) in a mixer to a smooth paste.

4. Now combine the dry and wet mixtures together using a hand blender or a whisk.

5. Sprinkle the chopped walnuts and fold them gently to spread evenly.
6. Transfer to batter to a prepared bread loaf (check notes) and bake in the middle rack for about 50-55 mins.
7. While baking, in the middle about 25-30 mins, cover the pan with aluminum foil to prevent the top layer from getting burnt.
8. Once the bread is done, allow it to rest in the pan for 5-7 minutes before transferring to a wire rack.
9. Let sit on the wired cooling rack until room temperature to slice and serve.
Enjoy baking!
Enjoy baking!

NOTES AND TIPS
- To prepare the pan, use a teaspoon of vegetable oil and brush the pan evenly. you may dust it with some dry flour or simply use a lining of parchment paper for the bottom for easy removal. The oil will help keep the liner in place.
- This bread keeps well refrigerated, after 24 hours but ours was over on the same day ;)

------------------------------------------------
Cabbage Mushroom Soup
You will love this nourishing vegetarian quick-to-fix comfort soup with just 2 main ingredients rich in antioxidants. The convenience of a one-pot meal on a busy cold night makes this a no-fuss soup.

Cabbage is an excellent source of vitamins K, C, and B6. It is also a fiber-rich and a very good source of manganese, dietary fiber, potassium, vitamin B1, folate, and copper. It is low in calories, saturated fat, and cholesterol. Mushrooms being a good source of protein (especially for vegetarians), dietary fiber, iron, zinc, and vitamins C, D and B6 add more flavor to this dish.
With great depth of flavor, the deliciously thick soup will steal your heart away when served in a bread bowl. Although I have embellished my hot soup with potato boro's this time. Well, it's about time to enjoy easy and simple healthy warm comfort soup this winter. You sure will impress your guests effortlessly!

PREP TIME
COOK TIME
TOTAL TIME
Category: Soup, Appetizer
Cuisine: Indian
Serves: 4
| Nutrition Facts | |
|---|---|
| Servings 4.0 | |
| Amount Per Serving | |
| calories 33 | |
| % Daily Value * | |
| Total Fat 1 g | 1 % |
| Saturated Fat 0 g | 2 % |
| Monounsaturated Fat 0g | |
| Polyunsaturated Fat 0 g | |
| Trans Fat 0 g | |
| Cholesterol 1 mg | 0 % |
| Sodium 280 mg | 10 % |
| Potassium 90 mg | 3 % |
| Total Carbohydrate 6 g | 2 % |
| Dietary Fiber 2 g | 7 % |
| Sugars 2 g | |
| Protein 2 g | 4 % |
| Vitamin A | 3 % |
| Vitamin C | 29 % |
| Calcium | 2 % |
| Iron | 1 % |
| * The Percent Daily Values are based on a 2,000 calorie diet, so your values may change depending on your calorie needs. The values here may not be 100% accurate because the recipes have not been professionally evaluated nor have they been evaluated by the U.S. FDA. | |
INGREDIENTS
- Butter - 1 teaspoon (melted)
- Mushroom - 2 cups (chopped)
- Cabbage - 2 cups (roughly chopped)
- Ginger Garlic paste - 1 tablespoon
- Onions (white) - 1/4 cup (optional)
- Coriander leaves - 1/4 cup (chopped)
- Salt to taste
- Water as required (approximately 3 cups)
DIRECTIONS
1. Heat a large saucepan with butter and ginger garlic paste, chopped mushrooms, and onions to saute for 3-4 minutes.
2. Pour in the water and add cabbage and coriander leaves along with required salt. Bring it to a boil.
3. Using a hand blender, directly puree the soup in the same pot. You may reserve some cooked cabbage to float in your soup.
4. Embellish with croutons/ potato boro or a slice of toasted bread on the side of the hot soup. Although serving in a bread bowl would be ideal. YUM!

NOTES AND TIPS
1. Let cool for a few minutes if using a blender.
2. Button mushrooms result in light creamy colored soup. Whereas, Shiitake mushrooms add more flavor but result in a light brown color.
3. Notice I haven't added any spice as the natural flavor will be thoroughly enjoyed. The mild heat from the ginger and garlic would suffice. You may add ground black pepper if required.

---------------------------------------------
Cheesy Shiitake Mushroom Crescent Roll
Craving for a rich and freshly baked tasty twist? A perfect Thanksgiving cheesy savory appetizer wrapped in Pillsbury's flaky crescent roll.
Flakey buttery goodness with Indian spiced mushrooms and melted cheese is mouth-watering. This dish can be a quick last-minute addition to any party. It's a semi-home-made recipe, where the stuffing can be made ahead of time and freshly baked with the readily available crescent roll dough. The French pastry bread or dinner roll is usually shaped up in a unique crescent shape, but I have mine rolled and covered completely for the stuffing to stay intact to look like a bundle.
These crescent rolls were transformed into a large Cornucopia using a cone-shaped aluminum foil and baked longer until they turned crisp. This cornucopia was filled with fresh fruits for our previous Thanksgiving Feast.
Last-minute non-traditional Thanksgiving menu ideas:
Last-minute non-traditional Thanksgiving menu ideas:
Bruschetta - Sun-dried Tomato Basil pesto
Caramel Spiced Rosemary Walnut
Six Tastes Watermelon Salad
Lobster Popcorn
BelVita Blueberry Cheesecake
European Tiramisu Cake
Strawberry Ale Mojito - Mocktail
Blueberry Infused Fizz
| Nutrition Facts | |
|---|---|
| Servings 8.0 | |
| Amount Per Serving | |
| calories 124 | |
| % Daily Value * | |
| Total Fat 4 g | 7 % |
| Saturated Fat 3 g | 14 % |
| Monounsaturated Fat 1g | |
| Polyunsaturated Fat 3 g | |
| Trans Fat 0 g | |
| Cholesterol 0 mg | 0 % |
| Sodium 299 mg | 12 % |
| Potassium 14 mg | 0 % |
| Total Carbohydrate 11g | 4 % |
| Dietary Fiber 0 g | 2 % |
| Sugars 4 g | |
| Protein 1 g | 3 % |
| Vitamin A | 3 % |
| Vitamin C | 1 % |
| Calcium | 0 % |
| Iron | 3 % |
| * The Percent Daily Values are based on a 2,000 calorie diet, so your values may change depending on your calorie needs. The values here may not be 100% accurate because the recipes have not been professionally evaluated nor have they been evaluated by the U.S. FDA. | |

BAKE TIME
COOK TIME
TOTAL TIME
Category: Appetizer
Cuisine: Fusion
Level: Medium
Level: Medium
Serves: 8 nos
INGREDIENTS
- 1. Pillsbury Crescent roll - 1(8oz)can refrigerated
- 2. Shiitake Mushrooms - 1/2 cup (sliced)
- 3. Onion - 1/4 cup (julienne)
- 4. Ginger garlic paste - 1/4 teaspoon
- 5. Chilly powder/ Paprika - 1/4 teaspoon
- 6. Coriander powder/ Dhanya powder - 1/4 teaspoon
- 7. Cumin powder/ Jeera - 1/8 teaspoon
- 8. Garam Masala - 1/8 teaspoon
- 9. Salt to taste
- 10. Pepper Jack (or any preferred)- 1 slice (cut into 8 small pieces)
- 11. Coriander leaves - garnish
- 12. Oil - 2 teaspoons
DIRECTIONS
STUFFING:
1. To make the Shiitake mushroom stuffing, in a saucepan/ kadai heat a couple of teaspoons of oil on medium heat. Add the onions and ginger and garlic paste and saute until golden brown.

2. Now add the sliced mushrooms, required salt, cumin powder, garam masala, chilly powder and coriander powder. Continue cooking for close to 7-8 mins.

3. Once done, garnish with coriander leaves remove from heat, and set aside to cool.
ASSEMBLY AND BAKING:
1. Preheat oven to 375°F. Open the can as per the directions stated. Unroll the dough and separate it into 8 triangles.

2. Place a small cheese slice or shredded cheese of your choice. Top it with approximately 2 teaspoons of prepared mushroom stuffing (as mentioned above) on the wider edge of the triangle dough.

3. Roll up to the narrow end (opposite point). The side of the rolls can be closed and wrapped completely to prevent the cheese from leaking.

4. Place rolls on cookie sheets leaving enough space to raise and fluff. I like to line my sheets with aluminum foil or parchment paper.

5. Bake at 375°F for 10- 12 minutes or until light golden color. Remove from the cookie sheet and serve immediately to enjoy the melted cheese with just the right amount of spice to this fluffy dinner roll.

NOTES AND TIPS
1. Keep the Pillsbury crescent rolls refrigerated until you are ready to bake. Keeping it at room temperature causes the dough to loosen its firmness which is difficult to roll.
2. Don't forget to cool your stuffing before you remove the dough from the refrigerator.
3. If you do not prefer masalas in your stuffing, you may simply add Spanish, cheese, and garlic powder and season with fresh ground pepper.
4. The bake time varies according to the construction of your oven and its settings.

-------------------------------------------------------
Salmon with Peanut Sauce and Papaya Salsa
Looking for an Asian-inspired seafood dish? Oven-roasted salmon is simply delicious when dipped in peanut dipping sauce and served with ripe papaya salsa.

This beautifully seared and roasted Salmon with Peanut sauce (Satay sauce) and Papaya salsa provides a good source of heart-healthy omega-3 fatty acids and vitamins. Salmon is seared using a cast iron skillet on the stovetop first, which crisps the outer layer delectably. Then transfer it to the oven to finish cooking. This method is highly recommended if cooking a few fillets that fit in the skillet. Do not crowd it with too many pieces of fish. You can prepare chicken the same way however cooking time in the oven is longer.

The fresh and tropical fruity Papaya salsa is a great accompaniment to a grilled fish or chicken. The pickled dill slice can be replaced with some lime juice and salt.
For more Seafood recipes check out my:

SALMON WITH PEANUT SAUCE AND PAPAYA SALSA
PREP TIMECOOK TIMETOTAL TIME
Category: MainCuisine: FusionServes: 2
Nutrition Facts Servings 2.0 Amount Per Serving calories 203 % Daily Value * Total Fat 7 g 10 % Saturated Fat 1 g 3 % Monounsaturated Fat 2g Polyunsaturated Fat 2 g Trans Fat 0 g Cholesterol 11mg 4 % Sodium 324 mg 13 % Potassium 426mg 12 % Total Carbohydrate 36g 12 % Dietary Fiber 4 g 18 % Sugars 19 g Protein 8 g 17 % Vitamin A 40 % Vitamin C 178% Calcium 6 % Iron 3 % * The Percent Daily Values are based on a 2,000 calorie diet, so your values may change depending on your calorie needs. The values here may not be 100% accurate because the recipes have not been professionally evaluated nor have they been evaluated by the U.S. FDA.
- INGREDIENTS
- Salmon:
- Salmon - 2 boneless, skinless fillet
- Oil - 1 tablespoon
- Salt to taste
- Black Pepper (freshly grounded) - as required
- Peanut sauce - 1 teaspoon
- Sesame seeds (white) - for garnishing
- Peanut Sauce/ Satay Sauce:
Peanut butter 1/4 cup (freshly pressed from Whole Foods)
- Papaya Salsa:
- Ripe papaya - 2 cups (peeled and chopped into small cubes)
- Red onions - 1/4 (finely chopped)
- Red bell pepper - 1/4 cup (chopped)
- Pickled dill -1 slice (drained, chopped)
- Red chilli flakes or Thai green chilly (finely chopped) - as required
DIRECTIONS
Salmon:

1. Preheat the oven to 400 degrees Fahrenheit.
2. Rinse the fish fillet and pat dry with a paper towel. Season with salt and freshly ground pepper. Add a spoonful of peanut sauce for the honey or brown sugar to caramelize to give a rich color and add more flavor to the fish.
3. In a heated cast-iron skillet on the stovetop, add 2 teaspoons of sesame oil.
4. Place the fish fillets gently in the skillet and cook for 3 mins over high heat to crisp. Flip using a broad spatula and cook for another 3 mins.
5. Now transfer the hot skillet into the preheated oven for approximately 8 minutes until the fish is cooked through.
Peanut sauce:

Stir together all the ingredients mentioned in a bowl. Serve at room temperature or refrigerate in an airtight container or freeze until required. This sauce is too good that I am sure you might not have leftovers ;)
Papaya Salsa:

Stir all the ingredients mentioned in the papaya salsa above in a bowl. Serve immediately to enjoy or cover with a cling wrap and refrigerate until ready to use.
For presentation:

I used a basting brush to brush some peanut sauce onto the plate and placed the roasted salmon. Using a flower-shaped cookie cutter I filled in with the papaya salsa. Thinly sliced papaya and a blueberry is arranged like a bird. More dipping sauce on the side finishes the presentation. Enjoy relishing this appetizing main course!
-------------------------------------------------------------------------Dulce de leche Molten Cake
Exactly a year ago on this day, I hit the "Publish" button on my very first blog post. Celebrating 1st Blog-versary with warm "Dulce de leche Molten Cake" paired with cool "Banana Crunchy Ice Cream".

"Life is short. Eat dessert first". - Ernestine Ulmer
This 1 year journey indeed has been a great roller coaster ride at my end. I was so excited and also ignorant of what exactly I was into. It has been a fantabulous year of great learning experiences from food photography, reading HTML codes, getting creative, and most importantly scheduling each day differently; as I have involved myself in various voluntary work apart from blogging and painting.

Many many thanks to all my blog followers and readers who continue to be supportive by liking my posts and commenting as well. Many bloggers have been an inspiration especially when it comes to food photography. Passion and perfection go hand in hand. Wish me luck and stay blessed friends!
SALMON WITH PEANUT SAUCE AND PAPAYA SALSA
PREP TIME
COOK TIME
TOTAL TIME
Category: Main
Cuisine: Fusion
Serves: 2
| Nutrition Facts | |
|---|---|
| Servings 2.0 | |
| Amount Per Serving | |
| calories 203 | |
| % Daily Value * | |
| Total Fat 7 g | 10 % |
| Saturated Fat 1 g | 3 % |
| Monounsaturated Fat 2g | |
| Polyunsaturated Fat 2 g | |
| Trans Fat 0 g | |
| Cholesterol 11mg | 4 % |
| Sodium 324 mg | 13 % |
| Potassium 426mg | 12 % |
| Total Carbohydrate 36g | 12 % |
| Dietary Fiber 4 g | 18 % |
| Sugars 19 g | |
| Protein 8 g | 17 % |
| Vitamin A | 40 % |
| Vitamin C | 178% |
| Calcium | 6 % |
| Iron | 3 % |
| * The Percent Daily Values are based on a 2,000 calorie diet, so your values may change depending on your calorie needs. The values here may not be 100% accurate because the recipes have not been professionally evaluated nor have they been evaluated by the U.S. FDA. | |
- INGREDIENTS
- Salmon:
- Salmon - 2 boneless, skinless fillet
- Oil - 1 tablespoon
- Salt to taste
- Black Pepper (freshly grounded) - as required
- Peanut sauce - 1 teaspoon
- Sesame seeds (white) - for garnishing
- Peanut Sauce/ Satay Sauce:
- Papaya Salsa:
- Ripe papaya - 2 cups (peeled and chopped into small cubes)
- Red onions - 1/4 (finely chopped)
- Red bell pepper - 1/4 cup (chopped)
- Pickled dill -1 slice (drained, chopped)
- Red chilli flakes or Thai green chilly (finely chopped) - as required
DIRECTIONS
Salmon:

1. Preheat the oven to 400 degrees Fahrenheit.
2. Rinse the fish fillet and pat dry with a paper towel. Season with salt and freshly ground pepper. Add a spoonful of peanut sauce for the honey or brown sugar to caramelize to give a rich color and add more flavor to the fish.
3. In a heated cast-iron skillet on the stovetop, add 2 teaspoons of sesame oil.
4. Place the fish fillets gently in the skillet and cook for 3 mins over high heat to crisp. Flip using a broad spatula and cook for another 3 mins.
5. Now transfer the hot skillet into the preheated oven for approximately 8 minutes until the fish is cooked through.
Peanut sauce:
Stir together all the ingredients mentioned in a bowl. Serve at room temperature or refrigerate in an airtight container or freeze until required. This sauce is too good that I am sure you might not have leftovers ;)

Papaya Salsa:
Stir all the ingredients mentioned in the papaya salsa above in a bowl. Serve immediately to enjoy or cover with a cling wrap and refrigerate until ready to use.

For presentation:

I used a basting brush to brush some peanut sauce onto the plate and placed the roasted salmon. Using a flower-shaped cookie cutter I filled in with the papaya salsa. Thinly sliced papaya and a blueberry is arranged like a bird. More dipping sauce on the side finishes the presentation. Enjoy relishing this appetizing main course!
-------------------------------------------------------------------------
Dulce de leche Molten Cake
Exactly a year ago on this day, I hit the "Publish" button on my very first blog post. Celebrating 1st Blog-versary with warm "Dulce de leche Molten Cake" paired with cool "Banana Crunchy Ice Cream".
 |
| "Life is short. Eat dessert first". - Ernestine Ulmer |
This 1 year journey indeed has been a great roller coaster ride at my end. I was so excited and also ignorant of what exactly I was into. It has been a fantabulous year of great learning experiences from food photography, reading HTML codes, getting creative, and most importantly scheduling each day differently; as I have involved myself in various voluntary work apart from blogging and painting.

Many many thanks to all my blog followers and readers who continue to be supportive by liking my posts and commenting as well. Many bloggers have been an inspiration especially when it comes to food photography. Passion and perfection go hand in hand. Wish me luck and stay blessed friends!
DULCE DE LECHE MOLTEN CAKE
Who does not like this insanely delicious dulce de leche flavor? An incredibly quick molten cake with your favorite flavor is surely gonna be a big hit. Baked in high temperature for the outer layer to set as a sturdy foundation to ensure the gooey center oozes out. Say yes to this sexy indulgent dessert even if you are watching your diet ;)

Prep time - 30 minutesCooking time - 13 minsYields - 6Category - DessertCuisine - French and Spanish-inspired
Nutrition Facts Servings 6.0 Amount Per Serving calories 185 % Daily Value * Total Fat 8 g 12 % Saturated Fat 2 g 10 % Monounsaturated Fat 1g Polyunsaturated Fat 0 g Trans Fat 0 g Cholesterol 97mg 32 % Sodium 102 mg 4 % Potassium 30 mg 1 % Total Carbohydrate 25g 8 % Dietary Fiber 0 g 1 % Sugars 0 g Protein 8 g 16 % Vitamin A 4 % Vitamin C 0 % Calcium 1 % Iron 4 % * The Percent Daily Values are based on a 2,000 calorie diet, so your values may change depending on your calorie needs. The values here may not be 100% accurate because the recipes have not been professionally evaluated nor have they been evaluated by the U.S. FDA.
Ingredients:
- Unsalted butter - 1 tablespoon + some for coating the ramekins
- All-purpose flour/ maida - 2.5 cups + more for dusting ramekins
- Salt - 1 pinch
- Egg yolks - 2 large
- Whole egg - 1 large
- Dulce de leche - 2/3 cup (scroll down for homemade recipe)
Directions:1. Preheat oven to 425°. Butter and dust the ramekins with flour to place them on a baking sheet.
2. Using an electric mixer, beat egg yolks and egg in a medium bowl until doubled in volume and eggs hold a slight ribbon (check notes for this term) which takes about 3 minutes.

- 3. Add dulce de leche and butter to beat until well combined. Then gradually sift in 2 1/2 tablespoons of flour and salt to beat until well incorporated. Divide batter among all the 6 ramekins almost to the top leaving about a centimeter on top.

- 4. Transfer the baking sheet to oven. Bake cakes until the outsides are golden brown in color but the centers still jiggle. Mine too exactly 13 minutes.

- 5. Transfer the baking sheet to a rack. Let it sit for 10 seconds for the sides to loosen. Also, run the tip of a small knife around the edges of ramekins to remove easily. Invert onto serving plates and carefully lift off the ramekins. Serve immediately with ice cream (in this case Banana Crunchy Ice cream).

Who does not like this insanely delicious dulce de leche flavor? An incredibly quick molten cake with your favorite flavor is surely gonna be a big hit. Baked in high temperature for the outer layer to set as a sturdy foundation to ensure the gooey center oozes out. Say yes to this sexy indulgent dessert even if you are watching your diet ;)

Prep time - 30 minutes
Cooking time - 13 mins
Yields - 6
Category - Dessert
Cuisine - French and Spanish-inspired
Ingredients:
| Nutrition Facts | |
|---|---|
| Servings 6.0 | |
| Amount Per Serving | |
| calories 185 | |
| % Daily Value * | |
| Total Fat 8 g | 12 % |
| Saturated Fat 2 g | 10 % |
| Monounsaturated Fat 1g | |
| Polyunsaturated Fat 0 g | |
| Trans Fat 0 g | |
| Cholesterol 97mg | 32 % |
| Sodium 102 mg | 4 % |
| Potassium 30 mg | 1 % |
| Total Carbohydrate 25g | 8 % |
| Dietary Fiber 0 g | 1 % |
| Sugars 0 g | |
| Protein 8 g | 16 % |
| Vitamin A | 4 % |
| Vitamin C | 0 % |
| Calcium | 1 % |
| Iron | 4 % |
| * The Percent Daily Values are based on a 2,000 calorie diet, so your values may change depending on your calorie needs. The values here may not be 100% accurate because the recipes have not been professionally evaluated nor have they been evaluated by the U.S. FDA. | |
- Unsalted butter - 1 tablespoon + some for coating the ramekins
- All-purpose flour/ maida - 2.5 cups + more for dusting ramekins
- Salt - 1 pinch
- Egg yolks - 2 large
- Whole egg - 1 large
- Dulce de leche - 2/3 cup (scroll down for homemade recipe)
Directions:
1. Preheat oven to 425°. Butter and dust the ramekins with flour to place them on a baking sheet.
2. Using an electric mixer, beat egg yolks and egg in a medium bowl until doubled in volume and eggs hold a slight ribbon (check notes for this term) which takes about 3 minutes.
2. Using an electric mixer, beat egg yolks and egg in a medium bowl until doubled in volume and eggs hold a slight ribbon (check notes for this term) which takes about 3 minutes.

- 3. Add dulce de leche and butter to beat until well combined. Then gradually sift in 2 1/2 tablespoons of flour and salt to beat until well incorporated. Divide batter among all the 6 ramekins almost to the top leaving about a centimeter on top.
- 4. Transfer the baking sheet to oven. Bake cakes until the outsides are golden brown in color but the centers still jiggle. Mine too exactly 13 minutes.
- 5. Transfer the baking sheet to a rack. Let it sit for 10 seconds for the sides to loosen. Also, run the tip of a small knife around the edges of ramekins to remove easily. Invert onto serving plates and carefully lift off the ramekins. Serve immediately with ice cream (in this case Banana Crunchy Ice cream).


Notes and Tips:
- The Ribbon Stage is a cooking term used to measure how well egg yolk and sugar are beaten together. When a whisk or spoon is moved through the mixture it leaves a trail behind that is visible for a split-second before merging back into the mixture. Another way to check is to spoon the mixture back into the bowl in ribbons for a short period to disappear is the right consistency.
- The Ribbon Stage is a cooking term used to measure how well egg yolk and sugar are beaten together. When a whisk or spoon is moved through the mixture it leaves a trail behind that is visible for a split-second before merging back into the mixture. Another way to check is to spoon the mixture back into the bowl in ribbons for a short period to disappear is the right consistency.
DULCE DE LECHE (Homemade)
A fudge-like caramel is basically simmering milk and sugar. It is a combination of two common browning reactions called Caramelization and the Maillard Reaction. This pressure cooker method makes the tedious task easy.

Prep time: 5 minutesCooking time: 30 minutesLevel: Easy
Ingredient and Requirement- Condensed milk (fat-free) - 1 can
- Pressure cooker

Directions:Remove the label from the condensed milk can and wash it thoroughly. Place it in a pressure cooker horizontally and fill water until half the can is immersed. Close and turn on the flame to high and cook for 1 whistle. Now is the time to simmer the flame to low and continue cooking for another 25 minutes. Switch off the flame and let it cool. Allow the pressure to release and open the lid for further cooling time. Do not touch or try lifting the can when hot to avoid burns. When the can cool completely wipe dry and open to find the delicious dulce de leche.

A fudge-like caramel is basically simmering milk and sugar. It is a combination of two common browning reactions called Caramelization and the Maillard Reaction. This pressure cooker method makes the tedious task easy.

Prep time: 5 minutes
Cooking time: 30 minutes
Level: Easy
Ingredient and Requirement
- Condensed milk (fat-free) - 1 can
- Pressure cooker

Directions:
Remove the label from the condensed milk can and wash it thoroughly. Place it in a pressure cooker horizontally and fill water until half the can is immersed. Close and turn on the flame to high and cook for 1 whistle. Now is the time to simmer the flame to low and continue cooking for another 25 minutes. Switch off the flame and let it cool. Allow the pressure to release and open the lid for further cooling time. Do not touch or try lifting the can when hot to avoid burns. When the can cool completely wipe dry and open to find the delicious dulce de leche.

BANANA CRUNCHY ICE CREAM
Cold stone Banana Caramel Crunch is the flavor I can never give up. Just came up with a shortcut to enjoy any day at home. Skipped the caramel as we are enjoying it with Dulce de leche Molten Cakes.
Ingredients:- Vanilla ice cream - 6 scoops (Cold Stone - optional)
- Banana - 1/2
- Granola or Toasted Almonds- 2 tablespoons (my choice - Granola)

Directions:Chill a marble slab in the freezer for about 20 minutes. Use two large spoons to fold in the ice cream and the mix-ins on the chilled marble slab. Scoop to serve immediately along with the Dulce de leche Molten cake.
Notes and Tips:
If you choose to have just the ice cream, add a swirl of dulce de leche or caramel to the prepared ice cream as an extra topping.

Always remember good things are coming to you. Just keep going!
----------------------------------------------------Chum Chum/ Chom Chom (Semi-homemade version included)
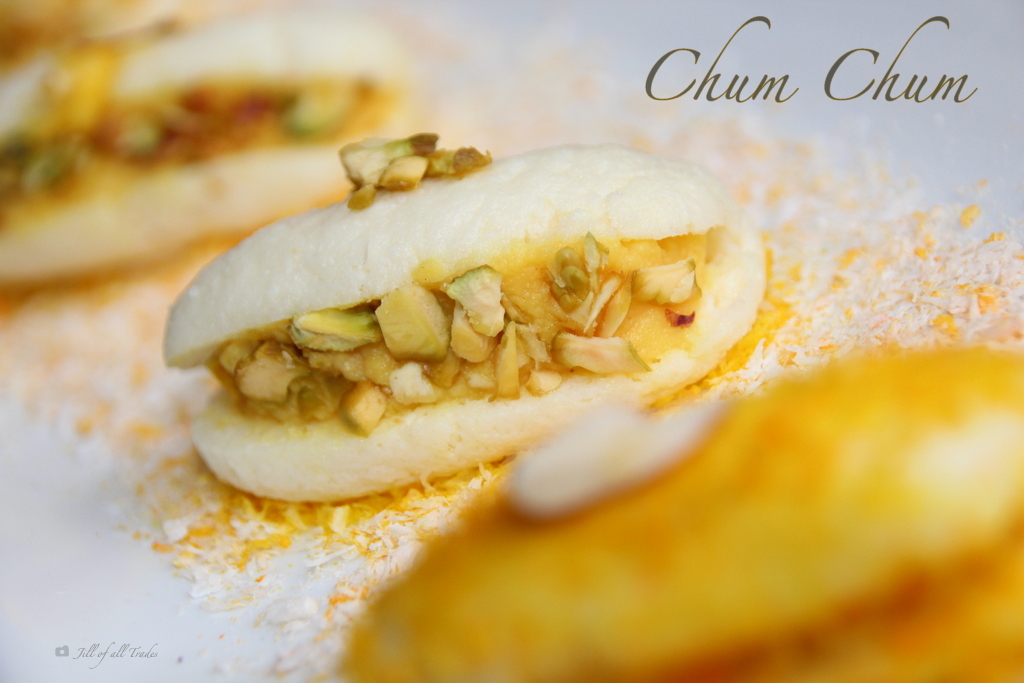
Stuffed and spongy like a teddy is not huggable but enjoyable with its sweet and soft texture. The most popular and all-time favorite Bengali milk sweet is similar to Rasgulla. It is stuffed with saffron-flavored Mawa/Khoya made from scratch. Comes in a variety of colors (pink, yellow, white) and is all the favorite milk sweet in our family.

To make Mawa using Ricotta cheese and evaporated milk please check Sweet Potato Gulab Jamun with Fig Mawa. If you are looking for more Indian dessert recipes for this Diwali, you might want to check out my Peda - 3 variations, Badhusha and Wheat Nutty Rawa Laddu.

Like "make your own teddy" here is a Semi-home and no-cooking version of Chum Chums especially for bachelors and working moms. Buy canned chum chum or rasgulla. Drain and squeeze out the excess sugar syrup. Slit with a knife and stuff with store-bought mawa (mix confectioners sugar and saffron strands soaked in warm milk for added flavor). Top it with chopped nuts and desiccated coconut flakes. Vola! You made it in less than 10 minutes. Pat your back and enjoy with your family!

Prep Time: 15 minutesCooking time: 45 minutesCuisine - Indian (Bengali)Category: Sweets/ Dessert
Nutrition Facts Servings 12.0 Amount Per Serving calories 157 % Daily Value * Total Fat 4 g 6 % Saturated Fat 2 g 12 % Monounsaturated Fat 0g Polyunsaturated Fat 0 g Trans Fat 0 g Cholesterol 10mg 3 % Sodium 99 mg 4 % Potassium 0 mg 0 % Total Carbohydrate 30g 10 % Dietary Fiber 0 g 1 % Sugars 29 g Protein 3 g 6 % Vitamin A 4 % Vitamin C 2 % Calcium 10 % Iron 0 % * The Percent Daily Values are based on a 2,000 calorie diet, so your values may change depending on your calorie needs. The values here may not be 100% accurate because the recipes have not been professionally evaluated nor have they been evaluated by the U.S. FDA.
Ingredients:1. Organic Whole Milk - 4 cups/ 1 quart/ 1 liter2. Rice Vinegar or Lemon Juice - 3 tablespoons3. Granulated Sugar - 1.5 cups4. Water - 3 cups5. Desiccated Coconut - 3 tablespoons6. Food color - Pink or Yellow (optional) I liked the natural white and skipped coloring.7. Ice cubes or cold water (for cooling the chena/ paneer)

Stuffing:1. Mawa/ Khoya - 1/4 cup (crumbled/ grated)
Check Sweet Potato Gulab Jamun with Fig Mawa for homemade fig mawa using Ricotta cheese.2. Saffron strands - few approximately 4-5 strands3. Milk - 1/2 Teaspoon4. Confectioners sugar - 1 teaspoon or as required (optional)5. Cardamom powder - 1/8 teaspoon6. Pistachio (chopped) - 3 tablespoons
Directions:Boil whole milk in a heavy-bottomed pan. Turn off the flame once it comes to a boil.

Let cool for 5 minutes and the vinegar or lemon juice for milk to curdle.

Once curdled, add ice cubes or cold water to stop the cooking process. This keeps the fresh chena/ paneer soft and the lemon juice/ vinegar is washed away as well.

Using a strainer, drain all the whey (water) to collect the panner/ chena in a muslin cloth or any thin cloth to remove excess moisture. Gently twist the cloth to squeeze out the remaining whey.

I used a clip and tied it to my microwave handle for about 30 minutes. Don't forget to keep a bowl underneath to collect the drippings.

Untie to see crumbled paneer / chena.

Mash and knead the panner to form dough-like. Stop kneading when you feel the fat releasing and your palms get greasy.

Now you may add the food color of your choice and mix well if you desire. Divide into 12 equal parts and shape them into thick oval patties as shown in the picture.

Remember the size will double as it cooks in the sugar syrup.

In a deep pan, boil the 3 cups of water add sugar to it, and stir to dissolve completely to make the sugar syrup.

Gently add the chum chums into the sugar syrup. Cover and cook on medium heat for 12 minutes. Flip the patties in between once after 6 minutes or so.

Once cooked, drain them and let them cool completely to prevent the chum chums from breaking. Gently press to remove excess syrup. Using a knife make a slit horizontally (with one end still connected) to stuff with Mawa.

To make the stuffing, add the saffron strands to the 1/2 teaspoon warm milk and let sit for a few mins to release the saffron color. Add this to Mawa/Khoya along with cardamom powder. I did not add Sugar as my homemade mawa (made with Ricotta cheese and evaporated milk) was sweet enough.

Take about 1/2 teaspoon of mawa stuffing and stuff the chum chum. Now repeat the same with the remaining chum chums. Top the stuffing with a generous amount of chopped pistachios and roll the chum chums in a bed of desiccated coconut for a finished look.

Malai/ Rabri Chum Chum
An instant version of sweet and creamy Rabri Chum Chum great for unexpected guests or last-minute dessert ideas. Preparation time is 5 minutes or less. Also, an excellent party dessert that can be made ahead of time.
Ingredients:
Condensed Milk - 1/2 can (7 oz)
Organic Whole Milk - 1 cup
Pistachios -1 tablespoon (chopped)
Slivered Almonds - 1 tablespoon
Saffron strands - a few
Cardamom powder - 1/8 teaspoon
Directions:
In a saucepan pour the milk and bring it to a boil. To this add the condensed milk and stir well.
Now add the rest of the ingredients and turn off the heat.
In a bowl arrange unstuffed chum chums and pour in the Rabri/malai to it. Ready to be served.

Indulge life is sweet and delicious! Happy Diwali!
Notes and Tips:1. When the milk curdles, immediately add the ice cubes to the chena/ paneer in order to stop cooking. this step helps retain the soft texture of chena.2. Keep the chum chums covered while cooking. 3. Always cool the chum chums completely before slitting to avoid breaking.

------------------------------------------------------------------------------------------- Sweet Potato Gulab Jamun with Fig Mawa
Purple Sweet Potato gives a slight mutation from the authentic Gulab Jamun. Layers of rich, unexpected flavors and color make this delicacy a succulent Indian treat that melts in your mouth. It is a wondrous way to sneak in some goodies, especially on special occasions.

A perfect festive delight to feed your loved ones or for give aways to your near and dear on this Diwali. Gulab Jamuns are usually made with Mawa or khoya which is nothing but evaporated milk solids. Mashed purple sweet potato is the main ingredient in this recipe. These sweet potato darlings are stuffed with homemade fig mawa/ khoya made with Ricotta cheese and Fig to add more flavor and irresistible.

Preparation time: 20 mins
Cooking time: 20 minutes
Soaking time: 1/2 to 1 hour
Yields: 30-35 jamuns
You might be interested in checking out my
Ingredients:
Sweet potatoes - 2 medium (purple - optional)
Evaporated milk - 1 tablespoon (check notes)
Maida/All-purpose flour - 2 tablespoons
Salt - 1 pinch
Oil or Ghee for deep frying ( check notes)
Pistachios (chopped) - for garnishing
Sugar Syrup:
Water - 2 cups
Sugar - 2 cups
Rose essence or Rose milk syrup - 1/4 teaspoon (optional)
Cardamom powder - 1/8 teaspoon
Fig Mawa / Khoya:
Fig / Athipazham/ Anjeer - 2 nos (peeled and mashed)
Ricotta cheese - 1/2 small tub (4 oz)
Evaporated milk or sugar -2 tablespoons

Nutrition Facts Servings 30.0 Amount Per Serving calories 98 % Daily Value * Total Fat 4 g 7 % Saturated Fat 1 g 6 % Monounsaturated Fat 1g Polyunsaturated Fat 2 g Trans Fat 0 g Cholesterol 2 mg 1 % Sodium 13 mg 1 % Potassium 41 mg 1 % Total Carbohydrate 15g 5 % Dietary Fiber 0 g 1 % Sugars 14 g Protein 1 g 1 % Vitamin A 26 % Vitamin C 1 % Calcium 1 % Iron 0 % * The Percent Daily Values are based on a 2,000 calorie diet, so your values may change depending on your calorie needs. The values here may not be 100% accurate because the recipes have not been professionally evaluated nor have they been evaluated by the U.S. FDA.
Directions:
Cut the sweet potatoes into large chunks and steam them in a pressure cooker or a steamer for 10 minutes.

Cool and peel to mash with potato masher or puree it in a blender to make it fast. You may add approximately a tablespoon of water or as required to blend it. To this add the evaporated milk, all purpose flour, salt and knead to a soft smooth dough for about 5 minutes.
For the Fig Mawa/khoya, in a large pan add the ricotta cheese and stir well on medium heat. It will turn into soup consistency and then start to evaporate the water to transform into milk solids. This will take approximately 15 minutes. Now add the evaporated milk or sugar and the mashed fig. You may remove the fig seeds by running through a sieve. But I prefer to leave the seeds in. Stir until it solidifies.

Sugar Syrup
In a large saucepan, add the water, sugar, and bring it to a boil, and simmer for a few more minutes until it thickens to a syrup consistency. Now add the rose essence, or rose milk syrup and cardamom powder. Turn off the heat and set aside.
Gulab Jamun
Now is the time to make Jamuns, take a small portion of the dough, about half the size of amla (Indian gooseberry). Flatten it slightly place a small quantity of fig mawa in the middle and roll it into a smooth ball.

Heat the Ghee and oil in a kadai for deep frying. Gently drop the jamuns and fry on medium heat until it turns brown. Since the sweet potatoes are purple colored, a rich reddish brown color is what we will see. Now drain them and place them on a paper towel-lined plate or container to cool.

Since these jamuns are delicate darlings, adding them to the sugar syrup immediately will break the jamuns easily. Let them rest for 5 minutes before you transfer them to the sugar syrup to soak for half to 1-hour maximum. Serve them at room temperature or chilled with some chopped pistachios as garnishing.

Notes and Tips:
- Evaporated milk gives the necessary sweetness and moisture to mash the potatoes well. You can substitute it with cream/milk as required along with 2 tablespoons of powdered or confectioner sugar.
- Ghee adds more flavor and richness to any Indian dessert, to deep fry I have modified the ratio of ghee and oil to 1:2 to incorporate the ghee flavor and aroma.
- If you want to eliminate the mawa/ khoya procedure, you may buy the mawa at any Indian store and add the pureed fig and required confectioners sugar and mix well.
- Always fry the jamuns in medium to low heat only. Do not stir the jamuns as soon as you drop them in the oil/ghee for deep frying. Allow the other layer to get crisp before turning them to avoid breaking.
- Good for 1 week when refrigerated.

-------------------------------------------------------------------------------------------------
Cold stone Banana Caramel Crunch is the flavor I can never give up. Just came up with a shortcut to enjoy any day at home. Skipped the caramel as we are enjoying it with Dulce de leche Molten Cakes.
Ingredients:
- Vanilla ice cream - 6 scoops (Cold Stone - optional)
- Banana - 1/2
- Granola or Toasted Almonds- 2 tablespoons (my choice - Granola)

Directions:
Chill a marble slab in the freezer for about 20 minutes. Use two large spoons to fold in the ice cream and the mix-ins on the chilled marble slab. Scoop to serve immediately along with the Dulce de leche Molten cake.
Notes and Tips:
If you choose to have just the ice cream, add a swirl of dulce de leche or caramel to the prepared ice cream as an extra topping.
Notes and Tips:
If you choose to have just the ice cream, add a swirl of dulce de leche or caramel to the prepared ice cream as an extra topping.
 |
| Always remember good things are coming to you. Just keep going! |
----------------------------------------------------
Chum Chum/ Chom Chom (Semi-homemade version included)
Stuffed and spongy like a teddy is not huggable but enjoyable with its sweet and soft texture. The most popular and all-time favorite Bengali milk sweet is similar to Rasgulla. It is stuffed with saffron-flavored Mawa/Khoya made from scratch. Comes in a variety of colors (pink, yellow, white) and is all the favorite milk sweet in our family.
To make Mawa using Ricotta cheese and evaporated milk please check Sweet Potato Gulab Jamun with Fig Mawa. If you are looking for more Indian dessert recipes for this Diwali, you might want to check out my Peda - 3 variations, Badhusha and Wheat Nutty Rawa Laddu.
Like "make your own teddy" here is a Semi-home and no-cooking version of Chum Chums especially for bachelors and working moms. Buy canned chum chum or rasgulla. Drain and squeeze out the excess sugar syrup. Slit with a knife and stuff with store-bought mawa (mix confectioners sugar and saffron strands soaked in warm milk for added flavor). Top it with chopped nuts and desiccated coconut flakes. Vola! You made it in less than 10 minutes. Pat your back and enjoy with your family!

Prep Time: 15 minutes
Cooking time: 45 minutes
Cuisine - Indian (Bengali)
Category: Sweets/ Dessert
| Nutrition Facts | |
|---|---|
| Servings 12.0 | |
| Amount Per Serving | |
| calories 157 | |
| % Daily Value * | |
| Total Fat 4 g | 6 % |
| Saturated Fat 2 g | 12 % |
| Monounsaturated Fat 0g | |
| Polyunsaturated Fat 0 g | |
| Trans Fat 0 g | |
| Cholesterol 10mg | 3 % |
| Sodium 99 mg | 4 % |
| Potassium 0 mg | 0 % |
| Total Carbohydrate 30g | 10 % |
| Dietary Fiber 0 g | 1 % |
| Sugars 29 g | |
| Protein 3 g | 6 % |
| Vitamin A | 4 % |
| Vitamin C | 2 % |
| Calcium | 10 % |
| Iron | 0 % |
| * The Percent Daily Values are based on a 2,000 calorie diet, so your values may change depending on your calorie needs. The values here may not be 100% accurate because the recipes have not been professionally evaluated nor have they been evaluated by the U.S. FDA. | |
Ingredients:
1. Organic Whole Milk - 4 cups/ 1 quart/ 1 liter
2. Rice Vinegar or Lemon Juice - 3 tablespoons
3. Granulated Sugar - 1.5 cups
4. Water - 3 cups
5. Desiccated Coconut - 3 tablespoons
6. Food color - Pink or Yellow (optional) I liked the natural white and skipped coloring.
7. Ice cubes or cold water (for cooling the chena/ paneer)

Stuffing:
1. Mawa/ Khoya - 1/4 cup (crumbled/ grated)
Check Sweet Potato Gulab Jamun with Fig Mawa for homemade fig mawa using Ricotta cheese.
Check Sweet Potato Gulab Jamun with Fig Mawa for homemade fig mawa using Ricotta cheese.
2. Saffron strands - few approximately 4-5 strands
3. Milk - 1/2 Teaspoon
4. Confectioners sugar - 1 teaspoon or as required (optional)
5. Cardamom powder - 1/8 teaspoon
6. Pistachio (chopped) - 3 tablespoons
Directions:
Boil whole milk in a heavy-bottomed pan. Turn off the flame once it comes to a boil.

Let cool for 5 minutes and the vinegar or lemon juice for milk to curdle.

Once curdled, add ice cubes or cold water to stop the cooking process. This keeps the fresh chena/ paneer soft and the lemon juice/ vinegar is washed away as well.

Using a strainer, drain all the whey (water) to collect the panner/ chena in a muslin cloth or any thin cloth to remove excess moisture. Gently twist the cloth to squeeze out the remaining whey.

I used a clip and tied it to my microwave handle for about 30 minutes. Don't forget to keep a bowl underneath to collect the drippings.

Untie to see crumbled paneer / chena.

Mash and knead the panner to form dough-like. Stop kneading when you feel the fat releasing and your palms get greasy.

Now you may add the food color of your choice and mix well if you desire. Divide into 12 equal parts and shape them into thick oval patties as shown in the picture.

Remember the size will double as it cooks in the sugar syrup.

In a deep pan, boil the 3 cups of water add sugar to it, and stir to dissolve completely to make the sugar syrup.


Once cooked, drain them and let them cool completely to prevent the chum chums from breaking. Gently press to remove excess syrup. Using a knife make a slit horizontally (with one end still connected) to stuff with Mawa.

To make the stuffing, add the saffron strands to the 1/2 teaspoon warm milk and let sit for a few mins to release the saffron color. Add this to Mawa/Khoya along with cardamom powder. I did not add Sugar as my homemade mawa (made with Ricotta cheese and evaporated milk) was sweet enough.

Take about 1/2 teaspoon of mawa stuffing and stuff the chum chum. Now repeat the same with the remaining chum chums. Top the stuffing with a generous amount of chopped pistachios and roll the chum chums in a bed of desiccated coconut for a finished look.

Malai/ Rabri Chum Chum
An instant version of sweet and creamy Rabri Chum Chum great for unexpected guests or last-minute dessert ideas. Preparation time is 5 minutes or less. Also, an excellent party dessert that can be made ahead of time.
Ingredients:
Condensed Milk - 1/2 can (7 oz)
Organic Whole Milk - 1 cup
Pistachios -1 tablespoon (chopped)
Slivered Almonds - 1 tablespoon
Saffron strands - a few
Cardamom powder - 1/8 teaspoon
Directions:
In a saucepan pour the milk and bring it to a boil. To this add the condensed milk and stir well.
Now add the rest of the ingredients and turn off the heat.
In a bowl arrange unstuffed chum chums and pour in the Rabri/malai to it. Ready to be served.
Indulge life is sweet and delicious! Happy Diwali!
An instant version of sweet and creamy Rabri Chum Chum great for unexpected guests or last-minute dessert ideas. Preparation time is 5 minutes or less. Also, an excellent party dessert that can be made ahead of time.
Ingredients:
Condensed Milk - 1/2 can (7 oz)
Organic Whole Milk - 1 cup
Pistachios -1 tablespoon (chopped)
Slivered Almonds - 1 tablespoon
Saffron strands - a few
Cardamom powder - 1/8 teaspoon
Directions:
In a saucepan pour the milk and bring it to a boil. To this add the condensed milk and stir well.
Now add the rest of the ingredients and turn off the heat.
In a bowl arrange unstuffed chum chums and pour in the Rabri/malai to it. Ready to be served.

Indulge life is sweet and delicious! Happy Diwali!
Notes and Tips:
1. When the milk curdles, immediately add the ice cubes to the chena/ paneer in order to stop cooking. this step helps retain the soft texture of chena.
2. Keep the chum chums covered while cooking.
3. Always cool the chum chums completely before slitting to avoid breaking.

-------------------------------------------------------------------------------------------
Sweet Potato Gulab Jamun with Fig Mawa
Purple Sweet Potato gives a slight mutation from the authentic Gulab Jamun. Layers of rich, unexpected flavors and color make this delicacy a succulent Indian treat that melts in your mouth. It is a wondrous way to sneak in some goodies, especially on special occasions.

A perfect festive delight to feed your loved ones or for give aways to your near and dear on this Diwali. Gulab Jamuns are usually made with Mawa or khoya which is nothing but evaporated milk solids. Mashed purple sweet potato is the main ingredient in this recipe. These sweet potato darlings are stuffed with homemade fig mawa/ khoya made with Ricotta cheese and Fig to add more flavor and irresistible.

Preparation time: 20 mins
Cooking time: 20 minutes
Soaking time: 1/2 to 1 hour
Yields: 30-35 jamuns
You might be interested in checking out my
Ingredients:
Sweet potatoes - 2 medium (purple - optional)
Evaporated milk - 1 tablespoon (check notes)
Maida/All-purpose flour - 2 tablespoons
Salt - 1 pinch
Oil or Ghee for deep frying ( check notes)
Pistachios (chopped) - for garnishing
Sugar Syrup:
Water - 2 cups
Sugar - 2 cups
Rose essence or Rose milk syrup - 1/4 teaspoon (optional)
Cardamom powder - 1/8 teaspoon
Fig Mawa / Khoya:
Fig / Athipazham/ Anjeer - 2 nos (peeled and mashed)
Ricotta cheese - 1/2 small tub (4 oz)
Evaporated milk or sugar -2 tablespoons

| Nutrition Facts | |
|---|---|
| Servings 30.0 | |
| Amount Per Serving | |
| calories 98 | |
| % Daily Value * | |
| Total Fat 4 g | 7 % |
| Saturated Fat 1 g | 6 % |
| Monounsaturated Fat 1g | |
| Polyunsaturated Fat 2 g | |
| Trans Fat 0 g | |
| Cholesterol 2 mg | 1 % |
| Sodium 13 mg | 1 % |
| Potassium 41 mg | 1 % |
| Total Carbohydrate 15g | 5 % |
| Dietary Fiber 0 g | 1 % |
| Sugars 14 g | |
| Protein 1 g | 1 % |
| Vitamin A | 26 % |
| Vitamin C | 1 % |
| Calcium | 1 % |
| Iron | 0 % |
| * The Percent Daily Values are based on a 2,000 calorie diet, so your values may change depending on your calorie needs. The values here may not be 100% accurate because the recipes have not been professionally evaluated nor have they been evaluated by the U.S. FDA. | |
Directions:
Cut the sweet potatoes into large chunks and steam them in a pressure cooker or a steamer for 10 minutes.

Cool and peel to mash with potato masher or puree it in a blender to make it fast. You may add approximately a tablespoon of water or as required to blend it. To this add the evaporated milk, all purpose flour, salt and knead to a soft smooth dough for about 5 minutes.
For the Fig Mawa/khoya, in a large pan add the ricotta cheese and stir well on medium heat. It will turn into soup consistency and then start to evaporate the water to transform into milk solids. This will take approximately 15 minutes. Now add the evaporated milk or sugar and the mashed fig. You may remove the fig seeds by running through a sieve. But I prefer to leave the seeds in. Stir until it solidifies.

Sugar Syrup
In a large saucepan, add the water, sugar, and bring it to a boil, and simmer for a few more minutes until it thickens to a syrup consistency. Now add the rose essence, or rose milk syrup and cardamom powder. Turn off the heat and set aside.
Gulab Jamun
Now is the time to make Jamuns, take a small portion of the dough, about half the size of amla (Indian gooseberry). Flatten it slightly place a small quantity of fig mawa in the middle and roll it into a smooth ball.

Heat the Ghee and oil in a kadai for deep frying. Gently drop the jamuns and fry on medium heat until it turns brown. Since the sweet potatoes are purple colored, a rich reddish brown color is what we will see. Now drain them and place them on a paper towel-lined plate or container to cool.

Since these jamuns are delicate darlings, adding them to the sugar syrup immediately will break the jamuns easily. Let them rest for 5 minutes before you transfer them to the sugar syrup to soak for half to 1-hour maximum. Serve them at room temperature or chilled with some chopped pistachios as garnishing.

Notes and Tips:
- Evaporated milk gives the necessary sweetness and moisture to mash the potatoes well. You can substitute it with cream/milk as required along with 2 tablespoons of powdered or confectioner sugar.
- Ghee adds more flavor and richness to any Indian dessert, to deep fry I have modified the ratio of ghee and oil to 1:2 to incorporate the ghee flavor and aroma.
- If you want to eliminate the mawa/ khoya procedure, you may buy the mawa at any Indian store and add the pureed fig and required confectioners sugar and mix well.
- Always fry the jamuns in medium to low heat only. Do not stir the jamuns as soon as you drop them in the oil/ghee for deep frying. Allow the other layer to get crisp before turning them to avoid breaking.
- Good for 1 week when refrigerated.

Thattuvadai set and Norukal
A unique savory snack similar to chaat is a popular street food that was commenced in Salem (Southern India). Although the spices vary from regular chaat, the green and red chutney is used to kick in your spice buds.

Thattuvadai basically is a sandwich of Thattai/ Thattu murrukku/ Chekkalu/ Nippattu with a salad of grated veggies and spicy chutneys. Along with Thattuvadai Set I also prepared Norukal. Norukal is similar to Bhel puri. It is a mixture of crumbled Thattai and grated veggies that is topped with a generous amount of thin sev to make it flavorful and crunchy.

My in-laws from Salem introduced me and made sure I relished my favorite snack on all my visits. They never failed to pack us with homemade Kai Murruku and Thattai as well, which I get to share with all my friends here. Feeling blessed!
If Thattai is not readily available or if you opt not to prepare them on your own, try substituting with Papdi (fried flour crisps) that are used for papdi chaat. Despite being a popular snack in Salem it is now growing much in Chennai as well. Do not miss this snack as I am sure kids will enjoy it as well (request for mild spice). A great way to have the kids intake veggies. Enjoy munching these crip sandwiches!
 Preparation Time: 10 mins
Cooking time: 5 minutes
Cuisine: Indian
Category: Snacks
Yields: 4
Preparation Time: 10 mins
Cooking time: 5 minutes
Cuisine: Indian
Category: Snacks
Yields: 4
Ingredients:
- Thattai / Milagu Thattai or Papdi (fried flour crispies) - 8 pieces + 4 pieces for Norukal
- Thin Sev - 1/2 cup (only for Norukal)
Filling:
- Beetroot (grated) - 1/2 cup
- Carrot (grated) - 1/2 cup
- Raw Mango (grated) - 1/2 cup
- Red onion (finely chopped) - 1/2 cup
- Coriander leaves (finely chopped) - 1/4 cup
- Lime juice - few drops
Green Chutney:
- Mint leaves - 1 cup
- Coriander leaves - 1/2 cup
- Green chillies - 2-3
- Lime juice - few drops
- Salt to taste
- Water as required
Red Chutney:
- Cooking oil - 2 teaspoons
- Tomato- 2 nos
- Red onion - 1/4 (small)
- Chilly powder - 1/2 teaspoon
- Garlic - 2 cloves (optional)
- Salt to taste
- Water as required
Nutrition Facts Servings 4.0 Amount Per Serving calories 438 % Daily Value * Total Fat 18 g 28 % Saturated Fat 1 g 3 % Monounsaturated Fat 1g Polyunsaturated Fat 1 g Trans Fat 0 g Cholesterol 0 mg 0 % Sodium 375 mg 16 % Potassium 503mg 14 % Total Carbohydrate 52g 17 % Dietary Fiber 4 g 15 % Sugars 8 g Protein 8 g 15 % Vitamin A 56 % Vitamin C 58 % Calcium 3 % Iron 3 % * The Percent Daily Values are based on a 2,000 calorie diet, so your values may change depending on your calorie needs. The values here may not be 100% accurate because the recipes have not been professionally evaluated nor have they been evaluated by the U.S. FDA.

Directions for Thattuvadai Set and Norukal:
- For Red chutney, saute the chopped onion, garlic, tomato, chilly powder in oil for about 4-5 mins. Once cooled, grind it with required salt and water to a fine paste.
- For Green chutney, grind all the ingredients (raw) as specified under "Green chutney" to a fine paste.
- To prepare the filling, in a large bowl mix all the ingredients listed. Sprinkle the lime juice right before you serve, else it can get the veggies soggy.
- To serve, take two thattuvadai's for each set. Apply the red chutney on one and green on the other. Now is the time to sandwich both with a generous quantity of filling to serve immediately!
- For Norukal, crumble approximately 3-4 Thattaies and mix it with rest of the filling ingredients. Drizzle few drops of lime juice, red and green chutneys and sprinkle some thin sev and serve it immediately.

Notes and Tips:
- Adding lime juice to the raw veggies give a sharp zesty flavor. A few drops goes a long way.
- Add the lime juice right before its time to serve to avoid it getting soggy.
- Extra spicy chutneys give the extra kick that you will enjoy!

A unique savory snack similar to chaat is a popular street food that was commenced in Salem (Southern India). Although the spices vary from regular chaat, the green and red chutney is used to kick in your spice buds.

Thattuvadai basically is a sandwich of Thattai/ Thattu murrukku/ Chekkalu/ Nippattu with a salad of grated veggies and spicy chutneys. Along with Thattuvadai Set I also prepared Norukal. Norukal is similar to Bhel puri. It is a mixture of crumbled Thattai and grated veggies that is topped with a generous amount of thin sev to make it flavorful and crunchy.

My in-laws from Salem introduced me and made sure I relished my favorite snack on all my visits. They never failed to pack us with homemade Kai Murruku and Thattai as well, which I get to share with all my friends here. Feeling blessed!
If Thattai is not readily available or if you opt not to prepare them on your own, try substituting with Papdi (fried flour crisps) that are used for papdi chaat. Despite being a popular snack in Salem it is now growing much in Chennai as well. Do not miss this snack as I am sure kids will enjoy it as well (request for mild spice). A great way to have the kids intake veggies. Enjoy munching these crip sandwiches!

Preparation Time: 10 mins
Cooking time: 5 minutes
Cuisine: Indian
Category: Snacks
Yields: 4
Ingredients:
- Thattai / Milagu Thattai or Papdi (fried flour crispies) - 8 pieces + 4 pieces for Norukal
- Thin Sev - 1/2 cup (only for Norukal)
Filling:
- Beetroot (grated) - 1/2 cup
- Carrot (grated) - 1/2 cup
- Raw Mango (grated) - 1/2 cup
- Red onion (finely chopped) - 1/2 cup
- Coriander leaves (finely chopped) - 1/4 cup
- Lime juice - few drops
Green Chutney:
- Mint leaves - 1 cup
- Coriander leaves - 1/2 cup
- Green chillies - 2-3
- Lime juice - few drops
- Salt to taste
- Water as required
Red Chutney:
- Cooking oil - 2 teaspoons
- Tomato- 2 nos
- Red onion - 1/4 (small)
- Chilly powder - 1/2 teaspoon
- Garlic - 2 cloves (optional)
- Salt to taste
- Water as required
| Nutrition Facts | |
|---|---|
| Servings 4.0 | |
| Amount Per Serving | |
| calories 438 | |
| % Daily Value * | |
| Total Fat 18 g | 28 % |
| Saturated Fat 1 g | 3 % |
| Monounsaturated Fat 1g | |
| Polyunsaturated Fat 1 g | |
| Trans Fat 0 g | |
| Cholesterol 0 mg | 0 % |
| Sodium 375 mg | 16 % |
| Potassium 503mg | 14 % |
| Total Carbohydrate 52g | 17 % |
| Dietary Fiber 4 g | 15 % |
| Sugars 8 g | |
| Protein 8 g | 15 % |
| Vitamin A | 56 % |
| Vitamin C | 58 % |
| Calcium | 3 % |
| Iron | 3 % |
| * The Percent Daily Values are based on a 2,000 calorie diet, so your values may change depending on your calorie needs. The values here may not be 100% accurate because the recipes have not been professionally evaluated nor have they been evaluated by the U.S. FDA. | |

Directions for Thattuvadai Set and Norukal:
- For Red chutney, saute the chopped onion, garlic, tomato, chilly powder in oil for about 4-5 mins. Once cooled, grind it with required salt and water to a fine paste.
- For Green chutney, grind all the ingredients (raw) as specified under "Green chutney" to a fine paste.
- To prepare the filling, in a large bowl mix all the ingredients listed. Sprinkle the lime juice right before you serve, else it can get the veggies soggy.
- To serve, take two thattuvadai's for each set. Apply the red chutney on one and green on the other. Now is the time to sandwich both with a generous quantity of filling to serve immediately!
- For Norukal, crumble approximately 3-4 Thattaies and mix it with rest of the filling ingredients. Drizzle few drops of lime juice, red and green chutneys and sprinkle some thin sev and serve it immediately.

Notes and Tips:
- Adding lime juice to the raw veggies give a sharp zesty flavor. A few drops goes a long way.
- Add the lime juice right before its time to serve to avoid it getting soggy.
- Extra spicy chutneys give the extra kick that you will enjoy!

--------------------------------------------------------------Blueberry Infused Fizz
Are you in the mood for a nipping and bubbly refreshment? Naturally flavorful and delicious Blueberry Infused Fizz is a wonderful departure from mundane juice blends to a fizzy concoction of goodness that will cool you off.

You can enjoy this lip-smacking bevy blends of two flavors that dances across your tongue. Freshly Squeezed Apple or Celery along with infused blueberry and ginger will knock your sock off. "Snapple" (Soda-Apple) is sweet and slightly sharp due to the infused ginger and berry. "Celda"(Celery-Soda) Blueberry Infused Fizz has a sharp, spicy and peppery taste yet a bit of sweetness from rock candy/sugar (crystalized cane sugar) is fascinating. You may pick your choice of flavor according to your taste buds. Both versions are exquisitely refreshing and a fantastic recipe for kids and teetotalers. You will need at least 12-24 hours for this comfort drink to infuse at its best. As I enjoy berry bits in my drink, some blueberries are punctured or gently crushed and incorporated into this thirst quencher.
 For garnishing I skewered few berries and rested them on top of the cocktail glass. This beverage can be prepared in advance and kept chilled. Whether you are brunching, picnicking or be it any occasion that needs a special drink; this perfect blend of flavors will compliment the natural goodness that is made from earth's best stuffs (organic produce).
 Preparation time: 10 minutes
Chill: 6 - 24 hours
Type: Beverages/ Drinks
Yields: 4 servings
 Ingredients:
Apple or Celery Juice (freshly squeezed) - 2 cups
Blueberries - 1/2 cup
Ginger - 1 inch (peeled and cut into fourths)
Ginger ale / Club soda - 1 can (small)
Palm rock sugar/candy (panam kalkandu) - as required
Chia seeds - 1 teaspoon (optional)
Ice cubes (optional)
 Directions:
1. Wash the apples or celery well and freshly squeeze the juices out.
2. In an infuser or a mason jar, add the cut ginger, slightly crushed or punctured blueberries, chia seeds and about 1-2 teaspoons of rock sugar/candy.
3. Close the jar and refrigerate it for 12-24 hours to infuse. You will note the change of color.
4. Add ice cubes if you desire and top off with ginger ale or club soda.
5. Garnished with blueberries, mint or lemon wedges and serve immediately.

Notes and Tips:
- Apples must be cored before adding them to the juice maker.
- If you have difficulty finding rock candy/sugar the best substitute will be a natural sweetener like raw honey. Avoid processed sugar.
- The ginger can be cut into fourths or just give it a whack in order to it release its flavors easily.
- For more twists you can add mint leaves or lemon wedges just 2 hours before serving.
- For parties or any large gatherings, simply buy store bought organic apple juice to make work easy.

Slowly but surely I reached my 50th post:) Wish me luck! Cheers!!
----------------------------------------------------------------------------------------
Sweet and Spicy Kozhukatai/ Modak
Happy Ganesh Chaturthi to all readers celebrating!
Kozhukattai/ Modak is an easy sweet/ savory dish that is prepared mainly on Ganesh Chaturthi.

Being a Labor day long weekend, we Indians residing in America gets to celebrate this special occasion in an elaborate manner. Lord Ganesha is born in our home this year. An incredible activity to involve kids to enjoy as we create an eco-friendly (edible) idol to celebrate Lord Ganesh's Birthday. We made the idol using rice flour (dough) and decorated with pulses and lentils. Be wary, as it dries it doesn't withstand for long. Lesson learnt to use clay on our next to preserve the idol to a certain extent.

Kozhukattai/ Modak being Lord Ganesha's favorite is offered as prashad on his day. I have 3 different delicious versions that are easy to make with assorted shapes here. The coconut stuffing and the spicy kozhukattai is inherited from my grandmother who passed it to my mom and now to me. I came up with the sesame and nuts stuffing.

The authentic elaborate method to make kozhukattai is quite time consuming. The soaked rice is ground like idly batter and then cooked in a pan for close to 10 mins. To prevent lumps continuous stirring is required until right consistency - soft and smooth dough. But for the past few years I picked up the easy version of using idiyappam flour, which even bachelors can enjoy making these effortless kozhukattais. Trust me you can never go wrong with this method of preparation. Enjoy shaping and hogging!

Preparation: 10 mins
Cook time: 10 mins
Cuisine: Indian
Yields: 20-25 nos
Ingredients:
Outer layer:
Rice flour (Idiyappam flour) 1- cup
Oil - for greasing and seasoning
Salt - generous pinch
Warm water - 1 cup (approximately)
Stuffing or Pooranam:
Sesame and Nut poornam:
Sesame seeds (white) - 2 teaspoons
Nuts (almonds, cashew-nuts, walnuts) - 1/2 cup
Brown cane sugar/ Karumbu Sarkarai (powdered) - 4 teaspoons
Cardamom powder - 1 pinch
Coconut poornam:
Coconut (grated) - 4 teaspoons
Sugar - 2 teaspoons
Cardamom powder - 2 pinches
Spicy Kozhukattai:
Oil - for seasoning
Mustand - 1/4 teaspoons
Urad dal - 1/4 teaspoons
Channa dal - 1/4 teaspoons
Asafoetida - 1 pinch
Salt to taste
Green chillies (finely chopped) - 2-3 nos
Coriander leaves (finely chopped) - few
Curry leaves (finely chopped)- Few

Directions:
Sesame and Nut poornam:
Dry roast the nuts and the sesame seeds until aromatic. Grind to a fine powder. To this add the brown cane sugar powder and cardamom powder, mix well and set aside to use as stuffing.
Coconut poornam:
Mix all the 3 ingredients together and set aside. You may fry the grated coconut in ghee if you prefer.

Outer layer:
1. In a large bowl add the rice flour and salt. Slowly pour in warm water little by little to the flour and knead the dough until you get a soft and smooth dough. For the right consistency you should be able to make a ball with no cracks. (check tips #2)
2. Grease your palms and divide the dough into small balls. I also divided them for all three versions.
3. Use a ziplock or banana leaf (greased with oil) as a base to make the desired shapes effortlessly.
4. Flatten the ball into round shape using greased finger tips and in the center add about 1/2 teaspoon of your desired poornam and make any shape you like. Make sure the seams are closed well and no cracks are visible.
5. Place them in a greased idly pan or a bamboo steamer and steam for 10 minutes. (Check Tips #1)

For the spicy version:
1. Heat about 1 teaspoon of oil and add the mustard seeds, urad dal, channa dal and allow it to splutter. now add the green chillies, asafetida, salt, curry leaves and remove from heat.
2. Now add the coriander leaves and tennis ball sized dough (for approximately10 spicy kozhukattai). Mix well.
3. I usually place a small ball of dough (gooseberry size) in between my 4 fingers and palm. By giving it a gentle press/squeeze to get the spicy kozhukattai shape.
4. Steam as stated above for 10 minutes.

Notes and Tips:
1. Make sure the steamer basket/ idly pan has at least 2 inches of boiling water and also check if the water is below the idly plate or steamer.
2. There is a quick fix if the dough seem to get dried, or if it breaks or cracks while shaping. Sprinkle some warm water to the dough and knead again until a soft and smooth dough is formed. Vola! Also keep the dough closed while preparing the kozhukattai.
--------------------------------------------------------------------------------------------------
Chocolate Raspberry Tofu Tart
Chocolates and Raspberries are match made in heaven. This red-berry is sinfully delicious and elegantly presented dessert will melt in your mouth. Silken tofu is an excellent guiltless alternative to the heavy cream used in making the classic filling. Smooth, creamy and rich texture is truly divine with its enticing taste.
 A tart is a sweet or savory dish with only a bottom crust. Usually a pastry dough is used to get a firm and crumbly crust. I have replaced the meticulous traditional way of making the base with flavorful Belvita made with ease. Be well assured this souped up version is simple as using Graham crackers with no compromise with its rich flavor. Indeed, it tastes way better with its cinnamon and brown sugar flavor.

The raspberry and chocolate overpowers with its flavor leaving tofu as a secret ingredient. Nevertheless, the silky texture is obtained from the tofu itself. The Belvita crust along with the silky chocolaty raspberry and the sauce goes very well together that tastes heavenly.
Decorate this decadent dessert with chocolate, raspberries, nectarous pecans and edible flowers or as you like. Enjoy!
 Preparation: 20 minutes
Baking time: 10 minutes (optional)
Total time: 2 hours and 30 minutes
Level: Medium
Category: Dessert
Yields: 9 inch pie pan
Preparation: 20 minutes
Baking time: 10 minutes (optional)
Total time: 2 hours and 30 minutes
Level: Medium
Category: Dessert
Yields: 9 inch pie pan
You might also be interested in my 'Belvita Blueberry Pie', a similar dessert.

Nutrition Facts Servings 8.0 Amount Per Serving calories 180 % Daily Value * Total Fat 9 g 14 % Saturated Fat 4 g 19 % Monounsaturated Fat 2g Polyunsaturated Fat 1 g Trans Fat 0 g Cholesterol 8 mg 3 % Sodium 80 mg 3 % Potassium 99 mg 3 % Total Carbohydrate 22g 7 % Dietary Fiber 3 g 12 % Sugars 9 g Protein 4 g 7 % Vitamin A 2 % Vitamin C 10 % Calcium 5 % Iron 7 % * The Percent Daily Values are based on a 2,000 calorie diet, so your values may change depending on your calorie needs. The values here may not be 100% accurate because the recipes have not been professionally evaluated nor have they been evaluated by the U.S. FDA.
Ingredients:
Crust: (baking can be eliminated)
BelVita (cinnamon brown sugar flavor) - 2 packs (8 biscuits)
Butter - 2 tablespoon (melted)
Sauce:
Raspberries (pureed and deseeded) - 1/2 cup (see notes)
Confectioners sugar - 1 teaspoon
Water - 1 tablespoon
Filling:
Silken tofu - 1 (12.3 ounce) (check notes)
Semi-sweet chocolate chips- 1/2 cup
Raspberries (fresh) - 1 cup + 1/2 cup (for sauce)
Vanilla extract - 2 teaspoon
Confectioners sugar - 1-2 teaspoons
Honey - 1 tablespoon

Directions:
Preheat oven to 325 degrees F (165 degrees C), although baking can be eliminated. Please check note for details.
Crust
1. Crumble the biscuits in a blender until fine crumbs.
2. Coat the pie pan with cooking spray or melted butter on the bottom and sides to remove the crust easily after baking.
3. Mix the crumbs with the melted butter. To check for the right consistency, you should be able to make a rough ball when compressed.
4. Now spread the crust mixture evenly flattening on the bottom and up the sides of the pie pan. Press firmly using the bottom of a flat glass and set aside.

Filling
1. Puree all the raspberries in a blender and run it through a sieve to remove the seeds. Use 1 cup for the filling and save 1/2 cup pureed raspberries for the sauce.
2. Process the tofu in the same blender until smooth.
3. Microwave the chocolate chips in a microwave safe bowl for about a minute. Stir well and add to the tofu.
4. Add honey, vanilla essence and 1 cup of pureed raspberries and blend everything together until a smooth mixture.
5. Now, pour the filling in the prepared crust pan and refrigerate for 2-3 hours minimum to set.
6. Disposable pie pan works like a gem to transfer the tart from the pan easily. Run a clean knife along the edges to separate the tart from the pan. Make a small cut on the edge to peel the pan off to retain the shape.
Sauce
Add all the sauce ingredients (1/2 cup pureed raspberries, sugar and water) in a sauce pan and bring it to a boil. Simmer for few extra minutes to get the right consistency. Once done turn the heat off and set aside. The topping gets thicker like a syrup consistency as it cools down.
Serve with warm sauce and decorate with fresh berries, chocolate, or honeyed/ caramelized nuts.

Notes and Tips:
- Shelf-stable firm Silken Tofu package seems to work better than regular refrigerated tofu given the texture.
- Please check Belvita Blueberry Pie "Notes and Tips" to wash and store fresh berries.
- Only the crust is baked for the crunchy crust to set well to prevent crumbs. You may eliminate this baking step, but be careful while removing the tart from the pan to avoid too much crumbs.
Thanks for stopping by! Please leave a comment with your suggestions if any. Your support will be appreciated :)

Morning Glory Detox
Begin your day with a glass of extremely potent, refreshingly tasty and rejuvenating mocktail.

--------------------------------------------------------------
Blueberry Infused Fizz
Are you in the mood for a nipping and bubbly refreshment? Naturally flavorful and delicious Blueberry Infused Fizz is a wonderful departure from mundane juice blends to a fizzy concoction of goodness that will cool you off.

You can enjoy this lip-smacking bevy blends of two flavors that dances across your tongue. Freshly Squeezed Apple or Celery along with infused blueberry and ginger will knock your sock off. "Snapple" (Soda-Apple) is sweet and slightly sharp due to the infused ginger and berry. "Celda"(Celery-Soda) Blueberry Infused Fizz has a sharp, spicy and peppery taste yet a bit of sweetness from rock candy/sugar (crystalized cane sugar) is fascinating. You may pick your choice of flavor according to your taste buds. Both versions are exquisitely refreshing and a fantastic recipe for kids and teetotalers. You will need at least 12-24 hours for this comfort drink to infuse at its best. As I enjoy berry bits in my drink, some blueberries are punctured or gently crushed and incorporated into this thirst quencher.


Chill: 6 - 24 hours
Type: Beverages/ Drinks
Yields: 4 servings

Apple or Celery Juice (freshly squeezed) - 2 cups
Blueberries - 1/2 cup
Ginger - 1 inch (peeled and cut into fourths)
Ginger ale / Club soda - 1 can (small)
Palm rock sugar/candy (panam kalkandu) - as required
Chia seeds - 1 teaspoon (optional)
Ice cubes (optional)

1. Wash the apples or celery well and freshly squeeze the juices out.
2. In an infuser or a mason jar, add the cut ginger, slightly crushed or punctured blueberries, chia seeds and about 1-2 teaspoons of rock sugar/candy.
3. Close the jar and refrigerate it for 12-24 hours to infuse. You will note the change of color.
4. Add ice cubes if you desire and top off with ginger ale or club soda.
5. Garnished with blueberries, mint or lemon wedges and serve immediately.

- Apples must be cored before adding them to the juice maker.
- If you have difficulty finding rock candy/sugar the best substitute will be a natural sweetener like raw honey. Avoid processed sugar.
- The ginger can be cut into fourths or just give it a whack in order to it release its flavors easily.
- For more twists you can add mint leaves or lemon wedges just 2 hours before serving.
- For parties or any large gatherings, simply buy store bought organic apple juice to make work easy.

Slowly but surely I reached my 50th post:) Wish me luck! Cheers!!
----------------------------------------------------------------------------------------
Sweet and Spicy Kozhukatai/ Modak
Happy Ganesh Chaturthi to all readers celebrating!
Kozhukattai/ Modak is an easy sweet/ savory dish that is prepared mainly on Ganesh Chaturthi.
Being a Labor day long weekend, we Indians residing in America gets to celebrate this special occasion in an elaborate manner. Lord Ganesha is born in our home this year. An incredible activity to involve kids to enjoy as we create an eco-friendly (edible) idol to celebrate Lord Ganesh's Birthday. We made the idol using rice flour (dough) and decorated with pulses and lentils. Be wary, as it dries it doesn't withstand for long. Lesson learnt to use clay on our next to preserve the idol to a certain extent.
Kozhukattai/ Modak being Lord Ganesha's favorite is offered as prashad on his day. I have 3 different delicious versions that are easy to make with assorted shapes here. The coconut stuffing and the spicy kozhukattai is inherited from my grandmother who passed it to my mom and now to me. I came up with the sesame and nuts stuffing.
Kozhukattai/ Modak is an easy sweet/ savory dish that is prepared mainly on Ganesh Chaturthi.

Being a Labor day long weekend, we Indians residing in America gets to celebrate this special occasion in an elaborate manner. Lord Ganesha is born in our home this year. An incredible activity to involve kids to enjoy as we create an eco-friendly (edible) idol to celebrate Lord Ganesh's Birthday. We made the idol using rice flour (dough) and decorated with pulses and lentils. Be wary, as it dries it doesn't withstand for long. Lesson learnt to use clay on our next to preserve the idol to a certain extent.

Kozhukattai/ Modak being Lord Ganesha's favorite is offered as prashad on his day. I have 3 different delicious versions that are easy to make with assorted shapes here. The coconut stuffing and the spicy kozhukattai is inherited from my grandmother who passed it to my mom and now to me. I came up with the sesame and nuts stuffing.

The authentic elaborate method to make kozhukattai is quite time consuming. The soaked rice is ground like idly batter and then cooked in a pan for close to 10 mins. To prevent lumps continuous stirring is required until right consistency - soft and smooth dough. But for the past few years I picked up the easy version of using idiyappam flour, which even bachelors can enjoy making these effortless kozhukattais. Trust me you can never go wrong with this method of preparation. Enjoy shaping and hogging!

Preparation: 10 mins
Cook time: 10 mins
Cuisine: Indian
Yields: 20-25 nos
Ingredients:
Outer layer:
Rice flour (Idiyappam flour) 1- cup
Oil - for greasing and seasoning
Salt - generous pinch
Warm water - 1 cup (approximately)
Stuffing or Pooranam:
Sesame and Nut poornam:
Sesame seeds (white) - 2 teaspoons
Nuts (almonds, cashew-nuts, walnuts) - 1/2 cup
Brown cane sugar/ Karumbu Sarkarai (powdered) - 4 teaspoons
Cardamom powder - 1 pinch
Coconut poornam:
Coconut (grated) - 4 teaspoons
Sugar - 2 teaspoons
Cardamom powder - 2 pinches
Spicy Kozhukattai:
Oil - for seasoning
Mustand - 1/4 teaspoons
Urad dal - 1/4 teaspoons
Channa dal - 1/4 teaspoons
Asafoetida - 1 pinch
Salt to taste
Green chillies (finely chopped) - 2-3 nos
Coriander leaves (finely chopped) - few
Curry leaves (finely chopped)- Few

Directions:
Sesame and Nut poornam:
Dry roast the nuts and the sesame seeds until aromatic. Grind to a fine powder. To this add the brown cane sugar powder and cardamom powder, mix well and set aside to use as stuffing.
Coconut poornam:
Mix all the 3 ingredients together and set aside. You may fry the grated coconut in ghee if you prefer.

Outer layer:
1. In a large bowl add the rice flour and salt. Slowly pour in warm water little by little to the flour and knead the dough until you get a soft and smooth dough. For the right consistency you should be able to make a ball with no cracks. (check tips #2)
2. Grease your palms and divide the dough into small balls. I also divided them for all three versions.
3. Use a ziplock or banana leaf (greased with oil) as a base to make the desired shapes effortlessly.
4. Flatten the ball into round shape using greased finger tips and in the center add about 1/2 teaspoon of your desired poornam and make any shape you like. Make sure the seams are closed well and no cracks are visible.
5. Place them in a greased idly pan or a bamboo steamer and steam for 10 minutes. (Check Tips #1)

For the spicy version:
1. Heat about 1 teaspoon of oil and add the mustard seeds, urad dal, channa dal and allow it to splutter. now add the green chillies, asafetida, salt, curry leaves and remove from heat.
2. Now add the coriander leaves and tennis ball sized dough (for approximately10 spicy kozhukattai). Mix well.
3. I usually place a small ball of dough (gooseberry size) in between my 4 fingers and palm. By giving it a gentle press/squeeze to get the spicy kozhukattai shape.
4. Steam as stated above for 10 minutes.

Notes and Tips:
1. Make sure the steamer basket/ idly pan has at least 2 inches of boiling water and also check if the water is below the idly plate or steamer.
2. There is a quick fix if the dough seem to get dried, or if it breaks or cracks while shaping. Sprinkle some warm water to the dough and knead again until a soft and smooth dough is formed. Vola! Also keep the dough closed while preparing the kozhukattai.
Chocolate Raspberry Tofu Tart
Chocolates and Raspberries are match made in heaven. This red-berry is sinfully delicious and elegantly presented dessert will melt in your mouth. Silken tofu is an excellent guiltless alternative to the heavy cream used in making the classic filling. Smooth, creamy and rich texture is truly divine with its enticing taste.

A tart is a sweet or savory dish with only a bottom crust. Usually a pastry dough is used to get a firm and crumbly crust. I have replaced the meticulous traditional way of making the base with flavorful Belvita made with ease. Be well assured this souped up version is simple as using Graham crackers with no compromise with its rich flavor. Indeed, it tastes way better with its cinnamon and brown sugar flavor.

The raspberry and chocolate overpowers with its flavor leaving tofu as a secret ingredient. Nevertheless, the silky texture is obtained from the tofu itself. The Belvita crust along with the silky chocolaty raspberry and the sauce goes very well together that tastes heavenly.
Decorate this decadent dessert with chocolate, raspberries, nectarous pecans and edible flowers or as you like. Enjoy!

Preparation: 20 minutes
Baking time: 10 minutes (optional)
Total time: 2 hours and 30 minutes
Level: Medium
Category: Dessert
Yields: 9 inch pie pan
You might also be interested in my 'Belvita Blueberry Pie', a similar dessert.

| Nutrition Facts | |
|---|---|
| Servings 8.0 | |
| Amount Per Serving | |
| calories 180 | |
| % Daily Value * | |
| Total Fat 9 g | 14 % |
| Saturated Fat 4 g | 19 % |
| Monounsaturated Fat 2g | |
| Polyunsaturated Fat 1 g | |
| Trans Fat 0 g | |
| Cholesterol 8 mg | 3 % |
| Sodium 80 mg | 3 % |
| Potassium 99 mg | 3 % |
| Total Carbohydrate 22g | 7 % |
| Dietary Fiber 3 g | 12 % |
| Sugars 9 g | |
| Protein 4 g | 7 % |
| Vitamin A | 2 % |
| Vitamin C | 10 % |
| Calcium | 5 % |
| Iron | 7 % |
| * The Percent Daily Values are based on a 2,000 calorie diet, so your values may change depending on your calorie needs. The values here may not be 100% accurate because the recipes have not been professionally evaluated nor have they been evaluated by the U.S. FDA. | |
Ingredients:
Crust: (baking can be eliminated)
BelVita (cinnamon brown sugar flavor) - 2 packs (8 biscuits)
Butter - 2 tablespoon (melted)
Sauce:
Raspberries (pureed and deseeded) - 1/2 cup (see notes)
Confectioners sugar - 1 teaspoon
Water - 1 tablespoon
Water - 1 tablespoon
Filling:
Silken tofu - 1 (12.3 ounce) (check notes)
Semi-sweet chocolate chips- 1/2 cup
Raspberries (fresh) - 1 cup + 1/2 cup (for sauce)
Vanilla extract - 2 teaspoon
Raspberries (fresh) - 1 cup + 1/2 cup (for sauce)
Vanilla extract - 2 teaspoon
Confectioners sugar - 1-2 teaspoons
Honey - 1 tablespoon
Directions:
Notes and Tips:

Directions:
Preheat oven to 325 degrees F (165 degrees C), although baking can be eliminated. Please check note for details.
Crust
1. Crumble the biscuits in a blender until fine crumbs.
2. Coat the pie pan with cooking spray or melted butter on the bottom and sides to remove the crust easily after baking.
3. Mix the crumbs with the melted butter. To check for the right consistency, you should be able to make a rough ball when compressed.
4. Now spread the crust mixture evenly flattening on the bottom and up the sides of the pie pan. Press firmly using the bottom of a flat glass and set aside.

Filling
1. Puree all the raspberries in a blender and run it through a sieve to remove the seeds. Use 1 cup for the filling and save 1/2 cup pureed raspberries for the sauce.
2. Process the tofu in the same blender until smooth.
3. Microwave the chocolate chips in a microwave safe bowl for about a minute. Stir well and add to the tofu.
4. Add honey, vanilla essence and 1 cup of pureed raspberries and blend everything together until a smooth mixture.
5. Now, pour the filling in the prepared crust pan and refrigerate for 2-3 hours minimum to set.
6. Disposable pie pan works like a gem to transfer the tart from the pan easily. Run a clean knife along the edges to separate the tart from the pan. Make a small cut on the edge to peel the pan off to retain the shape.
Sauce
Add all the sauce ingredients (1/2 cup pureed raspberries, sugar and water) in a sauce pan and bring it to a boil. Simmer for few extra minutes to get the right consistency. Once done turn the heat off and set aside. The topping gets thicker like a syrup consistency as it cools down.
Serve with warm sauce and decorate with fresh berries, chocolate, or honeyed/ caramelized nuts.

Notes and Tips:
- Shelf-stable firm Silken Tofu package seems to work better than regular refrigerated tofu given the texture.
- Please check Belvita Blueberry Pie "Notes and Tips" to wash and store fresh berries.
- Only the crust is baked for the crunchy crust to set well to prevent crumbs. You may eliminate this baking step, but be careful while removing the tart from the pan to avoid too much crumbs.

Morning Glory Detox
Begin your day with a glass of extremely potent, refreshingly tasty and rejuvenating mocktail.

Whether or not cleansing is your thing, this healthy juicing recipe will aid in nourishing and gets rid of the toxins from your body. Even kids would enjoy this exotic combination and would get full benefits of its vitamins and minerals. Don't be surprised if they thank you for such a palatable and refreshing drink.
Celery being the base for this juice is little known powerhouse. It's loaded with potassium, folic acid, magnesium, calcium, iron, phosphorus and essential amino acids. It also provides dietary fiber with low calorie weight loss diets. Get full benefits of its fibers and minerals. This vitamins rich celery contains a neutral taste and does not possess any palatable appeal. The apples just do the trick with its sweeter touch to increase the celery's palatability.
Celery being the base for this juice is little known powerhouse. It's loaded with potassium, folic acid, magnesium, calcium, iron, phosphorus and essential amino acids. It also provides dietary fiber with low calorie weight loss diets. Get full benefits of its fibers and minerals. This vitamins rich celery contains a neutral taste and does not possess any palatable appeal. The apples just do the trick with its sweeter touch to increase the celery's palatability.

Apples help-regulate detoxifying enzymes and contains anti-inflammatory properties. Green apples are ideal for this drink, if unavailable, the best reds to substitute are Fuji and Gala. Granny Smiths is naturally low sugar and is great for juices.
Amla or Indian gooseberry is highly rich in Vitamin C and packed with minerals like iron and zinc. This humble fruit benefits the circulatory system, purifies blood, detoxifies the body, and strengthens the immune system. Amla can definitely keep a number of diseases at bay.
Amla or Indian gooseberry is highly rich in Vitamin C and packed with minerals like iron and zinc. This humble fruit benefits the circulatory system, purifies blood, detoxifies the body, and strengthens the immune system. Amla can definitely keep a number of diseases at bay.
Parsley can help stimulate bile production that can help with detoxification process. Its folic acid clears out the uric acid in joins to relieve from pain.
Ginger helps benefit with detoxification process, improves digestion and its rich in antioxidants.
Limes deserves to be in the limelight for its remarkable healing properties. They are great detox and known for weight loss, cold preventives, antibiotic properties, vitamins, minerals, alkalizing, anti-cancer etc.

Ingredients:
Celery - 3 stalks
Apple - 2 (Green or Gala/Fuji)
Amla/ Indian gooseberry - 3
Ginger root - 1 inch
Parsley - few
Lime juice - 2 teaspoons
Ice cubes - 4-6
Preparation : 10 minutes
Yields: 2 servings
Category - Beverages/ Drinks/ Mocktails
Level : Easy

| Nutrition Facts | |
|---|---|
| Servings 2.0 | |
| Amount Per Serving | |
| calories 79 | |
| % Daily Value * | |
| Total Fat 0 g | 1 % |
| Saturated Fat 0 g | 0 % |
| Monounsaturated Fat 0g | |
| Polyunsaturated Fat 0 g | |
| Trans Fat 0 g | |
| Cholesterol 0 mg | 0 % |
| Sodium 1 mg | 0 % |
| Potassium 157mg | 4 % |
| Total Carbohydrate 20g | 7 % |
| Dietary Fiber 2 g | 10 % |
| Sugars 13 g | |
| Protein 1 g | 1 % |
| Vitamin A | 0 % |
| Vitamin C | 17 % |
| Calcium | 17 % |
| Iron | 1 % |
| * The Percent Daily Values are based on a 2,000 calorie diet, so your values may change depending on your calorie needs. The values here may not be 100% accurate because the recipes have not been professionally evaluated nor have they been evaluated by the U.S. FDA. | |
Directions:
- Wash all produce well.
- Core the apples and cut into quarters. Deseed amlas and peel ginger root.
- Add all the ingredients in a blender and blend well.
- Serve immediately. Cheers!
Tips and Notes:
- I prefer a blender for a juicer to keep all of the nutrients and fiber of the fruits and vegetables. A great way for picky eaters especially kids to intake some naturally grown fresh produce.

Khakhara Dahi Chat
Who does not love sweet, spicy and tangy Chat? Khakhara Dahi Chat is an easy and healthy snack that can be made in a jiffy.

Chat is a popular street food in Maharashtra, India. My favorite Dhai Poori and Dahi Papadi chat urged me try a quick and nutritive version to satisfy my cravings. Used store bought Khakhara as the base for this chat. Khakhara is a traditional Gujarati healthy snack. It is crispy, light and deliciously flavored with different masalas to pick from. It's usually cooked on low heat while continuously pressing the flattened dough (roti like) using a wooden press, potato masher or a folded cloth until it becomes crispy. It is readily available in Indian grocery stores with its different flavors. If you are planning to pick one, find for the one which is vacuum sealed which retains its freshness.

Sweet Dahi/ yogurt gives this chat more flavors to the already tangy tamarind sauce and the spicy mint sauce. This light and flavorful snack contains freshly grated raw vegetables. Minimal cooking is required to prepare the sweet and tangy sauce. This sauce can be refrigerated and stored in airtight container for couple of weeks.

Category: Snack, Chat
Preparation: 15-20 mins
Level: Easy
Serves: 4
Ingredients:
Khakhara - 1 pack (Vacuum sealed, your choice of flavor) .
Red onion - 1 (finely chopped)
Green mango - 1 (grated)
Carrot - 1 (grated)
Beetroot - 1 (grated)
Coriander leaves - 1/2 cup (finely chopped)
Thin sev - 1 cup
Green Chutney:
Coriander leaves - 1 cup (chopped)
Mint leaves - 1 cup (chopped)
Green chilly - 2-3 nos
Cumin powder - 1/4 teaspoon
Lemon juice - 1/2 teaspoon
Salt to taste
Sweet and tangy chutney / Tamarind chutney:
Tamarind paste - 2 tablespoons
Dates - 4 - 6 nos (pitted)
Brown sugar - 1 teaspoon (optional)
Dahi sauce:
Yogurt / Curd (whisked) - 1 cup
Chat masala or Khakhara seasoning - 1/2 teaspoon
Sugar - 1/2 teaspoon

Chutney/ Sauce Directions:
Green Chutney preparation:
Blend all the green chutney ingredients in a blender with a table spoon of water. Check for the seasoning and set aside.
Sweet and Tangy Chutney/ Tamarind Chutney preparation:
Grind all the tamarind chutney ingredients in a blender. Add required water and bring it to a boil on stove top, stir occasionally until you get the sauce consistency. Set aside to cool.
Dahi Sauce/ Sweetened yogurt preparation:
Whisk the yogurt/ curd along with sugar and Khakhara seasoning/ chat masala. Add water if required to have a sauce consistency.

Assembling:
1. Place a Khakhara on a serving plate/platter. Apply a layer of Green chutney as a base for the ingredients to set on place.
2. Now spread a layer of grated beetroot, carrot, mango and chopped onions.
3. Generously top it with sweetened Dahi and drizzle some tamarind sauce.
4. Sprinkle thin sev and chopped coriander and serve immediately.

Notes and Tips:
- Remember Chat masala already has salt so add accordingly if necessary.
- I used pizza cutter to cut my khakhara's before adding the topping for easy individual servings.
- Used masala khakhara as my base and the seasoning that came along with the packet is used as Dahi/yogurt sauce seasoning.
Spicy Tuna Sushi Roll
Spicy tuna is always classic. Requires very less cooking and definitely easy to make. All the spicy kick comes from the Homemade spicy mayo sauce. Substituted uncooked tuna with canned tuna by preference.

When it comes to sushi, presentation is key. I have laid pink sushi ginger and sprinkles of black sesame seed on this particular Spicy Tuna Sushi Roll for a dramatic effect.
For step by step instruction with pictures, check my Philadelphia Crab Sushi Roll. You might want to take a look at my Tricolored California Roll.

Yields: 3 Rolls
Cuisine: Japanese
Level: Easy
Nutrition Facts Servings 3.0 Amount Per Serving calories 155 % Daily Value * Total Fat 0 g 1 % Saturated Fat 0 g 0 % Monounsaturated Fat 0g Polyunsaturated Fat 0 g Trans Fat 0 g Cholesterol 10mg 3 % Sodium 237 mg 10 % Potassium 101mg 3 % Total Carbohydrate 29g 10 % Dietary Fiber 0 g 2 % Sugars 3 g Protein 7 g 13 % Vitamin A 1 % Vitamin C 1 % Calcium 1 % Iron 2 % * The Percent Daily Values are based on a 2,000 calorie diet, so your values may change depending on your calorie needs. The values here may not be 100% accurate because the recipes have not been professionally evaluated nor have they been evaluated by the U.S. FDA.
Khakhara - 1 pack (Vacuum sealed, your choice of flavor) .
Red onion - 1 (finely chopped)
Green mango - 1 (grated)
Carrot - 1 (grated)
Beetroot - 1 (grated)
Coriander leaves - 1/2 cup (finely chopped)
Thin sev - 1 cup
Green Chutney:
Coriander leaves - 1 cup (chopped)
Mint leaves - 1 cup (chopped)
Green chilly - 2-3 nos
Cumin powder - 1/4 teaspoon
Lemon juice - 1/2 teaspoon
Salt to taste
Sweet and tangy chutney / Tamarind chutney:
Tamarind paste - 2 tablespoons
Dates - 4 - 6 nos (pitted)
Brown sugar - 1 teaspoon (optional)
Dahi sauce:
Yogurt / Curd (whisked) - 1 cup
Chat masala or Khakhara seasoning - 1/2 teaspoon
Sugar - 1/2 teaspoon

Chutney/ Sauce Directions:
Green Chutney preparation:
Blend all the green chutney ingredients in a blender with a table spoon of water. Check for the seasoning and set aside.
Sweet and Tangy Chutney/ Tamarind Chutney preparation:
Grind all the tamarind chutney ingredients in a blender. Add required water and bring it to a boil on stove top, stir occasionally until you get the sauce consistency. Set aside to cool.
Dahi Sauce/ Sweetened yogurt preparation:
Whisk the yogurt/ curd along with sugar and Khakhara seasoning/ chat masala. Add water if required to have a sauce consistency.

Assembling:
1. Place a Khakhara on a serving plate/platter. Apply a layer of Green chutney as a base for the ingredients to set on place.
2. Now spread a layer of grated beetroot, carrot, mango and chopped onions.
3. Generously top it with sweetened Dahi and drizzle some tamarind sauce.
4. Sprinkle thin sev and chopped coriander and serve immediately.

Notes and Tips:
- Remember Chat masala already has salt so add accordingly if necessary.
- I used pizza cutter to cut my khakhara's before adding the topping for easy individual servings.
- Used masala khakhara as my base and the seasoning that came along with the packet is used as Dahi/yogurt sauce seasoning.
Spicy Tuna Sushi Roll
Spicy tuna is always classic. Requires very less cooking and definitely easy to make. All the spicy kick comes from the Homemade spicy mayo sauce. Substituted uncooked tuna with canned tuna by preference.

When it comes to sushi, presentation is key. I have laid pink sushi ginger and sprinkles of black sesame seed on this particular Spicy Tuna Sushi Roll for a dramatic effect.
For step by step instruction with pictures, check my Philadelphia Crab Sushi Roll. You might want to take a look at my Tricolored California Roll.

Yields: 3 Rolls
Cuisine: Japanese
Level: Easy
| Nutrition Facts | |
|---|---|
| Servings 3.0 | |
| Amount Per Serving | |
| calories 155 | |
| % Daily Value * | |
| Total Fat 0 g | 1 % |
| Saturated Fat 0 g | 0 % |
| Monounsaturated Fat 0g | |
| Polyunsaturated Fat 0 g | |
| Trans Fat 0 g | |
| Cholesterol 10mg | 3 % |
| Sodium 237 mg | 10 % |
| Potassium 101mg | 3 % |
| Total Carbohydrate 29g | 10 % |
| Dietary Fiber 0 g | 2 % |
| Sugars 3 g | |
| Protein 7 g | 13 % |
| Vitamin A | 1 % |
| Vitamin C | 1 % |
| Calcium | 1 % |
| Iron | 2 % |
| * The Percent Daily Values are based on a 2,000 calorie diet, so your values may change depending on your calorie needs. The values here may not be 100% accurate because the recipes have not been professionally evaluated nor have they been evaluated by the U.S. FDA. | |

Ingredients:
- Sushi Rice - 1 cup (Homai or California Calrose)
- Nori/Roasted seaweed - 1 pack (1 half sheet for each roll)
- Vinegar water - (1/4 cup rice vinegar + 1 cup water) for dipping your hands.
- Tuna - 1 canned in water (Strained)
- Cucumber - 1 (peeled, seeded and cut into match sticks/strips)
- Carrot - 1 (peeled and cut into match stick/strips)
- Roasted black sesame seeds - 1 teaspoon
- Wasabi - 1 teaspoon + to serve
- Soy sauce (low sodium) - to serve
- Sushi ginger - to serve
- Spicy mayo sauce - to serve . (Homemade - 3 parts of Vegenaise or Mayonnaise and 1 part of Sriracha hot sauce mixed together.)
Requirement:
- Bamboo sushi rolling mat - 1
- 1 Gallon ziplock bag or cling wrap (optional)

Directions:
1. Check my Sushi Rice for detailed steps and guideline to cook perfect rice to make sushi. Remember to work when its warm.
2. Insert the sushi mat in a gallon zip lock bag and place it on a flat surface with wider side closer to you.
3. We will work with just one half nori sheet for each sushi roll.
4. Take about a cup of rice and spread it on the nori sheet evenly. Now is the time to flip the sheet (optional).
Assemble cucumber (2), carrots sticks (2), Tuna meat (2 tbs approximately), and drizzle spicy mayo and sparingly add wasabi across the center of the rice/ nori sheet.

5. Using the rolling mat start rolling tightly, use your fingers to tuck in the fillings to hold in place. You will have to keep rolling a few times little by little simultaneously giving it a tight hug to make it into a log.
6. Now cut the roll into 6 equal pieces in all. Make sure you don't remove or move the sushi.
7. Once its all cut, using the rolling mat I like to give them another tight hug to retain its shape.
8. For presentation, I laid thinly sliced pink sushi ginger and spread it evenly on the sushi roll. You might want to use the bamboo sheet to give it a tight hug for the ginger to set in place. Sprinkle roasted black sesame seeds. For different presentations please check my other sushi posts.

Notes:
- Dip your hands in the vinegar-water and remove excess water by tapping on a damn cloth each time you handle the sushi rice being sticky.
- For a clean cut I prefer to wrap my sushi log in a cling/plastic wrap. Dip the knife each time in the vinegar-water and wipe clean for a clean cut. Cut the edged off to look even on the sides.
- If you are using raw sushi, make sure you dice them into small pieces. If you opt canned tuna (cooked), always remember to use only canned tuna in water. Do not pick the ones in oil, they might get your sushi roll mushy.

Six Taste Watermelon Salad
Nothing can beat this refreshing six taste salad which is sure to impress your family and guests. This salad is great for summer potlucks or picnics being a no cook dish that can be increased to large quantities easily. Savor all the 6 tastes instantaneously in one meal!

Ayurveda teaches that all six tastes should be eaten at every meal for us to feel satisfied and to ensure that all major food groups and nutrients are represented to stay healthy. The six tastes includes sweet (watermelon, blueberries), sour (orange), salty (salty olives), pungent (green chilly, pepper, onion, mint) and astringent (cucumber, blueberries). For more details dip into "Eat Taste Heal", An Ayurvedic Guidebook and Cookbook for Modern Living.

Watermelon salad can also be perfect as a side to a grilled dish. This effortless six taste salad is naturally flavorful and attractive with its vibrant colors yet the best coolant for summer.
A melon baller is a small spoon-like prepping tool used to cut round shaped sections of melons. Gently press the tool into the melon's flesh and rotate it to scoop out the melon balls. If you do not want to make balls, you may simply dice them into small chunks.

Cuisine: International
Category: Salad, Appetizer, Side
Level: Very Easy
Servings: 4
Nutrition Facts Servings 4.0 Amount Per Serving calories 148 % Daily Value * Total Fat 8 g 12 % Saturated Fat 2 g 8 % Monounsaturated Fat 5g Polyunsaturated Fat 1 g Trans Fat 0 g Cholesterol 2 mg 1 % Sodium 162 mg 7 % Potassium 198mg 6 % Total Carbohydrate 17g 6 % Dietary Fiber 2 g 7 % Sugars 12 g Protein 2 g 4 % Vitamin A 14 % Vitamin C 38 % Calcium 2 % Iron 3 % * The Percent Daily Values are based on a 2,000 calorie diet, so your values may change depending on your calorie needs. The values here may not be 100% accurate because the recipes have not been professionally evaluated nor have they been evaluated by the U.S. FDA.
- Dip your hands in the vinegar-water and remove excess water by tapping on a damn cloth each time you handle the sushi rice being sticky.
- For a clean cut I prefer to wrap my sushi log in a cling/plastic wrap. Dip the knife each time in the vinegar-water and wipe clean for a clean cut. Cut the edged off to look even on the sides.
- If you are using raw sushi, make sure you dice them into small pieces. If you opt canned tuna (cooked), always remember to use only canned tuna in water. Do not pick the ones in oil, they might get your sushi roll mushy.

Six Taste Watermelon Salad
Nothing can beat this refreshing six taste salad which is sure to impress your family and guests. This salad is great for summer potlucks or picnics being a no cook dish that can be increased to large quantities easily. Savor all the 6 tastes instantaneously in one meal!

Ayurveda teaches that all six tastes should be eaten at every meal for us to feel satisfied and to ensure that all major food groups and nutrients are represented to stay healthy. The six tastes includes sweet (watermelon, blueberries), sour (orange), salty (salty olives), pungent (green chilly, pepper, onion, mint) and astringent (cucumber, blueberries). For more details dip into "Eat Taste Heal", An Ayurvedic Guidebook and Cookbook for Modern Living.

Watermelon salad can also be perfect as a side to a grilled dish. This effortless six taste salad is naturally flavorful and attractive with its vibrant colors yet the best coolant for summer.
A melon baller is a small spoon-like prepping tool used to cut round shaped sections of melons. Gently press the tool into the melon's flesh and rotate it to scoop out the melon balls. If you do not want to make balls, you may simply dice them into small chunks.

Cuisine: International
Category: Salad, Appetizer, Side
Level: Very Easy
Servings: 4
| Nutrition Facts | |
|---|---|
| Servings 4.0 | |
| Amount Per Serving | |
| calories 148 | |
| % Daily Value * | |
| Total Fat 8 g | 12 % |
| Saturated Fat 2 g | 8 % |
| Monounsaturated Fat 5g | |
| Polyunsaturated Fat 1 g | |
| Trans Fat 0 g | |
| Cholesterol 2 mg | 1 % |
| Sodium 162 mg | 7 % |
| Potassium 198mg | 6 % |
| Total Carbohydrate 17g | 6 % |
| Dietary Fiber 2 g | 7 % |
| Sugars 12 g | |
| Protein 2 g | 4 % |
| Vitamin A | 14 % |
| Vitamin C | 38 % |
| Calcium | 2 % |
| Iron | 3 % |
| * The Percent Daily Values are based on a 2,000 calorie diet, so your values may change depending on your calorie needs. The values here may not be 100% accurate because the recipes have not been professionally evaluated nor have they been evaluated by the U.S. FDA. | |
Ingredients:
Extra virgin olive oil - 1 tablespoon
Black pepper powder - 1/2 teaspoon
Thai green chilly - 1- 2 (chopped)
Watermelon - 3 cups (balls or diced)
Cucumber (small) - 1 thinly sliced
Red onions - 1/2 cup (julienned)
Orange - 1 (peeled and cut into thin wedges)
Blueberries - 1 cup
Green olives stuffed with pimentos - 1 cup
Cheese - 1/4 cup ( check notes)
Mint leaves - 1/4 cup ( thinly sliced)
Tools required :
Melon Baller - optional

Melon Baller - optional

Preparation:
1. Using a melon baller scoop out the watermelons into your desired size or you can simple cut the melons into cube as well.
2. In a large bowl, combine olive oil, pepper and green chillies and give it a good stir.
3. To this add the fruits and veggies. Toss them gently to coat well. Sprinkle the grated cheese and mint leaves evenly.
4. Serve immediately or good to refrigerate up to 4 hours.

Tips and Notes:
- I did not add salt to this salad as olives are always salty. Since olives contain a chemical that makes the skin bitter, salt is added to balance it out.
- If you opt crumbled feta cheese or go with any grated cheese you like. I had pepper jack handy to simply julienne and toss it.
Lobster Popcorn
Crunchy appetizer made in a snap. This is a quick deep fry and would be perfect to treat yourself to feel special on any day.

"Popcorn Chicken" also known as "Salt and Pepper Chicken" originated from Taiwan. It is a street food with great influence from China and Japan. They have used Tapioca flour also known as Sweet potato flour. This is a slightly different variation made with lobster chunks that is flavorful, juicy and crispy on the outside is a perfect snack or an appetizer. Lobster has a firm texture and a sweet, mild yet distinctive flavor which is accentuated in this recipe. Vegetarians try tofu (firm), its awesome!

Preparation: 5 minutes
Cook time: 10 minutes
Marinade time: 20 - 30 minutes
Category - Appetizer / snack
Level - Easy
Servings - 4
Nutrition Facts Servings 4.0 Amount Per Serving calories 127 % Daily Value * Total Fat 5 g 7 % Saturated Fat 0 g 2 % Monounsaturated Fat 3g Polyunsaturated Fat 1 g Trans Fat 0 g Cholesterol 3 mg 1 % Sodium 341 mg 14 % Potassium 35 mg 1 % Total Carbohydrate 17g 6 % Dietary Fiber 0 g 1 % Sugars 1 g Protein 1 g 2 % Vitamin A 3 % Vitamin C 1 % Calcium 1 % Iron 1 % * The Percent Daily Values are based on a 2,000 calorie diet, so your values may change depending on your calorie needs. The values here may not be 100% accurate because the recipes have not been professionally evaluated nor have they been evaluated by the U.S. FDA.
- I did not add salt to this salad as olives are always salty. Since olives contain a chemical that makes the skin bitter, salt is added to balance it out.
- If you opt crumbled feta cheese or go with any grated cheese you like. I had pepper jack handy to simply julienne and toss it.
Lobster Popcorn
Crunchy appetizer made in a snap. This is a quick deep fry and would be perfect to treat yourself to feel special on any day.

"Popcorn Chicken" also known as "Salt and Pepper Chicken" originated from Taiwan. It is a street food with great influence from China and Japan. They have used Tapioca flour also known as Sweet potato flour. This is a slightly different variation made with lobster chunks that is flavorful, juicy and crispy on the outside is a perfect snack or an appetizer. Lobster has a firm texture and a sweet, mild yet distinctive flavor which is accentuated in this recipe. Vegetarians try tofu (firm), its awesome!

Preparation: 5 minutes
Cook time: 10 minutes
Marinade time: 20 - 30 minutes
Category - Appetizer / snack
Level - Easy
Servings - 4
| Nutrition Facts | |
|---|---|
| Servings 4.0 | |
| Amount Per Serving | |
| calories 127 | |
| % Daily Value * | |
| Total Fat 5 g | 7 % |
| Saturated Fat 0 g | 2 % |
| Monounsaturated Fat 3g | |
| Polyunsaturated Fat 1 g | |
| Trans Fat 0 g | |
| Cholesterol 3 mg | 1 % |
| Sodium 341 mg | 14 % |
| Potassium 35 mg | 1 % |
| Total Carbohydrate 17g | 6 % |
| Dietary Fiber 0 g | 1 % |
| Sugars 1 g | |
| Protein 1 g | 2 % |
| Vitamin A | 3 % |
| Vitamin C | 1 % |
| Calcium | 1 % |
| Iron | 1 % |
| * The Percent Daily Values are based on a 2,000 calorie diet, so your values may change depending on your calorie needs. The values here may not be 100% accurate because the recipes have not been professionally evaluated nor have they been evaluated by the U.S. FDA. | |
Ingredients:
Cooked lobster tail - 3 cups (chunks)
Cornstarch - 1 cup
Curry leaves - few
Cayenne pepper or Chilly powder - (Optional) few dashes
Hot and sweet dipping sauce - to serve
Oil for deep frying
Marinade:
Ginger and Garlic - 1 teaspoon (paste)
Soy sauce - 1 tablespoon
Oyster sauce - 1 tablespoon (optional)
Rice vinegar - 1 tablespoon
Pepper - 1/4 teaspoon
Salt to taste
Sesame oil- 1 teaspoon
Dried basil - 1/4 teaspoon (optional)

Directions:
1. In a large bowl combine all the marinade ingredients and mix it well. Add the cooked lobster chunks and gently coat them well. Set aside for 20-30 mins.
2. In a pan heat oil in medium high. Coat the lobster chunks individually with cornstarch evenly. Shake the excess off.
3. Deep fry the lobsters in small batches, giving room to fry evenly until golden brown. It may take about a couple of minutes only to flip the lobsters. Put few fresh curry leaves or basil leaves for another 2 mins. Remove and drain the oil.
4. Sprinkle some cayenne pepper or chilly powder for some spicy kick. Serve immediately with hot and sweet sauce.

Tips and Notes:
- Fresh basil leaves is preferred over curry leaves as it adds a unique flavor and aroma to the popcorn. But since it was not readily available at home, I used curry leaves and added dried basil to the marinade for added flavor.
- Always remember to drain the water well before adding the marinade. You may even lie them on a paper towel to remove the excess moisture.
- You may substitute lobster with shrimp or chicken. If the marinade doesn't coat well, add an egg to the mixture before coating the meat in the corn starch.
- For vegetarians, firm tofu and paneer are good options.

Strawberry Ale Mojito - Mocktail
Ready to beat the heat with a glass of refreshing mocktail?

Imagine your in a paradise with this summer thirst quencher, to treat yourself with an invigorating virgin drink (non-alcohol) that is full of flavor. Yes, this mocktail is great for the whole family and good for parties too as it is incredibly easy to make.
Mojito is basically an alcohol drink that contains, lime-lemon juice, mint and sugar. This virgin drink is substituted with ginger ale and a mixture of fruit juices making this an incredulous fizz.
 Ginger ale is a common home remedy that soothes sore throat, an upset stomach and also possible reduction in diarrhea and nausea. It is truly a treat for my kids when they are unwell to consume a cool ginger ale mocktail with some electrolyte, a secret ingredient. For beneficial effects, read the label of a ginger ale to choose an all-natural organic brand that includes ginger root in the ingredients.
Enjoy this cool mocktail as the minty, lime-y tang flavors slowly seeps in with each sip, along with the little punch from the ginger ale. Cheers!
Cuisine - Cuban
Category - Beverage/Drink/Mocktail
Level- Easy
Servings - 1

Nutrition Facts Servings 1.0 Amount Per Serving calories 68 % Daily Value * Total Fat 0 g 0 % Saturated Fat 0 g 0 % Monounsaturated Fat 0g Polyunsaturated Fat 0 g Trans Fat 0 g Cholesterol 0 mg 0 % Sodium 21 mg 1 % Potassium 31 mg 1 % Total Carbohydrate 18g 6 % Dietary Fiber 0 g 0 % Sugars 16 g Protein 0 g 0 % Vitamin A 0 % Vitamin C 24 % Calcium 0 % Iron 0 % * The Percent Daily Values are based on a 2,000 calorie diet, so your values may change depending on your calorie needs. The values here may not be 100% accurate because the recipes have not been professionally evaluated nor have they been evaluated by the U.S. FDA.
- Fresh basil leaves is preferred over curry leaves as it adds a unique flavor and aroma to the popcorn. But since it was not readily available at home, I used curry leaves and added dried basil to the marinade for added flavor.
- Always remember to drain the water well before adding the marinade. You may even lie them on a paper towel to remove the excess moisture.
- You may substitute lobster with shrimp or chicken. If the marinade doesn't coat well, add an egg to the mixture before coating the meat in the corn starch.
- For vegetarians, firm tofu and paneer are good options.

Strawberry Ale Mojito - Mocktail
Ready to beat the heat with a glass of refreshing mocktail?

Imagine your in a paradise with this summer thirst quencher, to treat yourself with an invigorating virgin drink (non-alcohol) that is full of flavor. Yes, this mocktail is great for the whole family and good for parties too as it is incredibly easy to make.
Mojito is basically an alcohol drink that contains, lime-lemon juice, mint and sugar. This virgin drink is substituted with ginger ale and a mixture of fruit juices making this an incredulous fizz.

Ginger ale is a common home remedy that soothes sore throat, an upset stomach and also possible reduction in diarrhea and nausea. It is truly a treat for my kids when they are unwell to consume a cool ginger ale mocktail with some electrolyte, a secret ingredient. For beneficial effects, read the label of a ginger ale to choose an all-natural organic brand that includes ginger root in the ingredients.
Enjoy this cool mocktail as the minty, lime-y tang flavors slowly seeps in with each sip, along with the little punch from the ginger ale. Cheers!
Enjoy this cool mocktail as the minty, lime-y tang flavors slowly seeps in with each sip, along with the little punch from the ginger ale. Cheers!
Cuisine - Cuban
Category - Beverage/Drink/Mocktail
Level- Easy
Servings - 1

| Nutrition Facts | |
|---|---|
| Servings 1.0 | |
| Amount Per Serving | |
| calories 68 | |
| % Daily Value * | |
| Total Fat 0 g | 0 % |
| Saturated Fat 0 g | 0 % |
| Monounsaturated Fat 0g | |
| Polyunsaturated Fat 0 g | |
| Trans Fat 0 g | |
| Cholesterol 0 mg | 0 % |
| Sodium 21 mg | 1 % |
| Potassium 31 mg | 1 % |
| Total Carbohydrate 18g | 6 % |
| Dietary Fiber 0 g | 0 % |
| Sugars 16 g | |
| Protein 0 g | 0 % |
| Vitamin A | 0 % |
| Vitamin C | 24 % |
| Calcium | 0 % |
| Iron | 0 % |
| * The Percent Daily Values are based on a 2,000 calorie diet, so your values may change depending on your calorie needs. The values here may not be 100% accurate because the recipes have not been professionally evaluated nor have they been evaluated by the U.S. FDA. | |
Ingredients:
1. Mint leaves - 8-10 large leaves
2. Granulated fine sugar (unbleached) - 1-2 teaspoons (as required)
3. Lemon , lime - 1 each (2 tablespoons of juice)
4. Strawberries - 4-5 (cleaned)
5. Ginger ale - 1 small bottle
6. Ice cubes or crushed ice

1. Mint leaves - 8-10 large leaves
2. Granulated fine sugar (unbleached) - 1-2 teaspoons (as required)
3. Lemon , lime - 1 each (2 tablespoons of juice)
4. Strawberries - 4-5 (cleaned)
5. Ginger ale - 1 small bottle
6. Ice cubes or crushed ice

Directions:
1. In a blender add strawberries (cleaned) and sugar and puree it with minimal water if required.
2. In a tall serving glass (previously prepped - check notes) add lime juice and mint leaves. Using a muddler or the back of a wooden spoon (unfinished) to gently muddle and twist the mint leaves to release its essential oils.
3. Add 3/4 glass with ice cubes or crushed ice. Now pour 2-3 tablespoons of strawberry puree. I like to add few thinly sliced strawberries to float.
4. Top it off with the chilled ginger ale or any aerated drink of your choice( check notes).
5. Garnish with a slice of lime, thinly sliced strawberry and sprigs of mint leaves. Serve immediately!

Notes and Tips:
- Mocktails are usually served in tall glasses to avoid crowding while adding plenty of ice. Also, choose a heavy bottomed glass to avoid breaking while muddling.
- Do not chop, shred or crush the mint leaves as it can release the chlorophyll that makes your drink slightly bitter.
- Chilled aerated drinks like flavored sparking water, club soda, lemon-lime soda (sprite) or root beer can be an alternative option for any mocktail. But remember the medicinal value from the ginger root will be missed out except for all natural root beer.
- For presentation, you may prep the glass rims with a slice lemon to moisten the rim and dip it in fine granulated sugar before you add your ingredients in.

Caramel Spiced Rosemary Walnut
Crunchy, delicious and easy savory snack or topping for a salad will sure be on your favorite party add-ins or on the go healthy snack.

Organic walnuts straight from farm and freshly picked rosemary from my garden tempted to make this easy-peasy, nevertheless a yummy and fragrant treat. I have been making this Caramel spiced rosemary walnut / mixed nuts for more than a decade and always been a smash hit in my parties especially Thanksgiving feasts. You may add different nuts like almonds, cashews, pecans and also peanuts to make it a mixed nuts snack.

Preparation time: 10 minutes
Level: Easy
Cuisine: International
Type: Appetizer, Snack
Yields: 1 cup
Nutrition Facts Servings 6.0 Amount Per Serving calories 64 % Daily Value * Total Fat 12 g 19 % Saturated Fat 1 g 7 % Monounsaturated Fat 0g Polyunsaturated Fat 0 g Trans Fat 0 g Cholesterol 0 mg 0 % Sodium 53 mg 2 % Potassium 4 mg 0 % Total Carbohydrate 8 g 3 % Dietary Fiber 3 g 11 % Sugars 4 g Protein 5 g 11 % Vitamin A 4 % Vitamin C 2 % Calcium 4 % Iron 7 % * The Percent Daily Values are based on a 2,000 calorie diet, so your values may change depending on your calorie needs. The values here may not be 100% accurate because the recipes have not been professionally evaluated nor have they been evaluated by the U.S. FDA.

Ingredients:
Walnuts - 1 cup (halves)
Rosemary - 2 tablespoons (fresh and chopped)
Brown sugar - 1/4 cup
Salt to taste
Cayenne pepper / Chilly powder - 1 teaspoon
Water - 3 tablespoons

Directions:
- Heat a skillet/ pan in medium heat and add the walnuts to roast for approximately 5 mins or less. Stirring constantly to roast evenly and to prevent burns.
- Now add the rest of the ingredients and allow the brown sugar to melt and start to boil. Continue stirring until the water evaporates to get the glossy caramel consistency.
- Transfer the nuts to a plate/tray to spreading them using forks to cool. Once it cooled the sticky coating tends to harden yet slightly sticky and crunchy.

Notes and Tips:
- Store the walnuts at room temperature in an airtight container for up to 10 days if they last that long ;)
You may toast the nuts in 300 degree pre-heated oven for 10-15 mins before tossing it into the caramel sauce.

Steamed Banana Blossom Falafel/ Vazhaipoo Kondai Kadalai Urundai (Vada)
Mediterranean and Indian fusion falafel is a protein rich healthy savory snack. This snack comprises 2 different healthy versions - steamed and baked without compromising flavor. The traditional South Indian Vada with a twist is sure gonna knock your sock off.

The dried garbanzo beans/ chickpeas/ konda kadalai/ kabuli chana is a nutty tasting legume. Its is an excellent source of dietary fiber, protein, copper, folate and manganese. Also helps lower LDL cholesterol (the 'bad cholesterol") levels and consequently reduce the risk of coronary heart disease.
Banana Blossom is highly nutritious and rich in fiber, vitamins and minerals. It wards of infections, manages diabetics and anemia, helps nursing mothers and also boost moods and reduces anxiety.

The steamed version with soft inside is slightly roasted in a kadai/pan for a thin crip outer layer for just the perfect crunch to savor this savory.
The next variant is slightly easier as it is baked in the oven and then broiled for added crispiness. This version is crispier and similar to the traditional deep fried vada texture.

How to clean the banana blossom:
Cleaning the blossoms can be time consuming, but its definitely worth it given the nutritious benefits it offers.
Remove the outer petal to find the bunch of florets inside. Remove the stamen from each of these florets and discard it. Chop the florets and immerse them in diluted buttermilk to prevent discoloration.
Cuisine: Indian - Mediterranean fusion
Category: Snack
Preparation time: 30 - 45 mins
Servings: Approximately 20 nos
Level- Easy

- Mocktails are usually served in tall glasses to avoid crowding while adding plenty of ice. Also, choose a heavy bottomed glass to avoid breaking while muddling.
- Do not chop, shred or crush the mint leaves as it can release the chlorophyll that makes your drink slightly bitter.
- Chilled aerated drinks like flavored sparking water, club soda, lemon-lime soda (sprite) or root beer can be an alternative option for any mocktail. But remember the medicinal value from the ginger root will be missed out except for all natural root beer.
- For presentation, you may prep the glass rims with a slice lemon to moisten the rim and dip it in fine granulated sugar before you add your ingredients in.

Caramel Spiced Rosemary Walnut
Crunchy, delicious and easy savory snack or topping for a salad will sure be on your favorite party add-ins or on the go healthy snack.
Organic walnuts straight from farm and freshly picked rosemary from my garden tempted to make this easy-peasy, nevertheless a yummy and fragrant treat. I have been making this Caramel spiced rosemary walnut / mixed nuts for more than a decade and always been a smash hit in my parties especially Thanksgiving feasts. You may add different nuts like almonds, cashews, pecans and also peanuts to make it a mixed nuts snack.

Preparation time: 10 minutes
Level: Easy
Cuisine: International
Type: Appetizer, Snack
Yields: 1 cup
| Nutrition Facts | |
|---|---|
| Servings 6.0 | |
| Amount Per Serving | |
| calories 64 | |
| % Daily Value * | |
| Total Fat 12 g | 19 % |
| Saturated Fat 1 g | 7 % |
| Monounsaturated Fat 0g | |
| Polyunsaturated Fat 0 g | |
| Trans Fat 0 g | |
| Cholesterol 0 mg | 0 % |
| Sodium 53 mg | 2 % |
| Potassium 4 mg | 0 % |
| Total Carbohydrate 8 g | 3 % |
| Dietary Fiber 3 g | 11 % |
| Sugars 4 g | |
| Protein 5 g | 11 % |
| Vitamin A | 4 % |
| Vitamin C | 2 % |
| Calcium | 4 % |
| Iron | 7 % |
| * The Percent Daily Values are based on a 2,000 calorie diet, so your values may change depending on your calorie needs. The values here may not be 100% accurate because the recipes have not been professionally evaluated nor have they been evaluated by the U.S. FDA. | |

Ingredients:
Rosemary - 2 tablespoons (fresh and chopped)
Brown sugar - 1/4 cup
Salt to taste
Cayenne pepper / Chilly powder - 1 teaspoon
Water - 3 tablespoons

Directions:
- Heat a skillet/ pan in medium heat and add the walnuts to roast for approximately 5 mins or less. Stirring constantly to roast evenly and to prevent burns.
- Now add the rest of the ingredients and allow the brown sugar to melt and start to boil. Continue stirring until the water evaporates to get the glossy caramel consistency.
- Transfer the nuts to a plate/tray to spreading them using forks to cool. Once it cooled the sticky coating tends to harden yet slightly sticky and crunchy.

Notes and Tips:
- Store the walnuts at room temperature in an airtight container for up to 10 days if they last that long ;) You may toast the nuts in 300 degree pre-heated oven for 10-15 mins before tossing it into the caramel sauce.

Steamed Banana Blossom Falafel/ Vazhaipoo Kondai Kadalai Urundai (Vada)
Mediterranean and Indian fusion falafel is a protein rich healthy savory snack. This snack comprises 2 different healthy versions - steamed and baked without compromising flavor. The traditional South Indian Vada with a twist is sure gonna knock your sock off.

The dried garbanzo beans/ chickpeas/ konda kadalai/ kabuli chana is a nutty tasting legume. Its is an excellent source of dietary fiber, protein, copper, folate and manganese. Also helps lower LDL cholesterol (the 'bad cholesterol") levels and consequently reduce the risk of coronary heart disease.
Banana Blossom is highly nutritious and rich in fiber, vitamins and minerals. It wards of infections, manages diabetics and anemia, helps nursing mothers and also boost moods and reduces anxiety.

The steamed version with soft inside is slightly roasted in a kadai/pan for a thin crip outer layer for just the perfect crunch to savor this savory.
The next variant is slightly easier as it is baked in the oven and then broiled for added crispiness. This version is crispier and similar to the traditional deep fried vada texture.

How to clean the banana blossom:
Cleaning the blossoms can be time consuming, but its definitely worth it given the nutritious benefits it offers.
Remove the outer petal to find the bunch of florets inside. Remove the stamen from each of these florets and discard it. Chop the florets and immerse them in diluted buttermilk to prevent discoloration.
Cuisine: Indian - Mediterranean fusion
Category: Snack
Preparation time: 30 - 45 mins
Servings: Approximately 20 nos
Level- Easy

Nutrition Facts Servings 20.0 Amount Per Serving calories 104 % Daily Value * Total Fat 2 g 2 % Saturated Fat 0 g 0 % Monounsaturated Fat 0g Polyunsaturated Fat 0 g Trans Fat 0 g Cholesterol 0 mg 0 % Sodium 129 mg 5 % Potassium 200mg 6 % Total Carbohydrate 22g 7 % Dietary Fiber 6 g 22 % Sugars 5 g Protein 3 g 7 % Vitamin A 0 % Vitamin C 10 % Calcium 3 % Iron 3 % * The Percent Daily Values are based on a 2,000 calorie diet, so your values may change depending on your calorie needs. The values here may not be 100% accurate because the recipes have not been professionally evaluated nor have they been evaluated by the U.S. FDA.
| Nutrition Facts | |
|---|---|
| Servings 20.0 | |
| Amount Per Serving | |
| calories 104 | |
| % Daily Value * | |
| Total Fat 2 g | 2 % |
| Saturated Fat 0 g | 0 % |
| Monounsaturated Fat 0g | |
| Polyunsaturated Fat 0 g | |
| Trans Fat 0 g | |
| Cholesterol 0 mg | 0 % |
| Sodium 129 mg | 5 % |
| Potassium 200mg | 6 % |
| Total Carbohydrate 22g | 7 % |
| Dietary Fiber 6 g | 22 % |
| Sugars 5 g | |
| Protein 3 g | 7 % |
| Vitamin A | 0 % |
| Vitamin C | 10 % |
| Calcium | 3 % |
| Iron | 3 % |
| * The Percent Daily Values are based on a 2,000 calorie diet, so your values may change depending on your calorie needs. The values here may not be 100% accurate because the recipes have not been professionally evaluated nor have they been evaluated by the U.S. FDA. | |
Ingredients:
Garbanzo beans/ Chickpeas/ kondai Kadalai/ Kabuli Chana - 2 cups (washed and soaked for 6-8 hours)
Banana Blossom - 1.5 cup (cleaned and chopped )
Green chilly - 3-4 nos
Cumin powder - 1/4 teaspoon
Turmeric powder - 1/4 teaspoon
Asafoetida - a dash
Salt as required
Onion- 1 medium (finely chopped)
Ginger garlic paste - 1 teaspoon
Coriander leaves - 1 tablespoon (chopped)
Curry leaves - 1 tablespoon (chopped)
Butter milk - 1/4 cup with 1 cup water (diluted)
Cooking oil spray

Method:
1. Drain and squeeze out the diluted buttermilk from the banana blossom and transfer it to a blender/mixer jar. Add the soaked garbanzo beans and green chillies to grind it coarsely using the pulse mode.
2. Transfer to a bowl along with all the remaining ingredients.
3. Make small balls about the size of Amla /gooseberry.
4. Steaming version:
- Arrange these falafels in oiled idly steamer plate or in any slightly greased pan. Make sure the steamer container contains enough water making sure the water level is slightly lower than the arranged falafel plates. Steam for 10-12 minutes.
- When done, remove the steamed falafels and in small batches roast them in a kadai with 3 teaspoons of oil. Use a wooden spatula to gently turn them to roast evenly all around. This final step might take 3-5 minutes for each batch which accentuates the flavor of these healthy banana blossom falafels. This version was a huge hit, the kids relished it as much as adults did.

5. Baked version:
- Pre-heat the oven to 350 degree Fahrenheit or 175 degree celsius. Flatten the balls to a disc shape like vada's and arrange on the greased baking sheet and bake for 30 minutes, turning once half way.
- Once done, switch the oven to the broiler mode. Spray the cooking oil on the flattened falafels and broil for 3-5 mins or until it turns crip. Flip and repeat the same on the other side as well.
Notes and Tips:
1. Drain and squeeze out all the buttermilk water from the banana blossom before grinding it, else the balls will be too soggy.
2. If your balls or the disc shape doesn't form easily, you may add 1 tablespoon of channa dal flour / pottukadalai mavu to the mixture, as it will absorb the excess moisture if any.
3. The banana blossom are usually steamed before mixing with other ingredients, but I eliminated this step and it tasted scrumptious.

Philadelphia Crab Sushi Roll / Philly Roll
Philadelphia Roll also known as Philly roll derives from the Philadelphia Cream Cheese brand. Cream cheese is not only for bagel any more.

This type of sushi is generally made with lox (smoked salmon), cream cheese and cucumber. My variation is to switch the smoked salmon with cooked crab, as we are not a big fan of raw or partly cooked meat. The cream cheese and cooked crab meat combination is incogitable with its creamy texture. Crisp lettuce will add more crunch along with the cucumber that is added to this Philly roll.

Ingredients:
- Sushi Rice - 1 cup (Homai or California Calrose)
- Nori/Roasted seaweed - 1 pack (1 half sheet for each roll)
- Vinegar water - (1/4 cup rice vinegar + 1 cup water) for dipping your hands.
- Crab - 2 sticks per roll (Cooked and Shelled)
- Philadelphia Cream Cheese - 1 block - Check notes
- Cucumber - 1 (peeled, seeded and cut into match sticks/strips)
- Baby romaine hearts (lettuce) - 1(washed and wiped clean) Check notes.
- Avocado - 1 (optional) - pitted, peeled and sliced into strips. Check notes.
- Roasted white sesame seeds - 1 tablespoon
- Wasabi - to serve
- Soy sauce (low sodium) - to serve
- Sushi ginger - to serve
- Spicy mayo sauce - to serve . (Homemade - 3 parts of Vegenaise or Mayonnaise and 1 part of Sriracha hot sauce mixed together.)
Requirement:
- Bamboo sushi rolling mat - 1
- 1 Gallon ziplock bag or cling wrap (optional)

Yields: 3 Rolls
Cuisine: Japanese
Level: Medium
You might be interested in my Tricolored California Sushi Roll as well.
Nutrition Facts Servings 1.0 = 1 Roll Amount Per Serving calories 261 % Daily Value * Total Fat 6 g 9 % Saturated Fat 3 g 13 % Monounsaturated Fat 1g Polyunsaturated Fat 0 g Trans Fat 0 g Cholesterol 10mg 3 % Sodium 133 mg 6 % Potassium 52 mg 1 % Total Carbohydrate 47g 16 % Dietary Fiber 1 g 4 % Sugars 1 g Protein 5 g 10 % Vitamin A 7 % Vitamin C 3 % Calcium 4 % Iron 1 % * The Percent Daily Values are based on a 2,000 calorie diet, so your values may change depending on your calorie needs. The values here may not be 100% accurate because the recipes have not been professionally evaluated nor have they been evaluated by the U.S. FDA.
1. Drain and squeeze out all the buttermilk water from the banana blossom before grinding it, else the balls will be too soggy.
2. If your balls or the disc shape doesn't form easily, you may add 1 tablespoon of channa dal flour / pottukadalai mavu to the mixture, as it will absorb the excess moisture if any.
3. The banana blossom are usually steamed before mixing with other ingredients, but I eliminated this step and it tasted scrumptious.

Philadelphia Crab Sushi Roll / Philly Roll
Philadelphia Roll also known as Philly roll derives from the Philadelphia Cream Cheese brand. Cream cheese is not only for bagel any more.

This type of sushi is generally made with lox (smoked salmon), cream cheese and cucumber. My variation is to switch the smoked salmon with cooked crab, as we are not a big fan of raw or partly cooked meat. The cream cheese and cooked crab meat combination is incogitable with its creamy texture. Crisp lettuce will add more crunch along with the cucumber that is added to this Philly roll.

Ingredients:
- Sushi Rice - 1 cup (Homai or California Calrose)
- Nori/Roasted seaweed - 1 pack (1 half sheet for each roll)
- Vinegar water - (1/4 cup rice vinegar + 1 cup water) for dipping your hands.
- Crab - 2 sticks per roll (Cooked and Shelled)
- Philadelphia Cream Cheese - 1 block - Check notes
- Cucumber - 1 (peeled, seeded and cut into match sticks/strips)
- Baby romaine hearts (lettuce) - 1(washed and wiped clean) Check notes.
- Avocado - 1 (optional) - pitted, peeled and sliced into strips. Check notes.
- Roasted white sesame seeds - 1 tablespoon
- Wasabi - to serve
- Soy sauce (low sodium) - to serve
- Sushi ginger - to serve
- Spicy mayo sauce - to serve . (Homemade - 3 parts of Vegenaise or Mayonnaise and 1 part of Sriracha hot sauce mixed together.)
Requirement:
- Bamboo sushi rolling mat - 1
- 1 Gallon ziplock bag or cling wrap (optional)

Yields: 3 Rolls
Cuisine: Japanese
Level: Medium
You might be interested in my Tricolored California Sushi Roll as well.
| Nutrition Facts | |
|---|---|
| Servings 1.0 = 1 Roll | |
| Amount Per Serving | |
| calories 261 | |
| % Daily Value * | |
| Total Fat 6 g | 9 % |
| Saturated Fat 3 g | 13 % |
| Monounsaturated Fat 1g | |
| Polyunsaturated Fat 0 g | |
| Trans Fat 0 g | |
| Cholesterol 10mg | 3 % |
| Sodium 133 mg | 6 % |
| Potassium 52 mg | 1 % |
| Total Carbohydrate 47g | 16 % |
| Dietary Fiber 1 g | 4 % |
| Sugars 1 g | |
| Protein 5 g | 10 % |
| Vitamin A | 7 % |
| Vitamin C | 3 % |
| Calcium | 4 % |
| Iron | 1 % |
| * The Percent Daily Values are based on a 2,000 calorie diet, so your values may change depending on your calorie needs. The values here may not be 100% accurate because the recipes have not been professionally evaluated nor have they been evaluated by the U.S. FDA. | |
Method (Step By Step):
Check my Sushi Rice for detailed steps and guideline to cook perfect rice to make sushi. Remember to work when its warm.

Insert the sushi mat in a gallon ziplock bag (for hygiene purpose) and place it on a flat surface with wider side closer to you.
Fold a nori sheet by half and press the seam to break the sheet into two equal parts. We will work with just one half nori sheet for each sushi roll.

Dip your hands in the vinegar-water and remove excess water by tapping on a damn cloth each time you handle the sushi rice being sticky.

Take about a cup of rice and spread it on the nori sheet evenly. Now is the time to flip the sheet(optional), if you do not like the nori on the outside. Assemble all the required condiments.

Align lettuce, cucumber, cream cheese and crab meat across the center of the rice/nori sheet.

Using the rolling mat as a guide start rolling tightly, use your fingers to tuck in the fillings to hold in place.

You will have to keep rolling a few times little by little simultaneously giving it a tight hug to make it into a log.

Generously sprinkle the roasted sesame seeds on the sushi roll mat and roll the sushi log to cover evenly.

For a clean cut I prefer to wrap my sushi log in a cling/plastic wrap. Dip the knife each time in the vinegar-water and wipe clean for a clean cut. Cut the edged off to look even on the sides.

Now find the center of the roll and cut into to halves. From there on eye ball and make 6 equal pieces in all. Make sure you don't remove or move the sushi.

Once its all cut, using the rolling mat I like to give them another tight hug to retain its shape.

Gently remove the plastic/cling wrap and serve with wasabi and pickled ginger.

For presentation, I have thinly sliced an avocado and spread it evenly on the sushi roll. You might want to use the bamboo sheet to give it a tight hug for the avocado to set in place (which I failed to remember). Drizzle the top with creamy spicy mayo sauce.
Notes:
- Cut avocados only when ready to use to retain color or sprinkle lemon juice.
- Purchase only Philadelphia brand cream cheese for best quality and only in brick form not tub.
- Baby Romaine hearts (lettuce) is added for some color and texture. Use the smallest leaves that will be found in the center to fit in your sushi roll.

Enjoy making and relishing these rolls.
Sushi Rice
Sushi Rice is the basis of Sushi. Japanese short or medium grained rice such as Homai or California Calrose is starchy and helps hold the roll together very well. Rice should be shiny and not mushy, with a slightly tart and sweet taste. Here is the perfect way to make sushi rice, the base for any kind of sushi roll.

Ingredients to make Sushi Rice:
Japanese short or medium grained Sushi Rice - 1 cup
Cold water - 1 + 1/2 cup
Seasoned rice vinegar - 1/4 cup
Sugar - 2 teaspoons
Salt - 1/2 teaspoons
Requirements:
Rice cooker - optional
Wooden / Plastic - Bowl and Spatular

Directions:
1. Wash/rinse the rice until the water runs clear.
2. In a separate bowl make the "Sushi Su"- a vinegar solution that seasons the rice. Mix vinegar, sugar and salt in a bowl and let it sit to dissolve. You may heat it up in low to dissolve completely. Stir occasionally.
3. You may use a stove top or rice cooker method of cooking the rice. I have tried both, felt the rice cooker maintains the right consistency of the rice. If using stove top, keep the heat on high, when it comes to a boil, lower the flame and cover using a lid and allow it to cook for about 6-8 mins.
4. After its cooked, transfer the rice to a wooden bowl using a wooden spatula, as the metal can ruin the texture of the rice.
5. Now is the time to add the Sushi Su to the rice and mix gently. Let sit for 10 mins covered with a damp cloth to prevent from drying, until ready to use.
Notes:
- Make sure the rice is well rinsed before cooking, as the excessive starch content can make the rice mushy.
- Always work with warm rice for best results. Use only cold water to uncooked rice and then turn on the heat for best results.
- Never refrigerate your cooked sushi rice as it can dry out easily.
- 1 cup of uncooked rice makes 3 rolls.

Sushi is mainly served with Wasabi or Japanese horseradish. This condiment has an extremely strong pungency more akin to hot mustard than the capsaicin in chilly pepper, producing vapors that stimulates the nasal passages more than the tongue. First timers do watch out, it has to be consumed very sparingly mixed with soy sauce, as a dipping sauce for the sushi.
Colored Sushi Rice
I have tried Green Sushi Rice and Black Sushi Rice. When rinsed a small portion of uncooked rice, I noticed the color was getting washed off as well. Hence cooked the rest without rinsing, the green sushi rice turned out mushy whereas, the black rice didn't cook well, took longer time (like brown rice).

The best alternative I would suggest is to add food color to the rinsed white sushi rice while cooking. Divide the well rinsed uncooked sushi rice and cook them separately adding a tiny amount of food color that you desire.
Check out my Tricolored California Sushi Roll and Philadelphia Crab Sushi Roll. There is a series of Sushi's coming up. Stay tuned!

European Tiramisu Cake
Nourishingly rich, moist and elegantly decorated layered cake will feast ones eyes and taste buds. You don't have to be sacrificial if you are on diet or super health conscious, this recipe sure will be a preferred variant to celebrate an occasion.

European Tiramisu Cake is an Italian and Russian medley made from scratch. Although Tiramisu is originated from Italy, I have replace the lady fingers with homemade Biskvit cake a very popular Russian sponge cake. This easy Biskvit sponge cake is fast, delicious and most importantly you can't go wrong. It is an egg based cake which is spongy enough to absorb the coffee syrup to retain the moistness of the cake. It requires very less flour and sugar. The freshly whipped expresso flavored frosting is truly a heaven. Cottage cheese is an explicitly wonderful substitute for cream cheese or mascarpone cheese.

I made this delicate Tiramisu cake for my better half to surprise him for his birthday. My kids urged for coffee flavored cake only. Decided to go with Tiramisu being our family's all time favorite nevertheless picking the right ingredient was challenging to keep the calories and sugar low without compromising the flavor. Being my first try whipping a real whipped cream icing, I had to do a lot of home work to get the right tips to keep my icing fluffy and airy with the right consistency. I am excited to share that the end result was outstanding.

This cake is best when refrigerated overnight or 24 hours for the cake to soak up well with its coffee syrup. If you don't consume eggs, try substituting Biskvit cake with any eggless white cake as the base. You might also like my easy "Eggless Tiramisu Mousse"!
Level: Medium
Cuisine: Italian/Russian fusion
Type: Dessert
Prep time: 30-40 minutes
Baking time: 30 minutes
Servings: 12

Nutrition Facts Servings 12.0 Amount Per Serving calories 200 % Daily Value * Total Fat 7 g 11 % Saturated Fat 5 g 24 % Monounsaturated Fat 2g Polyunsaturated Fat 0 g Trans Fat 0 g Cholesterol 27mg 9 % Sodium 112 mg 5 % Potassium 70 mg 2 % Total Carbohydrate 28g 9 % Dietary Fiber 0 g 1 % Sugars 20 g Protein 5 g 10 % Vitamin A 5 % Vitamin C 0 % Calcium 1 % Iron 2 % * The Percent Daily Values are based on a 2,000 calorie diet, so your values may change depending on your calorie needs. The values here may not be 100% accurate because the recipes have not been professionally evaluated nor have they been evaluated by the U.S. FDA.
Ingredients:
Biskvit Cake:
All-purpose flour - 1 cup (unbleached)
Eggs - 6, room temperature (organic)
Granulated sugar - 1 cup
Pure vanilla extract - 1 teaspoon
Cooking spray - as required
Tiramisu Frosting:
Heavy whipping cream - 1.5 cups (cold)
Cottage cheese - 8 oz, room temperature (Optional- cream cheese or mascarpone cheese)
Sugar - 1/2 cup
Instant expresso granules - 2 teaspoons
Coffee Syrup:
Instant expresso granules- 2-3 teaspoons (as required)
Hot water - 1.5 cups
Granulated sugar - 2 tablespoons
Pure vanilla extract - 1 teaspoon
Decoration/ Garnish:
Cocoa powder - 1/4 cup for dusting
Coffee bean chocolate - (optional)
Semi-sweet chocolate chips (optional)

Check my Sushi Rice for detailed steps and guideline to cook perfect rice to make sushi. Remember to work when its warm.

Insert the sushi mat in a gallon ziplock bag (for hygiene purpose) and place it on a flat surface with wider side closer to you.
Fold a nori sheet by half and press the seam to break the sheet into two equal parts. We will work with just one half nori sheet for each sushi roll.

Dip your hands in the vinegar-water and remove excess water by tapping on a damn cloth each time you handle the sushi rice being sticky.

Take about a cup of rice and spread it on the nori sheet evenly. Now is the time to flip the sheet(optional), if you do not like the nori on the outside. Assemble all the required condiments.
Align lettuce, cucumber, cream cheese and crab meat across the center of the rice/nori sheet.

Align lettuce, cucumber, cream cheese and crab meat across the center of the rice/nori sheet.

Using the rolling mat as a guide start rolling tightly, use your fingers to tuck in the fillings to hold in place.
You will have to keep rolling a few times little by little simultaneously giving it a tight hug to make it into a log.

You will have to keep rolling a few times little by little simultaneously giving it a tight hug to make it into a log.

Generously sprinkle the roasted sesame seeds on the sushi roll mat and roll the sushi log to cover evenly.

For a clean cut I prefer to wrap my sushi log in a cling/plastic wrap. Dip the knife each time in the vinegar-water and wipe clean for a clean cut. Cut the edged off to look even on the sides.

Now find the center of the roll and cut into to halves. From there on eye ball and make 6 equal pieces in all. Make sure you don't remove or move the sushi.
Once its all cut, using the rolling mat I like to give them another tight hug to retain its shape.

Once its all cut, using the rolling mat I like to give them another tight hug to retain its shape.

Gently remove the plastic/cling wrap and serve with wasabi and pickled ginger.

For presentation, I have thinly sliced an avocado and spread it evenly on the sushi roll. You might want to use the bamboo sheet to give it a tight hug for the avocado to set in place (which I failed to remember). Drizzle the top with creamy spicy mayo sauce.
Notes:
- Cut avocados only when ready to use to retain color or sprinkle lemon juice.
- Purchase only Philadelphia brand cream cheese for best quality and only in brick form not tub.
- Baby Romaine hearts (lettuce) is added for some color and texture. Use the smallest leaves that will be found in the center to fit in your sushi roll.

Enjoy making and relishing these rolls.
Sushi Rice
Sushi Rice is the basis of Sushi. Japanese short or medium grained rice such as Homai or California Calrose is starchy and helps hold the roll together very well. Rice should be shiny and not mushy, with a slightly tart and sweet taste. Here is the perfect way to make sushi rice, the base for any kind of sushi roll.

Ingredients to make Sushi Rice:
Japanese short or medium grained Sushi Rice - 1 cup
Cold water - 1 + 1/2 cup
Seasoned rice vinegar - 1/4 cup
Sugar - 2 teaspoons
Salt - 1/2 teaspoons
Requirements:
Rice cooker - optional
Wooden / Plastic - Bowl and Spatular

Directions:
1. Wash/rinse the rice until the water runs clear.
2. In a separate bowl make the "Sushi Su"- a vinegar solution that seasons the rice. Mix vinegar, sugar and salt in a bowl and let it sit to dissolve. You may heat it up in low to dissolve completely. Stir occasionally.
3. You may use a stove top or rice cooker method of cooking the rice. I have tried both, felt the rice cooker maintains the right consistency of the rice. If using stove top, keep the heat on high, when it comes to a boil, lower the flame and cover using a lid and allow it to cook for about 6-8 mins.
4. After its cooked, transfer the rice to a wooden bowl using a wooden spatula, as the metal can ruin the texture of the rice.
5. Now is the time to add the Sushi Su to the rice and mix gently. Let sit for 10 mins covered with a damp cloth to prevent from drying, until ready to use.
Notes:
- Make sure the rice is well rinsed before cooking, as the excessive starch content can make the rice mushy.
- Always work with warm rice for best results. Use only cold water to uncooked rice and then turn on the heat for best results.
- Never refrigerate your cooked sushi rice as it can dry out easily.
- 1 cup of uncooked rice makes 3 rolls.

Sushi is mainly served with Wasabi or Japanese horseradish. This condiment has an extremely strong pungency more akin to hot mustard than the capsaicin in chilly pepper, producing vapors that stimulates the nasal passages more than the tongue. First timers do watch out, it has to be consumed very sparingly mixed with soy sauce, as a dipping sauce for the sushi.
Colored Sushi Rice
I have tried Green Sushi Rice and Black Sushi Rice. When rinsed a small portion of uncooked rice, I noticed the color was getting washed off as well. Hence cooked the rest without rinsing, the green sushi rice turned out mushy whereas, the black rice didn't cook well, took longer time (like brown rice).

The best alternative I would suggest is to add food color to the rinsed white sushi rice while cooking. Divide the well rinsed uncooked sushi rice and cook them separately adding a tiny amount of food color that you desire.
Check out my Tricolored California Sushi Roll and Philadelphia Crab Sushi Roll. There is a series of Sushi's coming up. Stay tuned!

European Tiramisu Cake
Nourishingly rich, moist and elegantly decorated layered cake will feast ones eyes and taste buds. You don't have to be sacrificial if you are on diet or super health conscious, this recipe sure will be a preferred variant to celebrate an occasion.
European Tiramisu Cake is an Italian and Russian medley made from scratch. Although Tiramisu is originated from Italy, I have replace the lady fingers with homemade Biskvit cake a very popular Russian sponge cake. This easy Biskvit sponge cake is fast, delicious and most importantly you can't go wrong. It is an egg based cake which is spongy enough to absorb the coffee syrup to retain the moistness of the cake. It requires very less flour and sugar. The freshly whipped expresso flavored frosting is truly a heaven. Cottage cheese is an explicitly wonderful substitute for cream cheese or mascarpone cheese.

I made this delicate Tiramisu cake for my better half to surprise him for his birthday. My kids urged for coffee flavored cake only. Decided to go with Tiramisu being our family's all time favorite nevertheless picking the right ingredient was challenging to keep the calories and sugar low without compromising the flavor. Being my first try whipping a real whipped cream icing, I had to do a lot of home work to get the right tips to keep my icing fluffy and airy with the right consistency. I am excited to share that the end result was outstanding.

This cake is best when refrigerated overnight or 24 hours for the cake to soak up well with its coffee syrup. If you don't consume eggs, try substituting Biskvit cake with any eggless white cake as the base. You might also like my easy "Eggless Tiramisu Mousse"!
Level: Medium
Cuisine: Italian/Russian fusion
Type: Dessert
Prep time: 30-40 minutes
Baking time: 30 minutes
Servings: 12

| Nutrition Facts | |
|---|---|
| Servings 12.0 | |
| Amount Per Serving | |
| calories 200 | |
| % Daily Value * | |
| Total Fat 7 g | 11 % |
| Saturated Fat 5 g | 24 % |
| Monounsaturated Fat 2g | |
| Polyunsaturated Fat 0 g | |
| Trans Fat 0 g | |
| Cholesterol 27mg | 9 % |
| Sodium 112 mg | 5 % |
| Potassium 70 mg | 2 % |
| Total Carbohydrate 28g | 9 % |
| Dietary Fiber 0 g | 1 % |
| Sugars 20 g | |
| Protein 5 g | 10 % |
| Vitamin A | 5 % |
| Vitamin C | 0 % |
| Calcium | 1 % |
| Iron | 2 % |
| * The Percent Daily Values are based on a 2,000 calorie diet, so your values may change depending on your calorie needs. The values here may not be 100% accurate because the recipes have not been professionally evaluated nor have they been evaluated by the U.S. FDA. | |
Ingredients:
Biskvit Cake:
All-purpose flour - 1 cup (unbleached)
Eggs - 6, room temperature (organic)
Granulated sugar - 1 cup
Pure vanilla extract - 1 teaspoon
Cooking spray - as required
Tiramisu Frosting:
Heavy whipping cream - 1.5 cups (cold)
Cottage cheese - 8 oz, room temperature (Optional- cream cheese or mascarpone cheese)
Sugar - 1/2 cup
Instant expresso granules - 2 teaspoons
Coffee Syrup:
Instant expresso granules- 2-3 teaspoons (as required)
Hot water - 1.5 cups
Granulated sugar - 2 tablespoons
Pure vanilla extract - 1 teaspoon
Decoration/ Garnish:
Cocoa powder - 1/4 cup for dusting
Coffee bean chocolate - (optional)
Semi-sweet chocolate chips (optional)

Directions:
Biskvit Cake:
1. Preheat the oven to 350˚F
2. To prepare the baking pan, spray the sides of a 9" spring-foam pan using cooking spray and line the bottom with parchment paper dusted with flour.
3. In high speed, whisk all the 6 whole eggs for about 2 minutes. Slowly add the sugar and continue whisking for about 5 minutes until the concoction turns thick and tripled in volume looking pale yellow.
4. Now add the vanilla extract and sift the flour in small batches into the above mixture.
5. Gently fold the flour with a rubber/silicon spatula until all the flour is incorporated with no lumps settling at the bottom or sides. Do not over-mix your batter to retain its fluffiness.
6. Transfer the batter to the baking pan and bake for 30 minutes or until the top layer is golden brown and a toothpick comes out clean.
7. Remove from the oven and let it cool for 10-15 minutes.
8. Now run a clean knife along the side of the pan to remove and transfer the cake to a cooling wire rack.
9. Once the cake is at room temperature, you may cut the cake into two layers. Also peel off the parchment paper.

Tiramisu Frosting: (check notes and tips)
1. Whip the heavy cream in high speed until stiff peak for 3-4 mins (I used hand blender). Once done cover with plastic wrap and keep it refrigerated until required.
2. Beat the cottage cheese, sugar and instant expresso granules to a creamy and smooth consistency (blender works better and faster). Transfer to a mixing bowl.
3. Using a silicon/ rubber spatular gently fold in the whipped cream into the cottage cheese mixture to incorporate well. Refrigerate until ready to frost the cake.
Coffee syrup:
1. Mix in the instant expresso granules in the boiling water with sugar and stir until sugar dissolves.
2. Add the vanilla extract and allow it to cool to room temperature.

Assembling the Tiramisu Cake:
1. Place one layer of the cake on the cake platter. You may save the prettiest cake for the top layer. Check Notes and tips (2).
2. Use half of the coffee syrup to brush evenly on the cake. Avoid pouring the syrup directly on the cake.
3. Spread a layer of frosting over the cake's 1st layer. Sift cocoa powder evenly on the frosting.
4. Assemble the 2nd cake layer centered and aligned with the 1st layer. Repeat the process of brushing the remaining coffee syrup and spread the frosting lavishly on the top and the sides. Save some for piping the frosting for a decorative presentation.

Tips for Icing on the cake:
1. Apply the crumb frosting, a thin layer of tiramisu whipped cream to set the cake crumbs. Refrigerate for at least 10-15 minutes. Once its set, apply the whipped cream lavishly all over the cake.
2. Now comes the cocoa powder dusting. I used my kids magnetic letters (cleaned) as templates and dusted on it generously in the middle and gradually reducing it to look sparingly by the edges. Now carefully remove the letters.
3. Used Wilton open star 1 M frosting tip to make the rosettes and the tiny star's alternatively around the edges. To make the rosettes, pipe a larger star and quickly give it a slight twist.
4. I melted some semi-sweet chocolate in the microwave and pipped it on a parchment paper for some random designs. Using the smallest round tip, drew some vines and some quick leaf shapes for the sides of the cake. Refrigerated for 15 mins to set. Then, I spread remaining chocolate on the sheet and placed another parchment paper over it with a flat board (as a weight) for it to avoid curling. Used this as an edible plate for serving with a piece of cake. For directions to melt chocolate, check my Chocolate Cream Cheese Truffle.

5. Added some coffee bean chocolates. You may use chocolate shavings as well. Never dust expresso on the top, as you do not want your 1st bite to be bitter.
You may decorate as desired to delight yourself!

Notes and tips:
1. Heavy whipping cream is highly recommended for real whipped cream frosting. Keep it cold until the very last minute to whip it up. Also refrigerate your mixing bowl and whisk for about 15 minutes prior to whipping the cream to get the best fluffy results. Once you see stiff peaks on the tip of your whisk, immediately stop and refrigerate coving with plastic / cling wrap. Over-beating can cause the cream to turn buttery.
2. Cut a parchment paper a little larger than the cake platter and again cut into half. Place the paper on the platter and lay one layer of the cake. This paper will protect the platter from getting messy as you can remove them from either sides easily once the cake is done decorating.

Eat more cake!
Black Urad Bean Burger
Homemade Bean Burgers are good source of protein, iron and fiber for a daily healthy vegetarian diet. This particular burger patty is primarily made with Black gram/ Urad dal, a healthy pulse with various nutrition facts. A perfect weight watcher's recipe to reach your goal happily with low calories.

Eat right and stay fit to be healthy!
Black Urad dal also known as Black lentil/ Black gram/ Vigna mungo/ Urad saboot/ Ulundu parruppu or Minumulu. It is a highly nutritious special kind of bean that originated from India, Southern part of Asia. This healthy pulse is extensively utilized in various culinary preparations such as Idly/dosa batter, vada and papad. Urad /Black gram is a probiotic food that helps digestion and its high protein for maintenance, growth and repair of every tissue, organ and cell. For more health benefits of Urad/Black gram check out Amrisha's article from Blodsky.

I proudly declare that the source of this recipe is from my beloved husband. He consistently analysis the nutrition facts before purchasing or relishing any food to stay fit and healthy. He came up with the ingredients, quantity and the nutritious facts hidden. My job was simple to add basic seasoning and cook to perfection.

Working woman can make ahead and freeze for any busy weekday quick fix meal. This Burger recipe is family-friendly as kids also savor this healthy burger. You can skip the bun to wrap the burger and veggies in your favorite flat bread like tortilla, pita bread, naan or roti. My tween stated this burger is second to none as it tastes either like minced chicken or goat patty. Trust me meat-eaters, you wouldn't miss meat at all. Let's go green!
Yields: 10 patties
Level: Medium
Preparation time: 30 mins
1. Heavy whipping cream is highly recommended for real whipped cream frosting. Keep it cold until the very last minute to whip it up. Also refrigerate your mixing bowl and whisk for about 15 minutes prior to whipping the cream to get the best fluffy results. Once you see stiff peaks on the tip of your whisk, immediately stop and refrigerate coving with plastic / cling wrap. Over-beating can cause the cream to turn buttery.
2. Cut a parchment paper a little larger than the cake platter and again cut into half. Place the paper on the platter and lay one layer of the cake. This paper will protect the platter from getting messy as you can remove them from either sides easily once the cake is done decorating.
 |
| Eat more cake! |
Homemade Bean Burgers are good source of protein, iron and fiber for a daily healthy vegetarian diet. This particular burger patty is primarily made with Black gram/ Urad dal, a healthy pulse with various nutrition facts. A perfect weight watcher's recipe to reach your goal happily with low calories.
 |
| Eat right and stay fit to be healthy! |
Black Urad dal also known as Black lentil/ Black gram/ Vigna mungo/ Urad saboot/ Ulundu parruppu or Minumulu. It is a highly nutritious special kind of bean that originated from India, Southern part of Asia. This healthy pulse is extensively utilized in various culinary preparations such as Idly/dosa batter, vada and papad. Urad /Black gram is a probiotic food that helps digestion and its high protein for maintenance, growth and repair of every tissue, organ and cell. For more health benefits of Urad/Black gram check out Amrisha's article from Blodsky.

I proudly declare that the source of this recipe is from my beloved husband. He consistently analysis the nutrition facts before purchasing or relishing any food to stay fit and healthy. He came up with the ingredients, quantity and the nutritious facts hidden. My job was simple to add basic seasoning and cook to perfection.

Working woman can make ahead and freeze for any busy weekday quick fix meal. This Burger recipe is family-friendly as kids also savor this healthy burger. You can skip the bun to wrap the burger and veggies in your favorite flat bread like tortilla, pita bread, naan or roti. My tween stated this burger is second to none as it tastes either like minced chicken or goat patty. Trust me meat-eaters, you wouldn't miss meat at all. Let's go green!
Yields: 10 patties
Level: Medium
Preparation time: 30 mins
Ingredients:
For Patty:
Black gram/ Urad dal - 1 cup
Green gram/ Green moong beans - 1/4 cup
Organic ancient grains -
(Quinoa, Amaranth, Millet) - 1/4 cup
Brown rice - 1/4 cup
Potato - 2 Medium
Bread crumbs - 1 cup approximately
Black ground pepper - 1 teaspoon
Chilly powder - 1/2 teaspoon (optional)
Salt to taste
Oil (spray) - as required
For Burger:
Buns - 10 nos
Iceberg or Romaine Lettuce - 1
Tomato - 2 (cored and thinly sliced)
Onion - 1 (thinly sliced rings)
Pepper jack cheese - 10 slices
Ketchup as required


Nutrition Facts Servings 10.0 Amount Per Serving calories 175 % Daily Value * Total Fat 1 g 2 % Saturated Fat 0 g 1 % Monounsaturated Fat 0g Polyunsaturated Fat 0 g Trans Fat 0 g Cholesterol 0 mg 0 % Sodium 82 mg 3 % Potassium 182mg 5 % Total Carbohydrate 32g 11 % Dietary Fiber 8 g 30 % Sugars 2 g Protein 9 g 17 % Vitamin A 0 % Vitamin C 9 % Calcium 6 % Iron 16 % * The Percent Daily Values are based on a 2,000 calorie diet, so your values may change depending on your calorie needs. The values here may not be 100% accurate because the recipes have not been professionally evaluated nor have they been evaluated by the U.S. FDA.
For Patty:
Black gram/ Urad dal - 1 cup
Black gram/ Urad dal - 1 cup
Green gram/ Green moong beans - 1/4 cup
Organic ancient grains -
(Quinoa, Amaranth, Millet) - 1/4 cup
(Quinoa, Amaranth, Millet) - 1/4 cup
Brown rice - 1/4 cup
Potato - 2 Medium
Bread crumbs - 1 cup approximately
Black ground pepper - 1 teaspoon
Chilly powder - 1/2 teaspoon (optional)
Salt to taste
Oil (spray) - as required
For Burger:
For Burger:
Buns - 10 nos
Iceberg or Romaine Lettuce - 1
Tomato - 2 (cored and thinly sliced)
Onion - 1 (thinly sliced rings)
Pepper jack cheese - 10 slices
Ketchup as required


| Nutrition Facts | |
|---|---|
| Servings 10.0 | |
| Amount Per Serving | |
| calories 175 | |
| % Daily Value * | |
| Total Fat 1 g | 2 % |
| Saturated Fat 0 g | 1 % |
| Monounsaturated Fat 0g | |
| Polyunsaturated Fat 0 g | |
| Trans Fat 0 g | |
| Cholesterol 0 mg | 0 % |
| Sodium 82 mg | 3 % |
| Potassium 182mg | 5 % |
| Total Carbohydrate 32g | 11 % |
| Dietary Fiber 8 g | 30 % |
| Sugars 2 g | |
| Protein 9 g | 17 % |
| Vitamin A | 0 % |
| Vitamin C | 9 % |
| Calcium | 6 % |
| Iron | 16 % |
| * The Percent Daily Values are based on a 2,000 calorie diet, so your values may change depending on your calorie needs. The values here may not be 100% accurate because the recipes have not been professionally evaluated nor have they been evaluated by the U.S. FDA. | |
Directions:
1. Peel the potatoes and them cut them into quarters.
2. Wash and soak the black gram, green gram , brown rice and ancient grains for minimum 6 hours or over night.
3. In a rice cooker add 3 cups of water and add the soaked pulses and grains. In the vegetable steaming tray arrange the potatoes evenly and cook them according to your rice cooker settings. You may use pressure cooker method as an alternative for 1-2 whistles. Check notes for other variations of steaming potatoes.
4. Once cooked and cooled, add the required salt and ground pepper. Using potato masher, mash the potatoes and mix them well with the pulses and grains.
5. Divide into 10 balls (orange sized) and shape the mixture into 4 inch wide patties. Toss in the bread crumbs to coat evenly.
6. In oiled grill or on oiled skillet/pan place the burgers in medium heat about 5-6 mins on each side or until golden brown.
7. Toast the buns lightly in the same skillet/pan or grill.
8. Add lettuce, tomato, burger patty, onion rings, cheese and ketchup if desired. Serve with fries and drink to enjoy as a meal especially for fast food loving kids.

Bean Burger will make you full of bean (Feel energetic!)
1. Peel the potatoes and them cut them into quarters.
2. Wash and soak the black gram, green gram , brown rice and ancient grains for minimum 6 hours or over night.
3. In a rice cooker add 3 cups of water and add the soaked pulses and grains. In the vegetable steaming tray arrange the potatoes evenly and cook them according to your rice cooker settings. You may use pressure cooker method as an alternative for 1-2 whistles. Check notes for other variations of steaming potatoes.
4. Once cooked and cooled, add the required salt and ground pepper. Using potato masher, mash the potatoes and mix them well with the pulses and grains.
5. Divide into 10 balls (orange sized) and shape the mixture into 4 inch wide patties. Toss in the bread crumbs to coat evenly.
6. In oiled grill or on oiled skillet/pan place the burgers in medium heat about 5-6 mins on each side or until golden brown.
7. Toast the buns lightly in the same skillet/pan or grill.
8. Add lettuce, tomato, burger patty, onion rings, cheese and ketchup if desired. Serve with fries and drink to enjoy as a meal especially for fast food loving kids.
 |
| Bean Burger will make you full of bean (Feel energetic!) |
Notes and Tips:
1. Microwave steaming is another method to steam the potatoes. If choosing stove top method, in a large container add 2 cups of water and bring to a boil. Arrange the potatoes in any stainless steel vessel or steaming tray that fits inside the large container. You may use idly stand for the same purpose. Steam for 10-12 mins.
2. The organic ancient grains is available at Costco. You can also purchase the grains individually in small portions and combine them together according to availability.
3. Do not boil the potatoes in water as it may absorb moisture and the patties can get soggy.
4. You can freeze the uncooked patties for future use. I prefer placing a piece of parchment paper between the patties before arranging them in a freezer ziplock bag to remove the patties individually.
5. Freezing the patties lined up individually in a large covered tray for minimum of 2 hours, before stacking them in ziplock bag is the perfect and best method to remove frozen individual patties for cooking.

Enjoy making and feasting on these delicious and nutritious Black bean burgers!
BelVita Blueberry Cheesecake
Married a protein-packed Cottage cheese with fresh Blueberries harmoniously for this Valentines Day special! A deliciously creamy blueberry cheesecake just melts in your mouth. This protein rich and low-sugar version is a last minute healthier dessert plan to delight my Valentine's palate. The fresh and sweet blueberries adds natural sweetness and gorgeous color to the cheesecake.

BelVita is not just for breakfast anymore. Replaced the Graham crackers crust with this nutritious cinnamon brown sugar flavored BelVita crust. It is an effortless dessert, nevertheless requires baking. Trust me you and your guests will crave for seconds! Yum!
Yield : 5 inch Pie Pan
Prep Time: 15 mins
Baking time: 45 mins
Level : Medium

1. Microwave steaming is another method to steam the potatoes. If choosing stove top method, in a large container add 2 cups of water and bring to a boil. Arrange the potatoes in any stainless steel vessel or steaming tray that fits inside the large container. You may use idly stand for the same purpose. Steam for 10-12 mins.
2. The organic ancient grains is available at Costco. You can also purchase the grains individually in small portions and combine them together according to availability.
3. Do not boil the potatoes in water as it may absorb moisture and the patties can get soggy.
4. You can freeze the uncooked patties for future use. I prefer placing a piece of parchment paper between the patties before arranging them in a freezer ziplock bag to remove the patties individually.
5. Freezing the patties lined up individually in a large covered tray for minimum of 2 hours, before stacking them in ziplock bag is the perfect and best method to remove frozen individual patties for cooking.
5. Freezing the patties lined up individually in a large covered tray for minimum of 2 hours, before stacking them in ziplock bag is the perfect and best method to remove frozen individual patties for cooking.

Enjoy making and feasting on these delicious and nutritious Black bean burgers!
BelVita Blueberry Cheesecake
Married a protein-packed Cottage cheese with fresh Blueberries harmoniously for this Valentines Day special! A deliciously creamy blueberry cheesecake just melts in your mouth. This protein rich and low-sugar version is a last minute healthier dessert plan to delight my Valentine's palate. The fresh and sweet blueberries adds natural sweetness and gorgeous color to the cheesecake. 
BelVita is not just for breakfast anymore. Replaced the Graham crackers crust with this nutritious cinnamon brown sugar flavored BelVita crust. It is an effortless dessert, nevertheless requires baking. Trust me you and your guests will crave for seconds! Yum!
Yield : 5 inch Pie Pan
Prep Time: 15 mins
Baking time: 45 mins
Level : Medium

Ingredients:
For the crust:
BelVita (cinnamon brown sugar flavor) - 1 packs (8 biscuits)
Butter - 2 tablespoon (melted)
For the Topping:
Blueberries - 1 cup (see notes)
Sugar - 1 teaspoon
Water - 1 tablespoon
For the Filling:
Cottage Cheese - 1 cup ( Low fat)
Eggs - 2
Vanilla extract - 2 teaspoon
Sugar - 2 teaspoon
Blueberries - 1/4 cup

Directions:
1. Preheat oven to 325 degrees F (165 degrees C)
2. Crust: Crumble the biscuits in a blender until fine crumbs. Coat the pie pan with cooking spray on the bottom and sides to remove the pie easily after baking. Mix the crumbs with the melted butter and add a teaspoon of water if necessary. To check for the right consistency, you should be able to make a rough ball when compressed. Now spread the crust mixture evenly flattening on the bottom and up the sides of the pie pan. Press firmly and set aside.
3. Topping: Add all the topping ingredients in a sauce pan and bring it to a boil and simmer for few extra minutes to get the right consistency. Once done turn the heat off and set aside. As it cools the topping gets thicker like a syrup consistency.
4. Filling: Add all the filling ingredients in a large bowl and blend it to a smooth mixture using an electric blender.
5. Now, pour the filling in the prepared crust pan and bake for 45 mins or until the center is firm.
6. Once done, let it cool for 15-20 mins. Since I used a disposable pie pan, I ran a clean knife along the edges to separate the cheesecake from the pie pan. Made a small cut on the edge to peel the pan off to retain the shape.
7. Serve with warm topping and cool whipped cream (optional).

Notes and Tips:
1. The right way to clean fresh blueberries (any berries, fruits and vegetables) is to soak in warm water with a tablespoon of vinegar for 10 minutes for all the wax and dirt to eliminate. You will notice your berries sparkle with its natural bright color.
2. If you want to store the berries for future use, always do the above with room temperate water. Pat dry and line the storage container with paper towel slightly keeping the lid open. Don't forget to refrigerate!
3. The natural sugar from the blueberries is being accentuated in this cheesecake recipe. The sugar level in the filling is relatively mild on purpose. But when the topping is added, it will be even-steven. You don't want to miss this!

Shrimp Zucchini Pasta with Sun-dried Tomato Pesto
A perfect quickie that is highly nutritious, low in carbs, and flavorful is versatile and mouthwatering. Zucchini Pasta/Spaghetti is also known as Zoodle or Zucchini Noodle. This extremely healthy fusion recipe is full of Italian flavored stir-fry prepared in minutes. Anyone on diet would not want to miss this restaurant style dish that you don't find in a restaurant.

Vegetarians can skip the seafood, and make it a "Go Green" dish with no compromise with the flavor to enjoy it throughly. You may want to check out my Bruschetta with Sun-dried Tomato Pesto. My husband relishes this low-carb dish profoundly. Eat healthy, stay fit and have fun!

You will require a Spiralizer or a Mandoline to make the veggie Pasta/Noodle. To learn more and get inspired about spiralizing Click here. For the directions to use a Hand-Held Sprilizer Click here.

Yields: 4 servings
Prep Time : 15 mins
Cooking Time : 5-7 mins
Ingredients:
Zucchini - 4 medium
Shrimp - 12 medium sized (deveined and peeled)
Green Olives stuffed with Pimentoes - 1/4 cup
Black Olives - 2 teaspoons (pitted)
Yellow Bell Pepper - 1 medium (julianne)
Green onions - 2 (chopped for garnish)
Extra Virgin Olive oil - 1 tablespoon
Chilly flakes - as required
 Sun-dried Tomato Pesto Ingredients:
Sun-dried tomato - 1 jar (7 oz)
Pine nuts or Peanuts - 1 tablespoon (roasted)
Garlic - 3 cloves
Basil - 1 cup (fresh leaves)
Parmesan cheese - 2 tablespoons (grated)
Extra Virgin Olive oil - 1 tablespoon
Salt to taste

1. The right way to clean fresh blueberries (any berries, fruits and vegetables) is to soak in warm water with a tablespoon of vinegar for 10 minutes for all the wax and dirt to eliminate. You will notice your berries sparkle with its natural bright color.
2. If you want to store the berries for future use, always do the above with room temperate water. Pat dry and line the storage container with paper towel slightly keeping the lid open. Don't forget to refrigerate!
3. The natural sugar from the blueberries is being accentuated in this cheesecake recipe. The sugar level in the filling is relatively mild on purpose. But when the topping is added, it will be even-steven. You don't want to miss this!

Shrimp Zucchini Pasta with Sun-dried Tomato Pesto
A perfect quickie that is highly nutritious, low in carbs, and flavorful is versatile and mouthwatering. Zucchini Pasta/Spaghetti is also known as Zoodle or Zucchini Noodle. This extremely healthy fusion recipe is full of Italian flavored stir-fry prepared in minutes. Anyone on diet would not want to miss this restaurant style dish that you don't find in a restaurant. 
Vegetarians can skip the seafood, and make it a "Go Green" dish with no compromise with the flavor to enjoy it throughly. You may want to check out my Bruschetta with Sun-dried Tomato Pesto. My husband relishes this low-carb dish profoundly. Eat healthy, stay fit and have fun!

You will require a Spiralizer or a Mandoline to make the veggie Pasta/Noodle. To learn more and get inspired about spiralizing Click here. For the directions to use a Hand-Held Sprilizer Click here.

Yields: 4 servings
Prep Time : 15 mins
Cooking Time : 5-7 mins
Ingredients:
Zucchini - 4 medium
Shrimp - 12 medium sized (deveined and peeled)
Green Olives stuffed with Pimentoes - 1/4 cup
Black Olives - 2 teaspoons (pitted)
Yellow Bell Pepper - 1 medium (julianne)
Green onions - 2 (chopped for garnish)
Extra Virgin Olive oil - 1 tablespoon
Chilly flakes - as required

Sun-dried Tomato Pesto Ingredients:
Sun-dried tomato - 1 jar (7 oz)
Pine nuts or Peanuts - 1 tablespoon (roasted)
Garlic - 3 cloves
Basil - 1 cup (fresh leaves)
Parmesan cheese - 2 tablespoons (grated)
Extra Virgin Olive oil - 1 tablespoon
Salt to taste

Directions:
1. For the Sun-dried Tomato Pesto add all the pesto ingredients in a blender and simply whip up this zestful sauce.
2. Grab a spiralizer and zucchini and do the twists for fine pasta/noodle, or you may use your mandoline and slice thin and long strips like noodles.
3. Heat a wok / large pan with 1 tablespoon of olive oil and add the freshly made sun-dried tomato pesto, salt and chilly flakes. Allow it to cook for few minutes until it comes to a boil.
4. Now is the time to add the shrimp, zucchini pasta and bell pepper. Saute for 2-3 mins until it starts to wilt.
5. Turn the heat off and toss in the black and green olives.
6. Garnish with green onions and serve hot!

Notes and tips:
1. Always choose fresh zucchini to spiralize. You may peel or discard the outer skin. If using mandoline avoid the seeded part of the veggie.
2. Spiralize your veggie right after the prep work is done. In this case the sauce comes first in the directions.
3. Never cook your pasta/noodle more than 3-4 mins. Over cooking can cause the veggie to wilt and you will end up with a soggy dish.
4. Allowing the prepared meal to sit can get soggy as well. Serve the dish immediately to retain the texture of the pasta/noodle. Enjoy staying fit!

Eggless Tiramisu Mousse
A heavenly relish delish for all coffee lovers!

Have a weak spot for some sweet indulgence? Lift this edible dessert bowl and not let go to throughly enjoy your luscious dessert - Eggless Tiramisu Mousse. One of the most popular Italian dessert Tiramisu, quite literally means, "pick me up", "cheer me up", or "lift me up". A blend of the two bold caffeinated flavors of expresso and cocoa, yet still fairly light dessert is irresistible and unforgettable, as it certainly fulfills the criteria for a pleasurable dining experience.

This elegant and rich decadent dessert is layers of delicate flavors that would melt in your mouth. A no-bake, no-cake, eggless mousse can be prepared momentarily and chilled until ready to serve. You cannot go wrong with this simple recipe, that sure would be a huge hit at your family dining table.
 I served my Eggless Tiramisu Mousse in the Chocolate Tulip Bowl that I made ahead. For the Chocolate Tulip Bowl recipe click here! Dig in!
Preparation time: 20 mins
Yields: 4 - 6 servings
Level: Easy
Ingredients:
Instant expresso - 2 teaspoons (your favorite choice)
Hot water - 1/4 cup
Heavy whipping cream - 1 cup
Confectioners sugar/ Powdered sugar - 1 cup
Marscarpone cheese or Cream cheese - 8 ounces
Vanilla extract - 1 teaspoon
Cocoa powder - 1 tablespoon
Baking chocolate (semi-sweet) - 1/4 cup
Directions:
1. Mix the instant expresso in hot water and stir allowing it to cool.
2. Whip cold heavy whipping cream until stiff peaks form. Once done, refrigerate until ready to use.
3. Using a hand blender mix the marscarpone cheese and confectioners sugar until smooth and creamy.
4. Add the vanilla extract, expresso to the above and mix well.
5. Gently fold the whipped cream into the expresso mixture. Avoid mixing too much to retain the fluffy texture.
 6. You may use a piping bag with a large round or 1M tip to fill in a glass bowl, or simply scoop a small amount using a spoon into the bowl you want to serve in.
7. Top the layer with a thin layer of cocoa powder and whipped cream alternatively. You may use as many layers you want.
8. The top layer can be decorated with chocolate shavings or dust cocoa powder very sparingly as it can be bitter if used too much.
9. Refrigerate to chill the Tiramisu Mousse until ready to serve. Enjoy!

Notes:
- You may reserve 1 teaspoon of expresso for decorating the top layer with swirls.
- Whipping heavy cream step can be eliminated to substitute with store bought whipped cream for an easy to make dessert.
Chocolate Tulip Bowl
Excited about another Chocolate recipe!!!
Create a beautiful decorative bowl that is edible and elegant for any special occasion. This simple and effortless recipe is so much fun to make and impress your guests.

This is my second attempt to make these edible chocolate bowls. Chose to create different shapes - a textured tulip shape and smooth dome shape. These chocolate bowls can hold different treats and yummy desserts like chocolate candies, pretzel sticks, candied popcorns, custard, pudding, ice cream, mousse, whipped cream with fruits and the options are endless... I also created a budding tulip for a milk-shake this time.
 All you need is one main ingredient which is chocolate of any kind with good quality. Working with semi-sweet or dark chocolate is easier than white chocolate. Balloons are used as an inexpensive mould. They must be pre-washed with soapy water and dried throughly, as even a tiny drop of water can ruin the texture of your melted chocolate. I used 6-8 water balloons (inflated with air - 6 inches) and it seem to be just the right size to work with. Also note some are allergic to latex, if so opt for a mould that's available in any craft store. The best part is that the melted chocolate can be reused. So no worries of wasting the left over chocolate.
 Now is the time to WOW your guests or your spouse for this Valentines day with your glorious and beautiful tulip bowl filled with your favorite and delicious dessert.
Ingredient:
Semi-sweet Chocolate chips
 Directions:
1. Inflate your clean balloons with air and set them upright on a cup, or line a tray with parchment paper for the chocolate dipped balloons to set and cool.
Directions:
1. Inflate your clean balloons with air and set them upright on a cup, or line a tray with parchment paper for the chocolate dipped balloons to set and cool.
2. Melt chocolate in a clean microwave safe bowl that can easy fit in your inflated balloons. For directions to melt your chocolate check my Cream Cheese Truffle recipe.
3. Let the chocolate cool for about 3-5 mins. Use your clean finger tip to check for a runny but warm temperature. If its too hot, the heat can burst your balloon creating a messy kitchen.
4. For marbleized effect - Use both white and dark /semi-sweet chocolate. In a bowl of melted semi-sweet chocolate add a small amount of melted white chocolate and make very light swirls using knife and then dip your balloons in it. Do this in a small quantity, because if both the flavored chocolates are mixed, the excess cannot be reused.

5. Simple flower shaped bowl- Dip the balloon same as above but in an angle on all side about 5-6 times creating petal shapes. But this bowl has to be placed on a lined parchment paper for the base to set well to prevent from rolling. I tried the same flower shape and also covering almost one half of the balloon fully (6 inches) to give a unique shape.

6. Tulip shaped bowl- I used my rubber spatular and applied from top to bottom (about 4 inches), to have the textured petal effect. Once all the sides are covered with chocolate, rest it on the parchment paper.

7. Tulip bud shape - Do the same as the tulip bowl but all the way to the knotted area leaving about 1.5 inch diameter opening. It is quite tricky to remove the balloon after deflating, so patiently and gently peel off the balloon from the bottom.


8. Dome shape- Holding the knotted end, dip the bottom of inflated balloons in the melted chocolate about 3 inches or more as per your desired size and lift it gently to shake off the excess. Quickly turn it upright and place it on the cup to set.

9. To set these bowls, place them all in the fridge for 15-20 mins.
10. Remove from the fridge and now is the fun part of deflating the balloons. You may use a pair of scissors to cut the knotted area, for the balloon to slowly deflate. I prefer to use a needle to poke the balloons for the tulip shape for the edges to slightly curve.
11. Very gently pull off the balloons from the bottom. It is very tricky to remove from the bud shaped bowl, I used scissors and held the knot on another hand, once the air is released, gently pull the balloon off. If its difficult, use a long needle to pull out the balloon.
12. Always keep the chocolate bowls cool (refrigerated) until you are ready to serve them with your desired filling.

Dome presentation(video attached):
Placed 3 small scoops of dulce de leche ice-cream in a shallow plate with berries and chopped nuts. I covered completely with the chocolate bowl dome. Quickly pour in a hot chocolate (expresso flavored) ganache in the center for the dome to open up on the top and break down eventually. To view a video, click here!
 Expresso chocolate ganache:
Using the remaining chocolate that we dipped in, I added 1 cup of cream, 1 teaspoon of instant expresso, 3 teaspoon of powdered sugar. Mix all the ingredients together and bring it to a boil for the hot expresso chocolate ganache to melt your chocolate dome.
Expresso chocolate ganache:
Using the remaining chocolate that we dipped in, I added 1 cup of cream, 1 teaspoon of instant expresso, 3 teaspoon of powdered sugar. Mix all the ingredients together and bring it to a boil for the hot expresso chocolate ganache to melt your chocolate dome.
 Notes:
- Chocolate chips are easier way to melt evenly in a microwave or double broiler.
- If you want your chocolate bowl to be thick to hold your desert for longer period of time, I would repeat the dipping process after the 1st layer is set.
- You may spray cooking oil on to the balloons before dipping in the chocolate to remove easily. although I didn't have to use it.
- Cold desserts like ice cream works very well.
- Make this Valentines day special with these delicious and glorious dessert with your favorite filling... Any guesses on my next post?
Chocolate Cream Cheese Truffles
Anything is good if its made of Chocolate! Rich and decadent
handmade Chocolate Cream Cheese Truffle makes an exquisite
gift for any day of the year.

A Chocolate Truffle is a type of Chocolate confectionery,
traditionally made with a chocolate ganache centre coated in
chocolate, cocoa powder or chopped toasted nuts (hazelnuts,
almonds or coconut). Usually its in a spherical, conical, or curved
shape. Did you know that chocolate truffles actually got their name
from the classic, cocoa powder coating and not because they
contain actual truffles?

These bite-sized round petite chocolate truffles are a delicious treat
that is immensely enjoyable. Always thought truffles can be
complicated to make and didn't attempt until I found a recipe with
just two ingredients. For the first try this no bake recipe is insanely
easy and irresistible. Be happy eat Chocolate!

Preparation time: 15 mins
Yields: 22-25 truffles
Recipe level: Easy
Ingredients:
Semi chocolate chips- 1 cup
Cream Cheese - 4 oz (softened)
Confectioners' sugar - 3/4 cup (powdered sugar)
Vanilla extract - 1/4 teaspoon
Toppings:
Semi-sweet chocolate chips - 1/2 cup
Cocoa powder (Dutch process) - 1/4 cup
Desiccated coconut - 1/4 cup

Method:
- Melt chocolate as directed below. I have used microwave method to melt the Chocolate for this recipe.
- Add the softened cream cheese and mix well.
- Once its incorporated thoroughly, add the vanilla extract and confectioners' sugar and mix again.
- Using a melon baller or small ice cream scooper or a teaspoon take small amount of this mixture and roll it with clean hands gently and place it on a cookie sheet lined with parchment paper.
- Now is the time to roll the truffles in different topping, like cocoa powder, desiccated coconut, or even toasted chopped nuts. Refrigerate for about an hour.
- For a chocolate covered truffle, melt chocolate as directed using any of your favorite method. Gently dip each truffle one at a time in the melted chocolate using a clean dry fork and lift using the same to tap it twice on the side of the bowl to remove excess chocolate. Immediately place it carefully on the lined cookie sheet and refrigerate to set.
- After an hour serve to indulge or store in closed container refrigerated for 1-2 weeks.

Directions to melt chocolate:
Method 1 - Double Boiler/Water Bath (Stovetop)
- In a wide skillet with about an inch of water place it on a burner.
- In a heat proof bowl (stainless steel or tempered glass bowl) add the chocolate chips and place it on the skillet with water.
- Keep heat to low to avoid scotching and or water from splashing into the chocolate.
- Bring the water to a simmer and turn off the flame to allow the chocolate to melt.
Method 2 - Microwave
- Melt Chocolate chips in a microwave safe bowl for about 50 seconds, stopping in between once to give it a good mix.
- Once the chocolate is 3/4 melted, stir with a rubber spatula for it to melt completely leaving a smooth and glossy chocolate.

Notes and Tips for Melting Chocolate:
- If using chocolate bar for baking, chop the chocolate into uniform pieces to ensure even melting.
- Make sure all equipments are completely dry, as moisture can cause chocolate to seize or stiffen.
- Always use rubber or silicon spatular to stir melting chocolate. Avoid wooden spatula as it leaves wooded smell spoiling the natural aroma of the chocolate.
- Always stir chocolate frequently during melting once the outer edges start to melt.
- Its very difficult to determine exact microwave timings as the microwave wattage, chocolate quantity and the cocoa butter content may vary. So its best to frequently keep checking by stirring the chocolate.
- Melt chocolate slowly in low heat as chocolate is very delicate and can become lumpy or grainy if overheated.

Paneer Butter Masala - Jain version included
Paneer Butter Masala is one of most popular and frequently being
ordered from a vegetation menu. This deliciously rich and creamy
gravy is made with Paneer / Indian cottage cheese as main
ingredient. Its a North Indian gravy that is mildly spiced with a
slight sweet taste thats buttery and rich with flavor that everyone
relishes.

got this wonderful tip of using natural food color from my friend
Padmaja. I have attached a Jain version of the same recipe
below. Enjoy!!!
Preparation : 45 mins
Yields - 4 persons
Level - Easy
Cuisine : North Indian

Ingredients:
Paneer - 250 grams
Oil - 1 tablespoon
Ghee or Clarified Butter - 1 tablespoon
Onion - 2 nos (medium sized)
Cashew-nuts - 15 nos (soaked in water)
Almonds / Badham - 10 nos (soaked in water and peeled)
Ginger - 1/2 inch
Garlic - 3 cloves
Tomato - 3 nos
Beetroot - 1 small slice (2 inch)
Chilly powder - 1 teaspoon
Garam masala - 1/2 teaspoon
Kasuri Methi/ Dried Fenugreek leaves -1 teaspoon + for garnish
Sugar - 1 teaspoon
Salt as required
Fresh Cream - 1 cup

Method:
1. Cut Paneer into 1 inch cubes or rectangles and fry them in a non
stick skillet with the oil and ghee. Using tongs gently flip them
individually for an even golden brown color on all sides. Remove
from heat draining the oil and keep it aside.
2. Grind the roughly chopped onions,
ginger, garlic, soaked almonds and cashews to a fine paste.
3. In the same pan with the same oil, add the onion paste and stir it
well. Add the chilly powder, garam masala, salt and sugar. Allow
this to cook for 10-15 mins until the raw aroma disappears.
4. Blanch the tomatoes in boiling water for about 2-3 mins with the
beetroot piece and grind it to paste.
5. Add the tomato paste to the skillet with the onion mixture and
allow it to cook until the oil begins to leave.
6. Now is the time to add the kasuri methi leaves and fresh cream/
almond milk and stir gently.
7. Once it starts to come to a boil, add the fried panner cubes and
kasuri methi leaves for garnish and remove from heat. Serve hot
with Roti or Naan. For the home cooked Naan recipe CLICK
HERE.

Jain Version: Peas Butter Masala
Jains usually avoids root vegetables like onions, ginger, garlic,
beetroot and also dairy products from cow like paneer and
cream. When these root vegetables are eliminated in this recipe, the
quantity of the gravy tends to reduce naturally. Hence
substitute root vegetables with red bell peppers.
Ingredients required for substitution:
Green peas - 1 cup
Red bell pepper/ Capsicum - 2 nos ( roughly chopped)
Almond milk - 1 cup
Directions for substitution:
1. Saute these bell peppers in oil and grind with the blanched
1. Always choose fresh zucchini to spiralize. You may peel or discard the outer skin. If using mandoline avoid the seeded part of the veggie.
2. Spiralize your veggie right after the prep work is done. In this case the sauce comes first in the directions.
3. Never cook your pasta/noodle more than 3-4 mins. Over cooking can cause the veggie to wilt and you will end up with a soggy dish.
4. Allowing the prepared meal to sit can get soggy as well. Serve the dish immediately to retain the texture of the pasta/noodle. Enjoy staying fit!

Eggless Tiramisu Mousse
A heavenly relish delish for all coffee lovers!


This elegant and rich decadent dessert is layers of delicate flavors that would melt in your mouth. A no-bake, no-cake, eggless mousse can be prepared momentarily and chilled until ready to serve. You cannot go wrong with this simple recipe, that sure would be a huge hit at your family dining table.
 I served my Eggless Tiramisu Mousse in the Chocolate Tulip Bowl that I made ahead. For the Chocolate Tulip Bowl recipe click here! Dig in!
Preparation time: 20 mins
Yields: 4 - 6 servings
Level: Easy
Ingredients:
Instant expresso - 2 teaspoons (your favorite choice)
Hot water - 1/4 cup
Heavy whipping cream - 1 cup
Confectioners sugar/ Powdered sugar - 1 cup
Marscarpone cheese or Cream cheese - 8 ounces
Vanilla extract - 1 teaspoon
Cocoa powder - 1 tablespoon
Baking chocolate (semi-sweet) - 1/4 cup
Directions:
1. Mix the instant expresso in hot water and stir allowing it to cool.
2. Whip cold heavy whipping cream until stiff peaks form. Once done, refrigerate until ready to use.
3. Using a hand blender mix the marscarpone cheese and confectioners sugar until smooth and creamy.
4. Add the vanilla extract, expresso to the above and mix well.
5. Gently fold the whipped cream into the expresso mixture. Avoid mixing too much to retain the fluffy texture.
6. You may use a piping bag with a large round or 1M tip to fill in a glass bowl, or simply scoop a small amount using a spoon into the bowl you want to serve in.
7. Top the layer with a thin layer of cocoa powder and whipped cream alternatively. You may use as many layers you want.
8. The top layer can be decorated with chocolate shavings or dust cocoa powder very sparingly as it can be bitter if used too much.
9. Refrigerate to chill the Tiramisu Mousse until ready to serve. Enjoy!
Notes:
1. Mix the instant expresso in hot water and stir allowing it to cool.
2. Whip cold heavy whipping cream until stiff peaks form. Once done, refrigerate until ready to use.
3. Using a hand blender mix the marscarpone cheese and confectioners sugar until smooth and creamy.
4. Add the vanilla extract, expresso to the above and mix well.
5. Gently fold the whipped cream into the expresso mixture. Avoid mixing too much to retain the fluffy texture.

7. Top the layer with a thin layer of cocoa powder and whipped cream alternatively. You may use as many layers you want.
8. The top layer can be decorated with chocolate shavings or dust cocoa powder very sparingly as it can be bitter if used too much.
9. Refrigerate to chill the Tiramisu Mousse until ready to serve. Enjoy!

Notes:
- You may reserve 1 teaspoon of expresso for decorating the top layer with swirls.
- Whipping heavy cream step can be eliminated to substitute with store bought whipped cream for an easy to make dessert.
Chocolate Tulip Bowl
Excited about another Chocolate recipe!!!
Create a beautiful decorative bowl that is edible and elegant for any special occasion. This simple and effortless recipe is so much fun to make and impress your guests.

This is my second attempt to make these edible chocolate bowls. Chose to create different shapes - a textured tulip shape and smooth dome shape. These chocolate bowls can hold different treats and yummy desserts like chocolate candies, pretzel sticks, candied popcorns, custard, pudding, ice cream, mousse, whipped cream with fruits and the options are endless... I also created a budding tulip for a milk-shake this time.
 All you need is one main ingredient which is chocolate of any kind with good quality. Working with semi-sweet or dark chocolate is easier than white chocolate. Balloons are used as an inexpensive mould. They must be pre-washed with soapy water and dried throughly, as even a tiny drop of water can ruin the texture of your melted chocolate. I used 6-8 water balloons (inflated with air - 6 inches) and it seem to be just the right size to work with. Also note some are allergic to latex, if so opt for a mould that's available in any craft store. The best part is that the melted chocolate can be reused. So no worries of wasting the left over chocolate.
Ingredient:
Semi-sweet Chocolate chips

Directions:
1. Inflate your clean balloons with air and set them upright on a cup, or line a tray with parchment paper for the chocolate dipped balloons to set and cool.
2. Melt chocolate in a clean microwave safe bowl that can easy fit in your inflated balloons. For directions to melt your chocolate check my Cream Cheese Truffle recipe.
3. Let the chocolate cool for about 3-5 mins. Use your clean finger tip to check for a runny but warm temperature. If its too hot, the heat can burst your balloon creating a messy kitchen.
4. For marbleized effect - Use both white and dark /semi-sweet chocolate. In a bowl of melted semi-sweet chocolate add a small amount of melted white chocolate and make very light swirls using knife and then dip your balloons in it. Do this in a small quantity, because if both the flavored chocolates are mixed, the excess cannot be reused.

5. Simple flower shaped bowl- Dip the balloon same as above but in an angle on all side about 5-6 times creating petal shapes. But this bowl has to be placed on a lined parchment paper for the base to set well to prevent from rolling. I tried the same flower shape and also covering almost one half of the balloon fully (6 inches) to give a unique shape.

6. Tulip shaped bowl- I used my rubber spatular and applied from top to bottom (about 4 inches), to have the textured petal effect. Once all the sides are covered with chocolate, rest it on the parchment paper.

7. Tulip bud shape - Do the same as the tulip bowl but all the way to the knotted area leaving about 1.5 inch diameter opening. It is quite tricky to remove the balloon after deflating, so patiently and gently peel off the balloon from the bottom.


8. Dome shape- Holding the knotted end, dip the bottom of inflated balloons in the melted chocolate about 3 inches or more as per your desired size and lift it gently to shake off the excess. Quickly turn it upright and place it on the cup to set.

9. To set these bowls, place them all in the fridge for 15-20 mins.
10. Remove from the fridge and now is the fun part of deflating the balloons. You may use a pair of scissors to cut the knotted area, for the balloon to slowly deflate. I prefer to use a needle to poke the balloons for the tulip shape for the edges to slightly curve.
11. Very gently pull off the balloons from the bottom. It is very tricky to remove from the bud shaped bowl, I used scissors and held the knot on another hand, once the air is released, gently pull the balloon off. If its difficult, use a long needle to pull out the balloon.
12. Always keep the chocolate bowls cool (refrigerated) until you are ready to serve them with your desired filling.

Dome presentation(video attached):
Placed 3 small scoops of dulce de leche ice-cream in a shallow plate with berries and chopped nuts. I covered completely with the chocolate bowl dome. Quickly pour in a hot chocolate (expresso flavored) ganache in the center for the dome to open up on the top and break down eventually. To view a video, click here!
Placed 3 small scoops of dulce de leche ice-cream in a shallow plate with berries and chopped nuts. I covered completely with the chocolate bowl dome. Quickly pour in a hot chocolate (expresso flavored) ganache in the center for the dome to open up on the top and break down eventually. To view a video, click here!
 Expresso chocolate ganache:
Using the remaining chocolate that we dipped in, I added 1 cup of cream, 1 teaspoon of instant expresso, 3 teaspoon of powdered sugar. Mix all the ingredients together and bring it to a boil for the hot expresso chocolate ganache to melt your chocolate dome.

Notes:
- Chocolate chips are easier way to melt evenly in a microwave or double broiler.
- If you want your chocolate bowl to be thick to hold your desert for longer period of time, I would repeat the dipping process after the 1st layer is set.
- You may spray cooking oil on to the balloons before dipping in the chocolate to remove easily. although I didn't have to use it.
- Cold desserts like ice cream works very well.
- Make this Valentines day special with these delicious and glorious dessert with your favorite filling... Any guesses on my next post?
Chocolate Cream Cheese Truffles
Anything is good if its made of Chocolate! Rich and decadent
handmade Chocolate Cream Cheese Truffle makes an exquisite
gift for any day of the year.

A Chocolate Truffle is a type of Chocolate confectionery,
traditionally made with a chocolate ganache centre coated in
chocolate, cocoa powder or chopped toasted nuts (hazelnuts,
almonds or coconut). Usually its in a spherical, conical, or curved
shape. Did you know that chocolate truffles actually got their name
from the classic, cocoa powder coating and not because they
contain actual truffles?

These bite-sized round petite chocolate truffles are a delicious treat
that is immensely enjoyable. Always thought truffles can be
complicated to make and didn't attempt until I found a recipe with
just two ingredients. For the first try this no bake recipe is insanely
easy and irresistible. Be happy eat Chocolate!

Preparation time: 15 mins
Yields: 22-25 truffles
Recipe level: Easy
Ingredients:
Semi chocolate chips- 1 cup
Cream Cheese - 4 oz (softened)
Confectioners' sugar - 3/4 cup (powdered sugar)
Vanilla extract - 1/4 teaspoon
Toppings:
Semi-sweet chocolate chips - 1/2 cup
Cocoa powder (Dutch process) - 1/4 cup
Desiccated coconut - 1/4 cup

- Melt chocolate as directed below. I have used microwave method to melt the Chocolate for this recipe.
- Add the softened cream cheese and mix well.
- Once its incorporated thoroughly, add the vanilla extract and confectioners' sugar and mix again.
- Using a melon baller or small ice cream scooper or a teaspoon take small amount of this mixture and roll it with clean hands gently and place it on a cookie sheet lined with parchment paper.
- Now is the time to roll the truffles in different topping, like cocoa powder, desiccated coconut, or even toasted chopped nuts. Refrigerate for about an hour.
- For a chocolate covered truffle, melt chocolate as directed using any of your favorite method. Gently dip each truffle one at a time in the melted chocolate using a clean dry fork and lift using the same to tap it twice on the side of the bowl to remove excess chocolate. Immediately place it carefully on the lined cookie sheet and refrigerate to set.
- After an hour serve to indulge or store in closed container refrigerated for 1-2 weeks.

Directions to melt chocolate:
Method 1 - Double Boiler/Water Bath (Stovetop)
- In a wide skillet with about an inch of water place it on a burner.
- In a heat proof bowl (stainless steel or tempered glass bowl) add the chocolate chips and place it on the skillet with water.
- Keep heat to low to avoid scotching and or water from splashing into the chocolate.
- Bring the water to a simmer and turn off the flame to allow the chocolate to melt.
Method 2 - Microwave
- Melt Chocolate chips in a microwave safe bowl for about 50 seconds, stopping in between once to give it a good mix.
- Once the chocolate is 3/4 melted, stir with a rubber spatula for it to melt completely leaving a smooth and glossy chocolate.

Notes and Tips for Melting Chocolate:
- If using chocolate bar for baking, chop the chocolate into uniform pieces to ensure even melting.
- Make sure all equipments are completely dry, as moisture can cause chocolate to seize or stiffen.
- Always use rubber or silicon spatular to stir melting chocolate. Avoid wooden spatula as it leaves wooded smell spoiling the natural aroma of the chocolate.
- Always stir chocolate frequently during melting once the outer edges start to melt.
- Its very difficult to determine exact microwave timings as the microwave wattage, chocolate quantity and the cocoa butter content may vary. So its best to frequently keep checking by stirring the chocolate.
- Melt chocolate slowly in low heat as chocolate is very delicate and can become lumpy or grainy if overheated.

Paneer Butter Masala - Jain version included

Preparation : 45 mins


tomatoes to paste.
2. The green peas can be used instead of panner/indian cottage
cheese but will have to be added in the skillet along with the
tomato and red pepper puree.
3. Simply use almond milk in place of fresh cream.
4. Note the sugar quantity may be reduced or eliminated as the
natural sweetness from the red peppers will suffice.

Notes and Tips:
- Blanching accentuates the natural color of the tomatoes. A small piece of beetroot being the rich color and make this gravy colorful without artificial color.
- Always allow the raw aroma of the onions to eliminate before the tomato puree is added to avoid long period of cooking.

- Blanching accentuates the natural color of the tomatoes. A small piece of beetroot being the rich color and make this gravy colorful without artificial color.
- Always allow the raw aroma of the onions to eliminate before the tomato puree is added to avoid long period of cooking.
Naan / Indian Flatbread on Stove top
A common bread made mainly in North India though its originated from Middle east. Naan or Indian flatbread is traditionally baked over clay tandoor oven with wood burning fire. This home cooked Naan or oval shaped flatbread is on stove top with a lid to cover for soft and fluffy texture.
You must have read or even tried different kinds of recipes to make them. But I have a very easy recipe with fewer ingredients that's also quick to make and most importantly this naan dough doesn't need long resting time if using self raising flour (check notes for this tip). Most importantly this recipe has no yeast added. These soft textured and oval shaped flatbread/ Naan with its golden bottom crust would definitely be your family's favorite too. I remember making this recipe since I was in College. My kids love them when paired with the Panner Butter Masala or Chicken tikka masala.
Yields: 10-12 nos
Level: Easy
Cuisine: North Indian /Middle East
Preparation time :15 mins
Resting time : 1 hour or less
Cooking time: 30 mins
Ingredients:
All purpose flour (unbleached) or Maida - 2+1/2 cups
Salt to taste
Baking soda - 1/4 teaspoon
Baking powder - 1/4 teaspoon
Sugar - 3 tablespoons
Milk - 100 gms (warm)
Egg - 1(optional)
Water - for kneading as required (lukewarm)
Dry flour - for dusting
Garnish:
Garlic powder - - 1 tablespoon ( optional)
Cilantro leaves - few (Finely chopped)
Melted butter / Ghee - for brusing (optional)
 Directions to make and shaping the dough:
1. Add all of the above ingredients in a large bowl and add
lukewarm water little by little as required and knead to a smooth
and soft dough for about 6-8 mins.
2. Cover with a damp cloth for about an hour to double the dough
size.
3. Transfer to a work surface and divide the dough into 10-12 balls
slightly smaller than a tennis ball size.
4. Sprinkle the surface with dry flour and roll the ball one at a time
with a rolling pin into an oval or teardrop shape, about 1/4 inch
thick.
Directions for cooking the flatbread:
1. Heat the Tawa or non-stick skillet over medium- high heat. Once
heated, place the flatbread for 10 seconds and flip using spatula or
tongs and sprinkle the garlic powder if you desire. Cover
immediately with a lid with a small vent.
2. After 30-40 seconds you will see the bread fluffing up with
bubbles now is the time flip it 1 more time.
3. Now that its cooked completely just to get the burnt smell,
remove the tawa/pan off heat and quickly place the naan for 5
seconds on the flame directly. flip to do the same on both sides.
4. Transfer to the serving place and brush with melted butter and
sprinkle with cilantro leaves and serve hot.
 Tips and Notes:
1. If using self raising flour, as mention earlier the dough doesn't need long resting time. Also it requires only 5 major ingredients as we can avoid adding salt and baking powder and baking soda. I have tried with just 10 mins of resting time and it turned out with exactly the same texture.
2. I use rice cooker lid to cover as it works well being glass its easy to see the bread raising and the small hole acts as a vent for the moisture to evaporate. If using without a hole, allow a slight opening for the same purpose.
3. Serve hot, else stack them in a casserole lined with a paper towel to absorb moisture and cover with lid as and when you finish cooking, by doing so it still stays warm and soft.

Churna / Churan Rasam
A basic Rasam recipe is part of a regular three course meal in
almost every South Indian lunch menu. This particular recipe is
very comforting and is definitely going to stand out with its
Ayurvedic medicinal ingredients that is nutritious and best for
preventing and treating cold and cough.
The ingredients used in this recipe are rich with antioxidants,
vitamins and minerals. Although the ingredients list might seem
lengthy it is still easy to make. This recipe is a combination of my
Mom's and Mother-in-laws's recipe. My kids enjoy this rasam
when they are sick as well. This Churna Rasam may be served
with warm rice or it can also be a warm and soothing soup on a
cold evening.
Cuisine : Indian
Level : Easy
Yields : 5 cups
Preparation time : 10-15 mins
Ingredients :

Dry ingredients
Black Pepper - 1 Teaspoon
Cumin/Jeera - 1 Teaspoon
Coriander seeds / Dhaniya - 1 Teaspoon
Horse-gram - 1 Tablespoon
White mustard seeds - 1 Teaspoon
Wet ingredients
Tomatoes - 2
Ginger - 1/2 inch
Garlic - 3
Green Chilly - 1 (optional)
Turmeric/Haldi root - 1 inch (skin peeled)
Lemon juice
Masala Powders:
Rasam powder - 1 Teaspoon
Asafetida / Hing - 1/4 Teaspoon
Tulsi powder - 1/2 Teaspoon
Churna powder - 1 Teaspoon (For recipe Click here)
Salt to taste
Garnish:
Curry leaves - Few
Coriander/Cilantro leaves - Few

Method:
1. In a blender pulse all the dry ingredients to a fine powder.
2. With the same, add all the wet ingredients and grind to a paste. You may add
little water if required.
3. Transfer the mixture into a large sauce pan and add 4-5 cups of water. Mix
well with the ladle and heat it on the stove until it comes to a boil.
4. Now add the Masala powders and give it a stir.
5. You may garnish with few curry leaves and fresh coriander leaves with stem
finely chopped.
6. Serve hot as a soup or with rice. Enjoy!

Notes:- If you are lucky to get fresh Tulsi leaves, simply grind it along with the wet ingredients.
- You may substitute Churna powder with any instant Sukku coffee powder as an alternative.
- Lemon or Gooseberry/Amla based Rasam also works well with this recipe.


Coriander/Cilantro leaves - Few

Method:
2. With the same, add all the wet ingredients and grind to a paste. You may add
5. You may garnish with few curry leaves and fresh coriander leaves with stem
6. Serve hot as a soup or with rice. Enjoy!

Notes:
- If you are lucky to get fresh Tulsi leaves, simply grind it along with the wet ingredients.
- You may substitute Churna powder with any instant Sukku coffee powder as an alternative.
- Lemon or Gooseberry/Amla based Rasam also works well with this recipe.
Churna / Churan Powder
Churna is a mixture of powdered herbs and minerals used in
Ayurvedic medicine. This homemade Churna mixture is rich with
antioxidant, vitamins and minerals that boosts your immune
system with regular intake.
asthma and bronchitis. Intake orally for kids and adults to treat
cold and cough with honey. Doctors recommend Raw Buckwheat
honey as it works better than cough syrups. If Buckwheat honey is
not available, please opt for any Organic Raw Honey. Please note
children under the age of 1 should not intake honey.
I have added three different directions to consume this Ayurvedic
medicine orally. Stay Healthy!

Ingredients:
Dry ginger / Sukku / Sont
Long pepper / Thipilli / Pipal (Piper Longum Linn)
Black pepper / Milagu
Coriander seeds / Daniya
Cardomom / Elakka / Ilayachi
Garlic - Cut into small pieces
Cumin / Jeera
Lemon juice - from 2 lemons
 Method:
- All the above ingredients are of same ratio.
- They should be dried under sun separately for 2-3 days or in low-medium heat dry fry them on stove top in a wide pan until the aroma is being release.
- Some ingredients might require longer time to dry out completely.
- Once the Coriander seeds are dried completely, powder it first in a blender or coffee maker . To this add the lemon juice and mix well and allow it to dry under sun once again.
- Then break the lumps apart and mix with the other ingredients that are dried and powdered similarly.
- Store it in an airtight container for about 6 months.

Directions:
The following are 3 different direction to intake orally.
1. Mix 1 teaspoon of Churna powder with 1 tablespoon of
1. Mix 1 teaspoon of Churna powder with 1 tablespoon of
Buckwheat honey and 1/2 teaspoon of Cinnamon powder and
intake orally. Do not drink water for the next 10-15 mins.

teaspoon of turmeric powder with 1 cup of milk and bring it to a
boil and drink it warm. For Children, add a teaspoon of honey.

3. Use about 1 teaspoon of Churna powder to make any kind of

Walnut White Chocolate Chip Cookies

Cookies were not my favorite until I tried this recipe. Walnuts and white chocolate go hand in hand. These fluffy and soft cookies have just the right amount of crispness to enjoy it thoroughly. This is a versatile recipe, you can always go with any kind of nuts(Pecans or almonds) or chocolates (Milk, dark or semisweet) you like. Perfect to do with kids as well...Enjoy baking and relishing these yummy cookies!

Just found this easy recipe from my recipe book. Needless to say, my house smells good and welcoming with these freshly baked cookies. There's always a way to make cookies even when you don't have an oven.
Preparation Time: 20 minutes
Baking time: 10 mins
Level: Easy
Yields: 20 cookies
Ingredients
Wet Ingredients:
Butter - 1/2 cup (softened)
Brown sugar - 3/4 cup
Egg - 1
Vanilla Essence - 1 teaspoon
Dry Ingredients:
All purpose flour (unbleached) / Maida - 1+ 1/2 cups
Baking soda - 1/2 teaspoon
Salt - 1/2 teaspoon
Walnuts - 1/4 cup (Roughly chopped)
White chocolate chips - 1/4 cup

Directions:
1. In a large bowl add all the wet ingredients - egg, butter, sugar and vanilla extract.
2. Mix all the wet ingredients with a whisk or use a hand blender starting with low speed and turn to medium high speed.
3. Sieve the dry ingredients - flour, baking soda and salt.
4. Slowly add the dry ingredients to the well incorporated wet ingredients in 2-3 batches to avoid splattering. Use the blender in low speed or a rubber spatular works better to scrape the sides of the bowl and mix well.
5. Roughly chop the walnuts using a knife.
6. Add the chopped walnuts and white chocolate chips to the dough.
7. Scoop heaping tablespoon sized balls on the cookie sheet lined with parchment paper. I have used a mini sized ice-cream scooper.
8. In a 350 degree preheated oven, place the sheet on the second or medium rack and bake for 10 mins.
9. Remove the cookies from the cookie sheet after 2 mins and transfer them to a cooling rack and let it sit for 10 mins or completely cooled.

Pan Method:
1. Don't have access to an oven, you can still make these cookies with a pan and lid. yes, I have tried it! Heat the nonstick skillet /pan in medium flame. Spray it with oil for the parchment paper to adhere to the pan. Lining with parchment paper avoids direct heat which would burn the cookie.
2. Place a small lemon sized dough and lightly press it to look like a disk shape. Immediately turn the flame to lowest setting and cover it with a lid leaving a small gap as a vent to prevent any steam that may form.
3. Let it sit for 10-12 mins and remove from the pan and cool it completely. Use a larger pan for convenience or make giant cookies but allow it to cook longer.


Expert Tips:
1. If you use an electric mixer use the paddle attachment.
2. When using ice-cream scoop, level off the dough on the side of the bowl to get an even sized round cookie.
3. The right time to remove the cookie is when the sized are golden brown with a soft centre. As it cools the texture will be just perfect.
4. Want a light brown colored cookie as in the picture below? Simply reduce the brown sugar quantity to 1/4 cup and add 1/2 cup of granulated white sugar. But I have used granulated unbleached sugar.

Crispy Fish Balls
Fish balls are a delicious and crispy party snack or an appetizer. Fish/seafood is rich with omega-3 fatty acid and good source of protein and iron. The best part being low in saturated fat. Though this looks like a deep fried recipe, I have shallow fried them for a healthier version. You may also shape it into patties and shallow fry like fish cutlets.

Just found this easy recipe from my recipe book. Needless to say, my house smells good and welcoming with these freshly baked cookies. There's always a way to make cookies even when you don't have an oven.
Preparation Time: 20 minutes
Baking time: 10 mins
Level: Easy
Yields: 20 cookies
Level: Easy
Yields: 20 cookies
Ingredients
Wet Ingredients:
Butter - 1/2 cup (softened)
Brown sugar - 3/4 cup
Egg - 1
Vanilla Essence - 1 teaspoon
Dry Ingredients:
All purpose flour (unbleached) / Maida - 1+ 1/2 cups
Baking soda - 1/2 teaspoon
Salt - 1/2 teaspoon
Walnuts - 1/4 cup (Roughly chopped)
White chocolate chips - 1/4 cup

Directions:
1. In a large bowl add all the wet ingredients - egg, butter, sugar and vanilla extract.
2. Mix all the wet ingredients with a whisk or use a hand blender starting with low speed and turn to medium high speed.
3. Sieve the dry ingredients - flour, baking soda and salt.
4. Slowly add the dry ingredients to the well incorporated wet ingredients in 2-3 batches to avoid splattering. Use the blender in low speed or a rubber spatular works better to scrape the sides of the bowl and mix well.
5. Roughly chop the walnuts using a knife.
6. Add the chopped walnuts and white chocolate chips to the dough.
7. Scoop heaping tablespoon sized balls on the cookie sheet lined with parchment paper. I have used a mini sized ice-cream scooper.
8. In a 350 degree preheated oven, place the sheet on the second or medium rack and bake for 10 mins.
9. Remove the cookies from the cookie sheet after 2 mins and transfer them to a cooling rack and let it sit for 10 mins or completely cooled.

Pan Method:
1. Don't have access to an oven, you can still make these cookies with a pan and lid. yes, I have tried it! Heat the nonstick skillet /pan in medium flame. Spray it with oil for the parchment paper to adhere to the pan. Lining with parchment paper avoids direct heat which would burn the cookie.
2. Place a small lemon sized dough and lightly press it to look like a disk shape. Immediately turn the flame to lowest setting and cover it with a lid leaving a small gap as a vent to prevent any steam that may form.
3. Let it sit for 10-12 mins and remove from the pan and cool it completely. Use a larger pan for convenience or make giant cookies but allow it to cook longer.


Expert Tips:
1. If you use an electric mixer use the paddle attachment.
2. When using ice-cream scoop, level off the dough on the side of the bowl to get an even sized round cookie.
4. Want a light brown colored cookie as in the picture below? Simply reduce the brown sugar quantity to 1/4 cup and add 1/2 cup of granulated white sugar. But I have used granulated unbleached sugar.

Crispy Fish Balls
Fish balls are a delicious and crispy party snack or an appetizer. Fish/seafood is rich with omega-3 fatty acid and good source of protein and iron. The best part being low in saturated fat. Though this looks like a deep fried recipe, I have shallow fried them for a healthier version. You may also shape it into patties and shallow fry like fish cutlets.

Recipe Level : Easy
Recipe Cuisine : Indian
Preparation Time : 15 minutes
Cooking Time : 20 minutes
Yields : 20 Fish balls
Ingredients:
- Fish fillet - 4 fillets (Tilapia, Mackerel or any boneless white fish fillet) -Cleaned and cut to small pieces
- Potato - 1 (boiled, peeled and mashed)
- White onion - 1/4 cup (chopped)
- Ginger and Garlic paste - 1 teaspoon
- Green chillies - 2 (finely chopped)
- Coriander leaves - 1/4 cup (chopped)
- Turmeric powder - 1/4 teaspoon
- Salt to taste
- Corn flour - 1/2 cup
- Bread crumbs - 1 cup + 1 Tablespoon
- Egg white - 2 (separated from the yoke)
- Oil for shallow frying + 2 Tablespoons
- Sriracha (hot sauce) or Tomato Ketchup - As required (optional)

Method:
- In a skillet add a teaspoon of oil and saute onions, ginger garlic paste, turmeric powder, green chillies and salt for about 3 - 4 minutes.
- Once the onions are translucent, add the fish fillet and cook it in medium heat for 10 mins until all the moisture evaporates. Stirring often to break the fish with the spatula.
- Add the mashed potatoes and coriander leaves to the same to mix well for 2 minutes and remove from heat.
- When the above mixture cools add 1 tablespoon of bread crumbs and mix to bind well.
- Gently make small lemon sized balls and roll them in the corn flour.
- In a bowl lightly beat the egg whites using a fork and dip the flour coated balls one by one to coat well and immediately roll in the bread crumbs.
- Heat oil in a small wok or kadai over medium flame.
- Shallow fry the fish balls in small batches turning once after 2-3 mins using tongs for the other side to fry till it turns golden brown.
- Drain and remove from oil and set it on a kitchen paper towel to absorb the excess oil.
- Serve hot and enjoy with Sriracha hot sauce or Tomato ketchup.

Notes and Tips:
- A wooden cutting board may absorb the fish smell and takes longer to clean. I recommend a plastic or glass cutting board to clean and cut the fish or any meat.
- The fish balls can be frozen and fried when required. Thawing is required before frying to avoid splattering. This also prevents excess absorption of oil.
- Coating the fish balls in corn flour absorbs any moisture retained in the fish balls. Followed by egg white coating and bread crumbs adds the extra crispy texture.
- Vegetarians may substitute fish with finely chopped and cooked veggies like carrots, bean, cabbage and peas to make Veggie Balls. The egg white may be substituted with cornflour batter or maida batter.
Roasted Gram Murukku
Roasted Gram Murukku / Pottukadalai Muruk is a savory, crunchy snack originated in India. Yet another authentic recipe from Mom. I should admit this is an elaborate process, but definitely worth it. Trust me, after having relished this recipe, till date none can take its place.

You will throughly enjoy the lightness and just the right amount of crisp texture loaded with unique flavors. The secret is nothing but to grind the soaked rice as the base (instead of a store bought rice flour) to make this Roasted Gram Murukku. Enjoy making and savor this savory!
Preparation time: 1 hour
Cooking time: 1 hour
Yields: 60 numbers
Recipe Category: Savory/Snack
Cuisine: Indian
Ingredients:
- Idly Rice - 2 +1/2 cups
- Split roasted gram/ Pottukadalai -1 +1/4 cups
- Butter (unsalted) - 2 tablespoon (melted)
- Ajwain/Bishop's weed seed/Omam -2 teaspoons
- Sesame seeds (white) -2 teaspoon
- Asafetida- 1/2 teaspoon
- Chilly powder- 1+1/2 tablespoons
- Salt - 1+3/4 teaspoons
- Oil - for frying
Kitchen gadget (required)- Murukku press or Chakli

Method:

Recipe Level : Easy
Recipe Cuisine : Indian
Preparation Time : 15 minutes
Cooking Time : 20 minutes
Yields : 20 Fish balls
Ingredients:
- Fish fillet - 4 fillets (Tilapia, Mackerel or any boneless white fish fillet) -Cleaned and cut to small pieces
- Potato - 1 (boiled, peeled and mashed)
- White onion - 1/4 cup (chopped)
- Ginger and Garlic paste - 1 teaspoon
- Green chillies - 2 (finely chopped)
- Coriander leaves - 1/4 cup (chopped)
- Turmeric powder - 1/4 teaspoon
- Salt to taste
- Corn flour - 1/2 cup
- Bread crumbs - 1 cup + 1 Tablespoon
- Egg white - 2 (separated from the yoke)
- Oil for shallow frying + 2 Tablespoons
- Sriracha (hot sauce) or Tomato Ketchup - As required (optional)

Method:
- In a skillet add a teaspoon of oil and saute onions, ginger garlic paste, turmeric powder, green chillies and salt for about 3 - 4 minutes.
- Once the onions are translucent, add the fish fillet and cook it in medium heat for 10 mins until all the moisture evaporates. Stirring often to break the fish with the spatula.
- Add the mashed potatoes and coriander leaves to the same to mix well for 2 minutes and remove from heat.
- When the above mixture cools add 1 tablespoon of bread crumbs and mix to bind well.
- Gently make small lemon sized balls and roll them in the corn flour.
- In a bowl lightly beat the egg whites using a fork and dip the flour coated balls one by one to coat well and immediately roll in the bread crumbs.
- Heat oil in a small wok or kadai over medium flame.
- Shallow fry the fish balls in small batches turning once after 2-3 mins using tongs for the other side to fry till it turns golden brown.
- Drain and remove from oil and set it on a kitchen paper towel to absorb the excess oil.
- Serve hot and enjoy with Sriracha hot sauce or Tomato ketchup.

Notes and Tips:
- A wooden cutting board may absorb the fish smell and takes longer to clean. I recommend a plastic or glass cutting board to clean and cut the fish or any meat.
- The fish balls can be frozen and fried when required. Thawing is required before frying to avoid splattering. This also prevents excess absorption of oil.
- Coating the fish balls in corn flour absorbs any moisture retained in the fish balls. Followed by egg white coating and bread crumbs adds the extra crispy texture.
- Vegetarians may substitute fish with finely chopped and cooked veggies like carrots, bean, cabbage and peas to make Veggie Balls. The egg white may be substituted with cornflour batter or maida batter.
Roasted Gram Murukku / Pottukadalai Muruk is a savory, crunchy snack originated in India. Yet another authentic recipe from Mom. I should admit this is an elaborate process, but definitely worth it. Trust me, after having relished this recipe, till date none can take its place.

You will throughly enjoy the lightness and just the right amount of crisp texture loaded with unique flavors. The secret is nothing but to grind the soaked rice as the base (instead of a store bought rice flour) to make this Roasted Gram Murukku. Enjoy making and savor this savory!
Preparation time: 1 hour
Cooking time: 1 hour
Yields: 60 numbers
Recipe Category: Savory/Snack
Cuisine: Indian
Ingredients:
- Idly Rice - 2 +1/2 cups
- Split roasted gram/ Pottukadalai -1 +1/4 cups
- Butter (unsalted) - 2 tablespoon (melted)
- Ajwain/Bishop's weed seed/Omam -2 teaspoons
- Sesame seeds (white) -2 teaspoon
- Asafetida- 1/2 teaspoon
- Chilly powder- 1+1/2 tablespoons
- Salt - 1+3/4 teaspoons
- Oil - for frying
Kitchen gadget (required)- Murukku press or Chakli

Method:
- Soak Idly rice for at least 3 hours and grind it to the idly batter consistency. You may add water as required.
- Powder the split roasted gram in a mixer and sieve it.
- Set a large Kadai and heat with the required oil for deep fry.
- In a large bowl mix the rice batter, roasted gram powder and all of the above ingredients. You may apply oil to your hand and mix to a soft smooth dough like a Chapathi/Roti dough consistency.
- Take a fist size of dough and fill in the Murukku press (using a 3 or 5 eyed plate). On a clean thin cloth, or on the greased back of spatular; press the dough in one complete circular motion from center to outside. Gently set it with your finger and transfer it to the hot oil kadai carefully.
- You will notice the sizzling sound from oil reducing gradually as its being deep fried. When you the sizzling sound dies, you will see a golden brown/beige colored Murukku, its time to flip it gently to cook/fry the other side.
-
Again, when the sizzling sound reduces, check for the right color and remove from heat while draining the oil .

Notes and tips:
- To check if the oil is heated enough, press a spatular in the oil kadai to see bubbles raising. Or drop a small piece of dough into the hot oil and check if it rises immediately for the right temperature.
- Set the stove in medium - high flame for even cooking.
- I prefer using a clean white thin cloth to press the dough into the required size and pattern when a set of murukku's are frying. This allows the dough to set on the cloth for few minutes absorbing any excess water. Also prevents the snack from getting too oily.
- I fried 5 murukku's at a time. Make sure you keep the remaining dough always covered to avoid drying out.
- If the dough is kept for long hours more then 4-5 hours it can ferment easily and spoil the taste. So its recommended that you fry them immediately. The dough can be refrigerated in an air tight container for few hours.
- Once the cooked murruku is removed transfer it to a tray lined with paper towel or napkins to absorb any oil.
- Let cool for about an hour and store it in an air tight container lined with paper towel or napkins.
Again, when the sizzling sound reduces, check for the right color and remove from heat while draining the oil .

Peda - Milk Sweet
Peda, a milk fudge is very popular North Indian sweet that is traditionally made with Khoya or mawa. Ricotta cheese is an excellent substitute as its much quicker than evaporated milk method of cooking.

This recipe can easily be adjusted to your taste with regards to the sugar level. Although this recipe can be made with microwave, I chose to use the regular stove top cooking as i'm not a big fan of microwave. This colorful Peda is irresistible both to the eyes and tastebuds. Do give it a try to enjoy as much as we do.
Preparation time: 10 minutes
Cooking time: 30 minutes
Yields: 20 nos
Recipe category: Sweet/ Desert
Recipe cuisine: Indian
Ingredients:
Ricotta Cheese or Khoya or Mawa - 15 oz /425 gms
Milk Powder - 2 cups
Sugar 1/2 cup
Ghee/ Clarified butter - 1 tablespoon and 1 teaspoon
For Yellow/Saffron Peda:
Yellow food color - as desired
Saffron - 20 stigmas
Milk - 1 tablespoon
For Green/Pista Peda:
Pistachios - 20 nos
Milk - 1 tablespoon
Green food color - as desired
Pista essence - 1/4 teaspoon
For Brown/Chocolate Peda:
Cocoa powder - 1 + 1/2 tablespoons
Chocolate syrup - 1 tablespoon

Method:
- Heat a non-stick pan and add 1 tablespoon of ghee and the ricotta cheese stirring continuously in medium-low flame. The cheese will start to melt and turn soupy initially, but keep stirring for close to 10-15 minutes for all the water from the cheese to evaporate.
- When the water evaporates, it starts to thicken leaving the sides of the pan to form a ball of khoya as you keep stirring.
- Now add the sugar and milk powder to this khoya and mix just to incorporate well.
- Turn off the stove and you may divide it into 3 parts if you desire all the 3 varieties or chose as you wish. Set the two portions aside, leaving 1 in the pan itself.
- For a Saffron Peda, heat the milk and add saffron to soak in for 5 mins to release its flavor and color. Add the food color to the same and mix in 1 portion of khoya in the pan. Turn the flame to medium and stir continuously until it thickens for close to 5 to 10 minutes. Now its ready to shape into small lemon sized balls or disks and decorate with a saffron stigma.
- For Pista Peda, grind approximately 20 pistachios with milk to a smooth paste and add to 1 portion of Khoya with green food color and essence. In a heated pan stir until this mixture thickens. Its ready to be shaped and decorated with pistachios.
- Now for the last being Chocolate Peda, you don't have to get to the stove. Just add the cocoa powder and the chocolate syrup and knead it to a ball. Its time to shape and decorate with chocolate.

Viola! All the 3 different flavors are done. Hope you enjoy making and enjoying this tricolored milk sweet.
Notes and Tips:
- If you chose to use microwave method, you might have to keep stirring every 3 mins to avoid any burns, until you get the desired consistency.
- Check to see if you can make a ball out of the thicken Khoya, else keep stirring with medium-low heat until you get the right consistency or simply add some milk powder to it.
- You may apply some ghee to your palms while kneading the peda dough.
- To shape the pedas, I used some of my kitchen tools like wooded spatular's end, bottle cap, straw and even tooth prick. You may also use cookie cutter or simply make a handmade disk shape and use forks to make any desired design.
Peda, a milk fudge is very popular North Indian sweet that is traditionally made with Khoya or mawa. Ricotta cheese is an excellent substitute as its much quicker than evaporated milk method of cooking.

This recipe can easily be adjusted to your taste with regards to the sugar level. Although this recipe can be made with microwave, I chose to use the regular stove top cooking as i'm not a big fan of microwave. This colorful Peda is irresistible both to the eyes and tastebuds. Do give it a try to enjoy as much as we do.
Preparation time: 10 minutes
Cooking time: 30 minutes
Yields: 20 nos
Recipe category: Sweet/ Desert
Recipe cuisine: Indian
Ingredients:
Ricotta Cheese or Khoya or Mawa - 15 oz /425 gms
Milk Powder - 2 cups
Sugar 1/2 cup
Ghee/ Clarified butter - 1 tablespoon and 1 teaspoon
For Yellow/Saffron Peda:
Yellow food color - as desired
Saffron - 20 stigmas
Milk - 1 tablespoon
For Green/Pista Peda:
Pistachios - 20 nos
Milk - 1 tablespoon
Green food color - as desired
Pista essence - 1/4 teaspoon
For Brown/Chocolate Peda:
Cocoa powder - 1 + 1/2 tablespoons
Chocolate syrup - 1 tablespoon

Method:

Viola! All the 3 different flavors are done. Hope you enjoy making and enjoying this tricolored milk sweet.
Notes and Tips:
Wheat Rava Nutty Laddu
Laddus are always tempting. How about a healthier version that's easier and rich with flavor? Rava laddu made with wheat and nuts can be made by anyone. Yes, even a newbie to kitchen can give this recipe a try. It's that simple with very few ingredients and tastes yum! I love the texture when using wheat rava instead of the wheat flour. This recipe is perfect for a last minute sweet for any occasion!

Yields: 15-20 nos
Recipe Category: Sweet/ Desert
Recipe Cuisine: Indian
Ingredients:
- Wheat Rava/ Godhumai Rava - 1 cup
- Sugar - 1/2 cup
- Mixed Nuts - 1/2 cup (Almonds, Cashews, Pistachios, Walnuts)
- Ghee - 2 tablespoons + 1 tablespoon
- Cardamom powder - 1/4 teaspoons
- Desiccated coconut - 2 tablespoon (optional)
- Pistachios - 1 tablespoon coarsely chopped for decoration (optional)

Method:
- In a pan add two tablespoons of ghee and roast all the nuts together, once they turn golden brown remove from heat and set aside.
- Using the same ghee left in the pan add the wheat rava and fry well for close to 10-15 mins (depending on the size of your rava) in medium-low flame. Its important to keep stirring to roast evenly and to prevent from any burns.
- Once the raw smell leaves and the sweet roasted rava aroma arises, keep the flame in low for couple more mins for extra roasting and then turn the flame off.
- Let cool to transfer the rava in a dry mixer with nuts, coconut and sugar and grind them together. Do not grind to a fine powder, just to maintain the slightly coarse crunchy texture.
- Now add the cardamom powder and pulse it twice to mix well.
- Add the other one tablespoon of ghee to this mixture and mix well.
- You may apply little ghee to your palms to make lemon size balls.
- I have dipped these balls slightly in the ghee for the pistachios to stick well on to the laddus for decoration.

Notes and Tips:
- If texture doesn't matter you may opt for wheat flour for even simpler version. That way only the nuts and coconuts will have to be grinded.
- Store it in an air tight container for one week at room temperature. Refrigeration is not required.
- Do try this recipe and send in your comments! Enjoy cooking and eating!
Badhusha
Diwali (Deepavali), the "Festival of Lights" is just around the corner. Its the biggest and brightest Hindu festival in India. How about we enjoy some of the authentic sweets and savory? The first sweet that came to my mind is Badhusha, my all time favorite. Badhusha is similar to a glazed doughnut in terms of ingredients, but differs in texture and taste.

Recipe Category: Sweet
Recipe Cuisine : Indian
Preparation Time - 30 minutes
Cooking Time -20 minutes
Yields - 15-20 Numbers
Ingredients:
Maida or All purpose flour (unbleached) - 1+1/2 cups
Yogurt - 1/2 cup
Sugar - 4 Tsp
Salt - 1 pinch
Ghee - 1/4 cup
Baking soda - 1/2 tsp
Baking powder - 1/4 tsp
Oil - for frying
For the sugar syrup:
Sugar - 1 cup
Sugar - 1 cup
Water - 3/4 cup
Saffron - few strands
Lemon juice - 1/4 tsp

Method:

- In a bowl mix the yogurt, sugar, ghee, baking powder, baking soda and salt with a spatula in a circular motion in the same direction until it turns creamy and butter like.
- Slowly add the maida in two batches to the above and continue the same method of mixing. It will start to look like crumbs (This will add the flakey layers inside once they are cooked).
- Now sprinkle about a tablespoon of water or less to knead it to form a soft dough. Highly recommend to knead for close to 10 mins.
- Divide the dough into small lemon sized balls and set aside to rest for 10 mins.
- Now its time to start shaping the Badhushas. You can simple flatten with a small dent in the middle (like mini doughnuts) or make decorative ends swirl. Click here for a video to make ends swirl by Raks Anand.
- In a separate pan to make the sugar syrup, add the sugar and water to bring it to a boil stirring occasionally until it turns in a think syrupy consistency. To this add the lemon juice and saffron strands.
- In another pan or kadai, add the required oil for frying and heat in medium high. Always test with a tiny piece of dough to see it rising immediately for the right temperature.
- Now add the shaped Badhushas in small batches and once they all rise up set the flame to low for it to cook with the preheated oil itself. This method works well for the inside to cook throughly. When it turns light brown, flip it to the other side.
- Once the bubbles reduce remove it and drain it well to put them in the sugar syrup immediately. Leave it for few mins and flip to the other side as well.
- Now drain the excess syrup and transfer them to a parchment or foil lined tray to avoid sticking. You may decorate it with desiccated coconut, silvered almonds, or chopped nuts. Enjoy making and tasting !!!

Tips and Notes:
- Make sure your dough is smooth and soft enough else it might crack easily.
- If your badhusha's dissolve in oil, add some flour to the dough and knead again.
- On the other hand, if they are hard you might have to add more ghee or oil.
- Lemon juice is added to the sugar syrup to avoid crystallization.
- Badhusha's are always best when it cools completely.
- Never refrigerate, its good to store in a clean container in room temperature for about a weeks time.
Homemade Fudgy Cocoa Brownie
Hello Readers! A warm welcome to my space as I have just started my journey with my very first blog! If you are looking for awesomely rich chocolatey flavored Brownies, you are on the right page. You will instantly fall in love with these sinful brownies from scratch.

For convenience I used to buy a good box mix brownies but not after I tried this simple recipe thats quick and easy to bake and also tastes amazing. I like my brownies with chocolatey fudge middles and a shiny candy-like flakey crust. You must give these brownies a try. Needless to say, they were a big hit when these warm brownies are paired with a scoop of vanilla ice cream or whipped cream topped with fresh raspberries. I am sure you would relish it as much as we do... Have fun baking and enjoy these dangerously delicious brownies!
Prep Time: 10 minutes
Bake Time: 35 minutes
Level: Easy
Level: Easy

Ingredients
Dry ingredients
1 1/2 cup white granulated sugar
3/4 cup plus 2 tablespoons unsweetened cocoa powder (Dutch process)
1/2 cup unbleached all-purpose flour
1/4 teaspoon Kosher salt
1/4 teaspoon baking powder
Wet Ingredients
10 tablespoons butter (melted then cooled)
2 large eggs (cold)
1 teaspoon vanilla extract

Instructions
- Preheat the oven to 325 degrees F (163 C) and position the oven rack in the lower third of the oven.
- Use a square baking pan lined with parchment paper or aluminum foil.
- In a large bowl combine melted butter, sugar, vanilla extract, cocoa powder and salt to whisk using a wire whisker.
- Add the eggs one by one and whisk for the above gritty mixture to smooth out until it turns thick, shiny and creamy.
- Now gently fold in the flour, using the silicon or rubber spatula scraping the sides to avoid any flour pockets.
- Transfer the batter into the prepared baking pan and smooth the top with a spatula. I also like to tap the pan on the surface couple of times to avoid any air pockets.
- Bake for 30-35 minutes or until a toothpick can be inserted into the center and come out with little moist crumbs.
- Cool completely to remove from the pan using the parchment paper / aluminum foil as a single piece.
- For cleanest lines when cutting, dip a thin knife in hot water and wipe off the water to cut each time.
- Line the baking pan with parchment paper or aluminum foil, leaving an overhang on two opposite sides for easy lifting when the brownies are cooled. I like some buttering in between for the parchment to stick to the pan itself, as this makes the brownies pop out right out of the pan easily.
- The brand and type of cocoa powder will determine your brownie color and flavor. I personally would recommend and have used Dutch Process Cocoa powder for a rich and dark chocolatey color. You may use Natural Cocoa powder for a red chocolatey color.
- This is a straight up Brownie recipe, but you may add 1/2 cup of nuts like walnuts or pecans for some crunch or even some chocolate chips for more chocolatey flavor.
- If you like a warm brownie, let the the brownies cool for just 8 minutes and cut to serve warm.

-001.jpg)
love to eat you brownies
ReplyDelete:)
DeleteTreat to the eyes and mouth.Instructions and tips in simple text pushes to give a try for those who consider baking a Herculean task.Good job ammu.
ReplyDeleteThanks Anita!
DeleteWay to go Amudha...love your blog...it's beautiful..the treats looks soo delicious...love the pictures you clicked.... ..especially all the 'murruku's' hanging and takin' a break and the 'pedas' all lined up to be gobbled....good job...keep it comin'...
ReplyDeleteThanks Carol :)
DeleteWhat is a nice post, I did not read before here. Your work is too hard. I got a lot dishes for Upalis by this post. Good work. Keep it up.
ReplyDelete